Using the SMTP Application to send emails
Summary
In this tutorial, we will create an integration that queries Salesforce accounts and create opportunities in Marketo, and then sends an email containing the total number of records queried from Salesforce and inserted into Marketo.
Before you begin

A valid Gmail account as we will use the Gmail SMTP server to send emails.
Using the SMTP Application to send emails
1. Log in to Integration Cloud.
2. Click Projects > Select a Project> Applications > Predefined Applications > Simple Mail Transfer Protocol (SMTP).
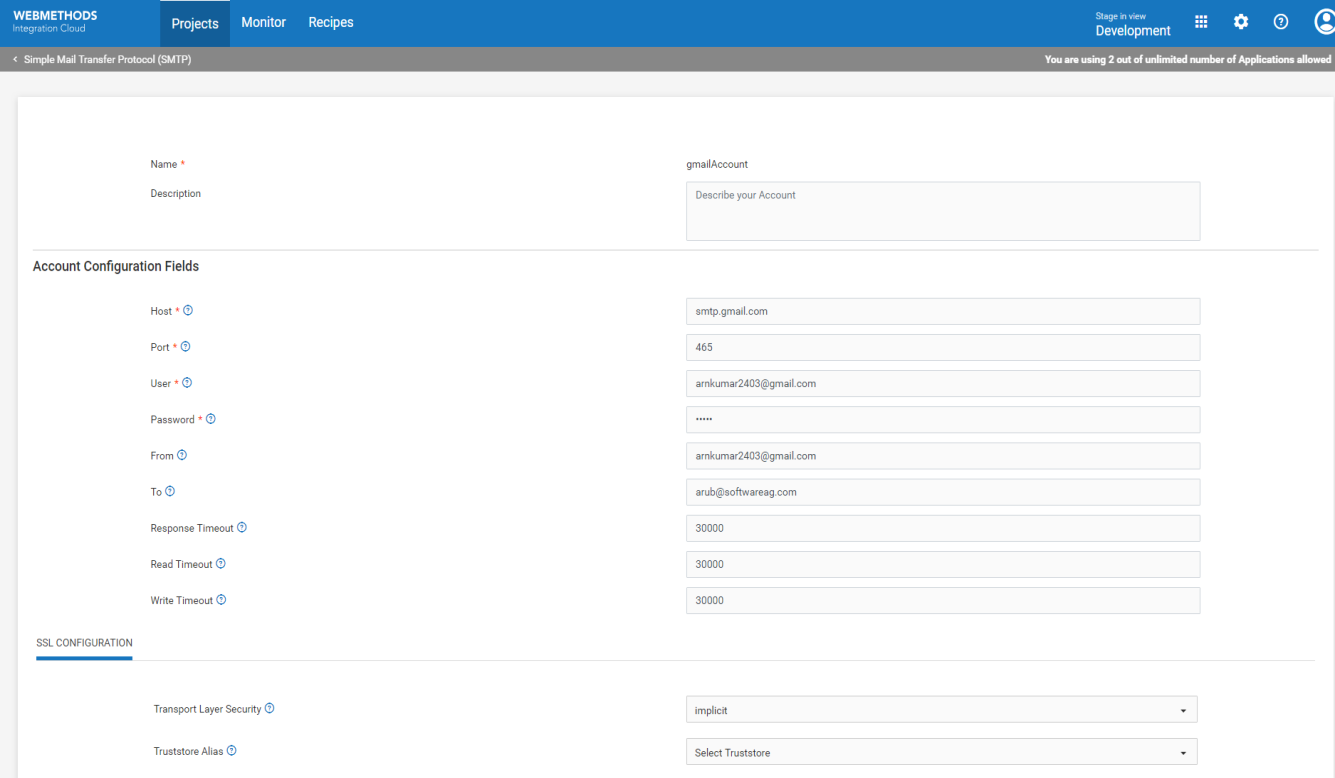
3. Click Add New Account.
Note: You can specify the From and To addresses either at the Account level here or while executing the operation. If you provide them at both places, Integration Cloud will use the addresses provided by you when you execute the operation.
Further, as shown below, set the Transport Layer Security to Implicit to connect to SSL port 465. Integration Cloud internally sets the mail.smtp.ssl.enable property to true.
If you want to connect to Gmail SMTP server TLS Port (587), specify the mandatory account configuration fields. Also, as shown below, specify the Transport Layer Security as Explicit.
If Transport Layer Security is set as Explicit, Integration Cloud adds the mail.smtp.tls.required property as true by default, while executing the operation. Also, Integration Cloud connects to the SMTP server and issues STARTTLS to change the unencrypted connection to an encrypted connection.
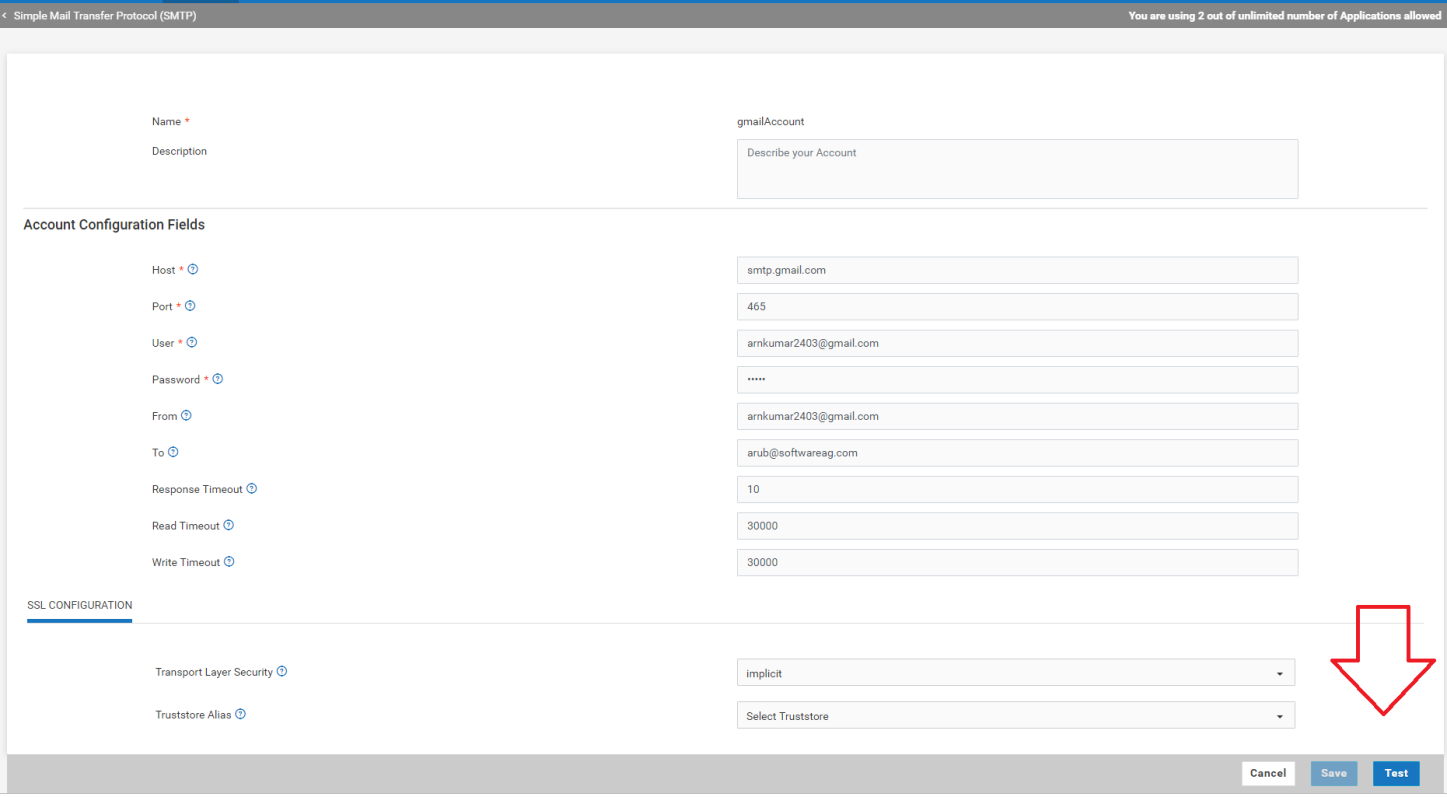
5. After you have provided the above account configuration values, click Test on the Account Configuration page as shown below to test the SMTP server configuration.
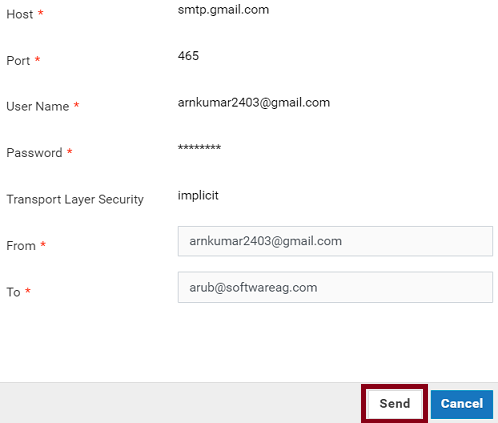
6. Click Send to send the test email to the recipient. You can also click Test on the Operations page to test the SMTP server configuration.
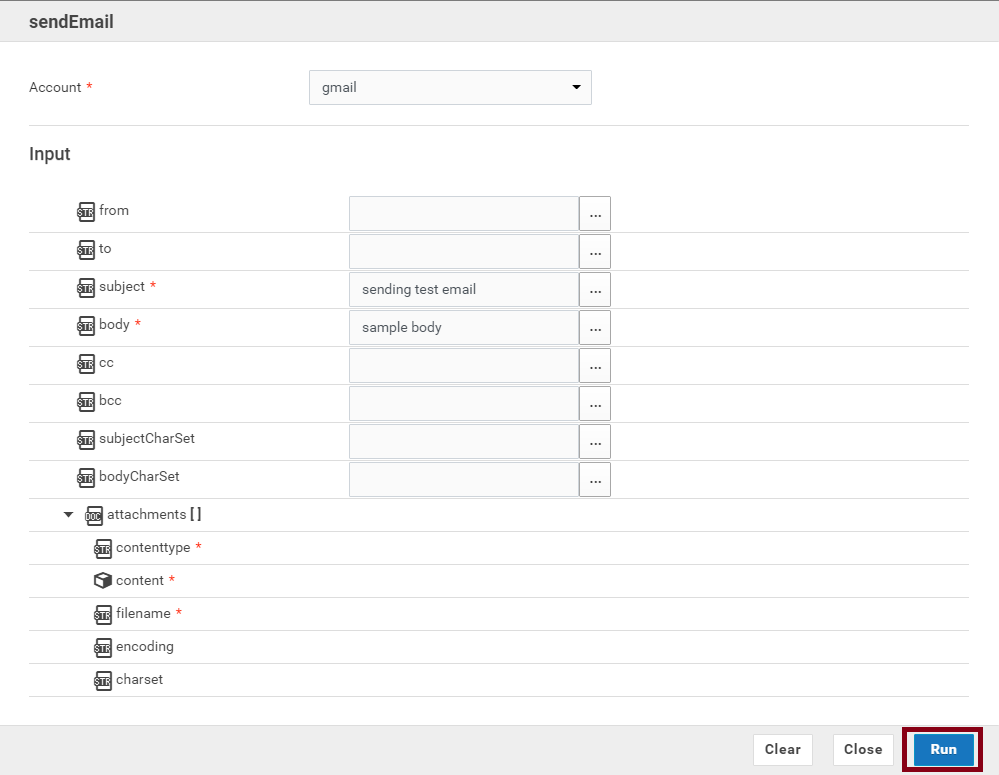
7. After you click Test on the Operations page, add the input values as shown below, and then click Run.
Note: You can add attachments only while creating an Integration.
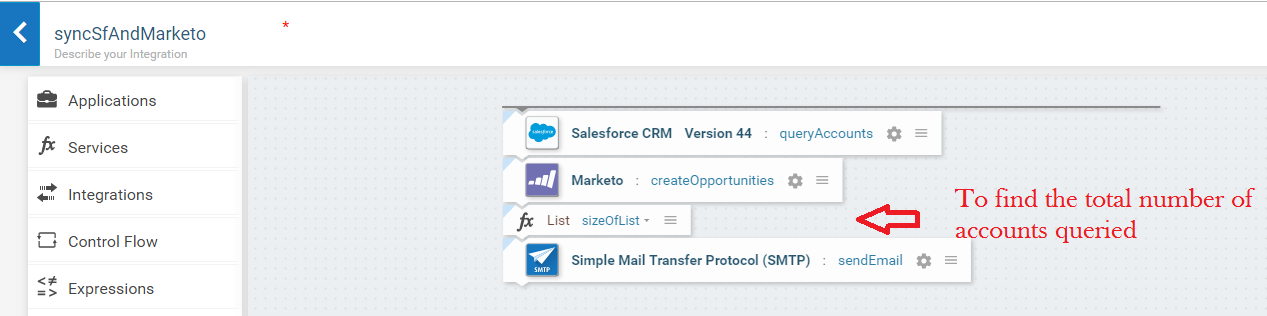
8. Use the SMTP Application to create the Orchestrated Integration as shown below. See
Orchestrated Integrations on how to create an Orchestrated Integration.
Do the following:
Add the QueryAccounts operation from Salesforce.
Add the createOpportunities operation from Marketo.
Map the queried Salesforce accounts to Marketo createOpportunities.
Add the sizeOfList service from the List category.
Map the queried Salesforce accounts to the sizeOfList service to get the total number of accounts queried.
Add the
sendEmail operation from the SMTP Application.
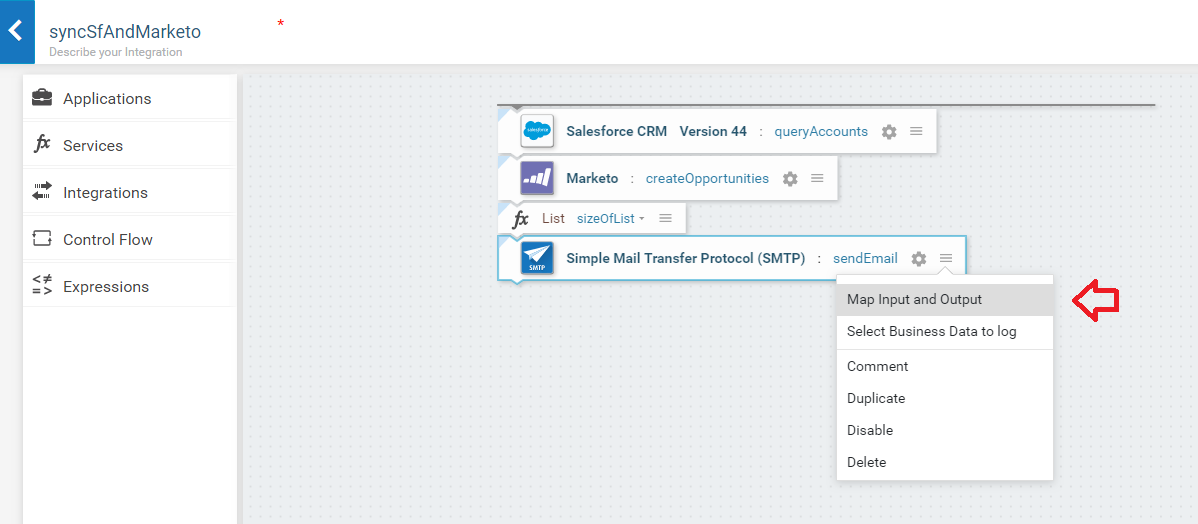
9. Map input and output.
10. Click subject and set a value. Then click body.
11. Set a value for the body, that is, type the email body. Wrap the dynamic fields which are in the pipeline with % and click Perform pipeline variable substitution.
12. Click Apply, save the integration, and then run the Integration.
An email is sent to the recipients specified in the To field on the SMTP Account Configuration page.
Exceptions
Timeout errors may occur while executing the
sendEmail operation. Do the following as remedial actions:
Check if the host and port details are configured correctly.
Increase the
Response Timeout value on the
Account Configuration page.