Creating Solutions
The Solution List page displays the solutions created in Integration Cloud.
Note: You must have the required permissions under
Settings  > Access Profiles > Administrative Permissions > Functional Controls > Solution
 to create, update, or delete Solutions.
Note: You must first create a solution in Integration Cloud before deploying the on-premises assets and configurations.
All solutions created are initially copied to the Development stage. You can create a new solution in any stage, for example, development, test, live, and prelive. Further, you cannot modify the solution name and clustering details after it is created. You can configure the solution in subsequent stages but after you configure a solution in a stage, you cannot modify the solution again in that stage. In a stage, you can configure only those solutions that are marked as Not Configured.

To create a solution
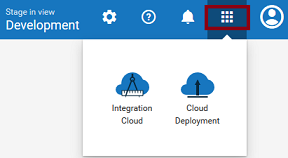
1. Switch to the Cloud Deployment perspective.
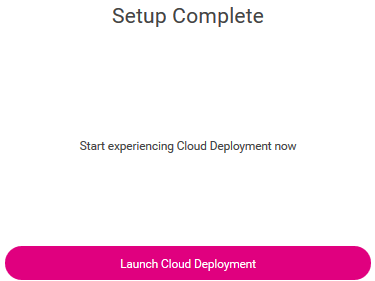
As soon as you register, Cloud Deployment capability is enabled by default for all tenants. By default, 3 CPU core and 6 GB memory are allocated for all tenants. When you access Cloud Deployment for the first time using the application launcher, you need to start provisioning.
After provisioning, your setup will be complete, and you can launch Cloud Deployment.
Note: Solutions created using a trial account are deactivated daily. After you log in, you need to reactivate the solutions. All assets will be available after a short delay.
2. After you launch Cloud Deployment, from the Cloud Deployment navigation bar, click Solutions > Solution List.
The Solution List page appears.
3. From the Solution List page, click Create New Solution to create a solution. You can create a solution in any stage.
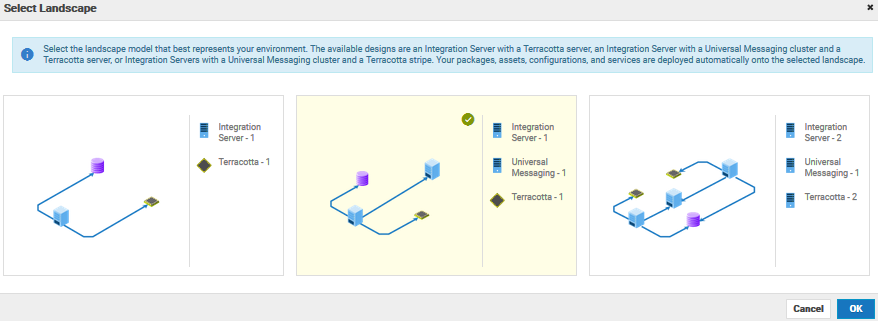
4. Select the landscape model that best represents your environment. The available designs are an webMethods Integration Server with a Terracotta server, an webMethods Integration Server with a cluster and a Terracotta server, or webMethods Integration Servers with a Universal Messaging cluster and a Terracotta stripe. Your packages, assets, configurations, and services are deployed automatically onto the selected landscape.
5. Click OK.
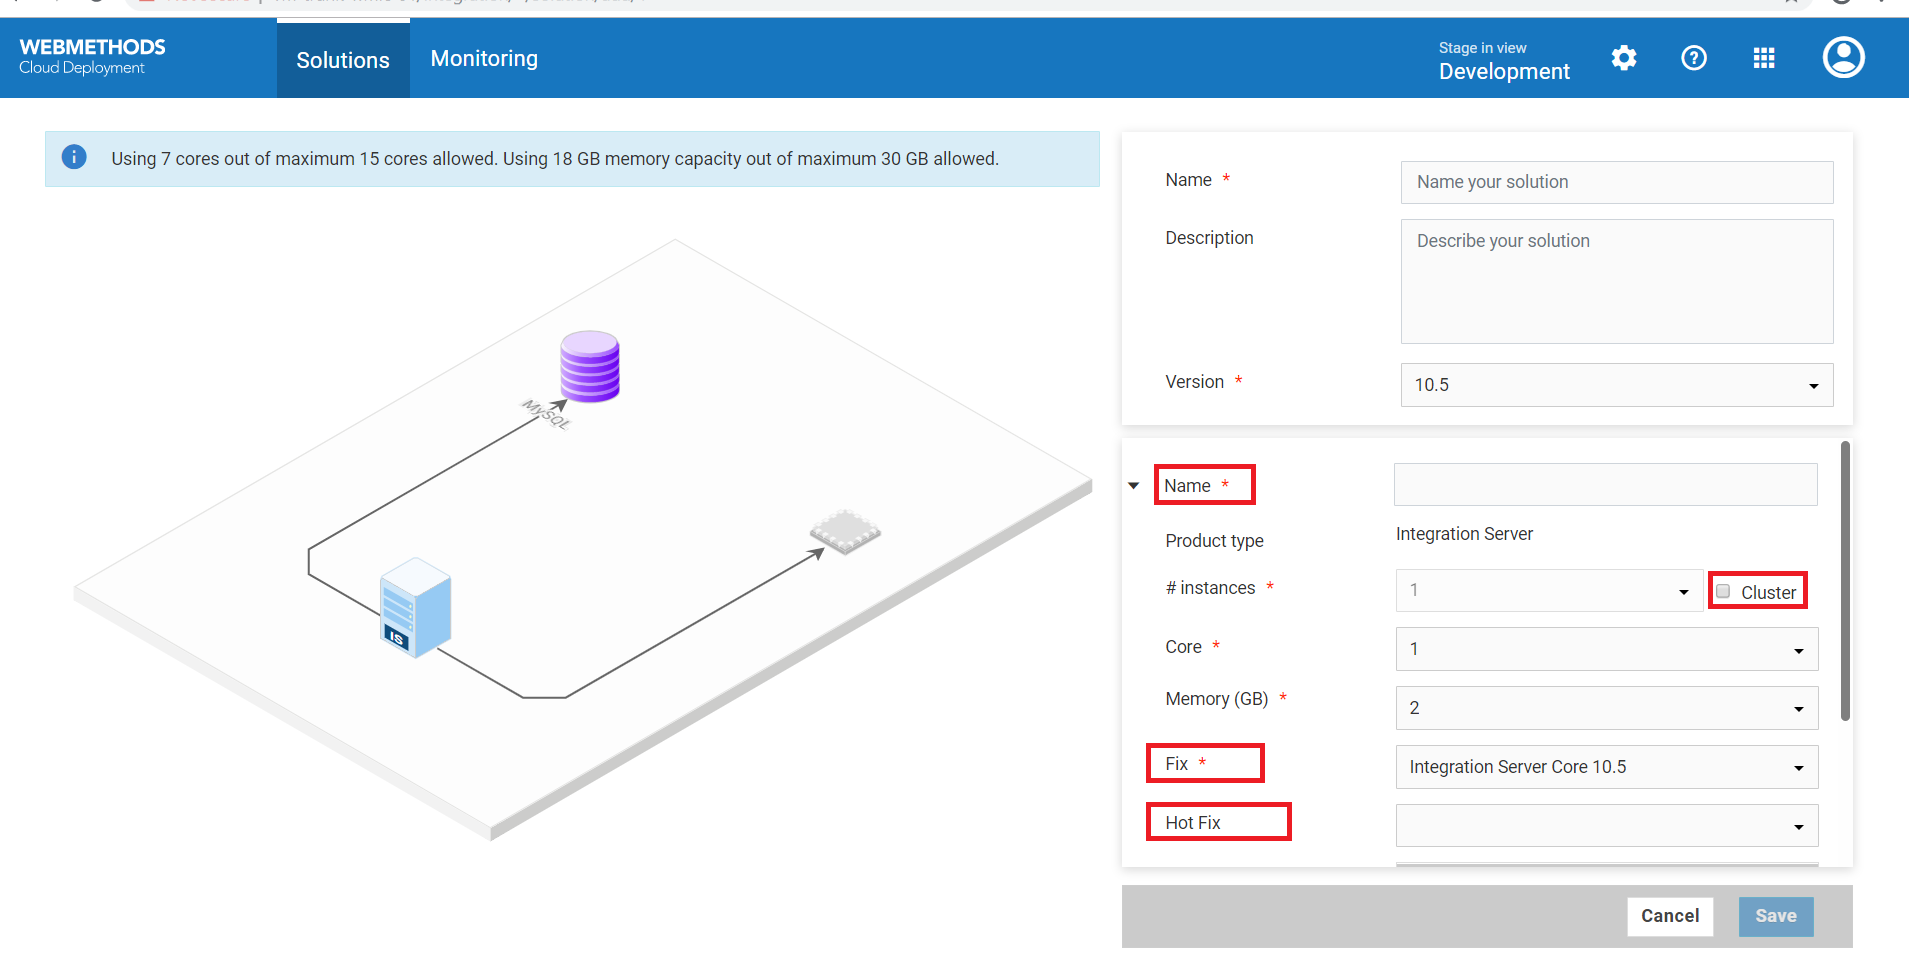
6. In the New Solution page, fill in the solution Name, the solution Description, the name of the webMethods Integration Server and Universal Messaging instances, number of CPU Cores, and Memory characteristics of the hardware to support each service in the solution landscape.
Note: You can also select the webMethods Integration Server and Universal Messaging icons to highlight the sections in the New Solution page. Terracotta is available only when webMethods Integration Server runs in a clustered mode. Further, clustering and Terracotta options are not available in the Development stage.
The Version list box lists all the available major versions. The solution will be created based on the available Fix version. webMethods Integration Server packages such as WmCloudStreams and WmJDBCAdapter will appear in the Packages group box based on the Fix version. Select the Packages you want to enable. After you save the solution, you will not be able to change the major Version. You can change only the number of CPU Cores, Memory, Fix version if available, and Packages.
You can deploy CloudStreams provider packages, CloudStreams connector services, CloudStreams connection, and CloudStreams connector listeners to a solution in Cloud Deployment only if you have selected WmCloudStreams as the package option while creating the solution.
On the Landscape page, select the Cluster Type as Stateless if the group of webMethods Integration Servers function in a manner similar to a cluster but are not part of a configured cluster. A stateless cluster of webMethods Integration Servers does not use a Terracotta Server Array. Select Stateful to add the Terracotta section. The Terracotta icons will be activated.
The Hot Fix list box lists all available fixes that include enhancements to versions. Hot fix field is optional. Selecting None option will remove the hotfixes applied on the solution, and the solution will point to the base fix version. Typically, hotfixes are created for specific tenants.
Note: After creating a solution, if you modify the package list options in the Packages group box and save the solution, due to webMethods Integration Server restart, the assets will appear after a short delay.
Updating products to a higher fix version in a solution
You can update any product in a solution to the available higher fix version after you create the solution. The Update Available option appears if a higher fix version is available for any of the products in the solution. The latest fix version appears in the Fix drop-down list. For example, if you have selected Fix 3 of webMethods Integration Server while creating a solution, and if Fix 4 is now available, you can select Fix 4 and save the solution.
Note: While configuring a solution in a higher stage, the fix version of the products in the solution will be taken from the lower stage. If a solution is updated in a lower stage, you will be given an option to update the solution in the higher stage, to the fix versions of the products in the lower stage.
For example, if you configure a solution in a higher stage (Test stage) and then go back to a lower stage (Development stage), and If a higher fix version is available for a product in the Development stage, you can click Update Available, and in the Edit Solution screen, you can select the higher fix version for the product in the solution. Now if you go to the higher stage (Test), the Update Available option will appear in the Test stage. You can update products in a solution at every stage, to the fix versions of the products in the solution available in the immediate lower stage. Note that after you update or update the products in the solution, the products in the solution will not be accessible for sometime.
Updating products to a higher version in a solution
You can update any product in a solution to the available higher version after you create the solution. The Update Available option appears if a higher version is available for any of the products in the solution. The latest version appears in the Version drop-down list. For example, if you have selected 10.3 of webMethods Integration Server while creating a solution, and if 10.5 is now available, you can select version 10.5 and save the solution. Further, if you update to v10.5, the latest available fix for v10.5 will be automatically selected.
Note: While configuring a solution in a higher stage, the version of the products in the solution will be taken from the lower stage.
If a higher version is available for a product in a stage, you can click Update Available, and in the Edit Solution screen, you can select the higher version for the product in the solution.
The Schedule option appears if you select a higher version available for any of the products in the solution. Click Schedule to schedule the update process by specifying the date and time on which you want the update process to execute. Once the solution is scheduled for update, you can click Cancel Schedule to cancel the schedule or click Modify Schedule to modify the schedule. If the update process is scheduled, the status of the solution on the Solution List page displays Update scheduled. The status of the solution on the Solution List page displays Update in progress if the scheduled update process is under way.
Note: After a solution is updated successfully, ensure that you click Confirm Update within seven days to complete the update process or click Rollback to rollback the solution to the previous version. After seven days, except for the Confirm Update and Rollback options, the solution page will not be available. If you rollback, the status of the solution on the Solution List page displays Rollback in progress until the solution is rolled back to the previous version.
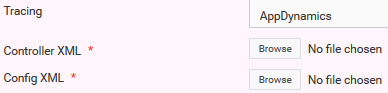
7. The Tracing list box appears only if you have the App Dynamics capability and if you are currently using AppDynamics to trace end to end business flows. It allows you to trace logs after you create or update a solution for an webMethods Integration Server runtime. Currently, tracing support is provided only for the webMethods Integration Server runtime. Select AppDynamics from the drop-down list to provide the AppDynamics tracing support and upload a valid Controller XML and Config XML file containing the Appdynamics details. You can update the controller file for each webMethods Integration Server runtime. You also have the option to download the controller and config files and then upload the files after modifying them.
Note: If you select AppDynamics tracing and provide a valid controller file, the tracing data will appear on the AppDynamics cloud application.
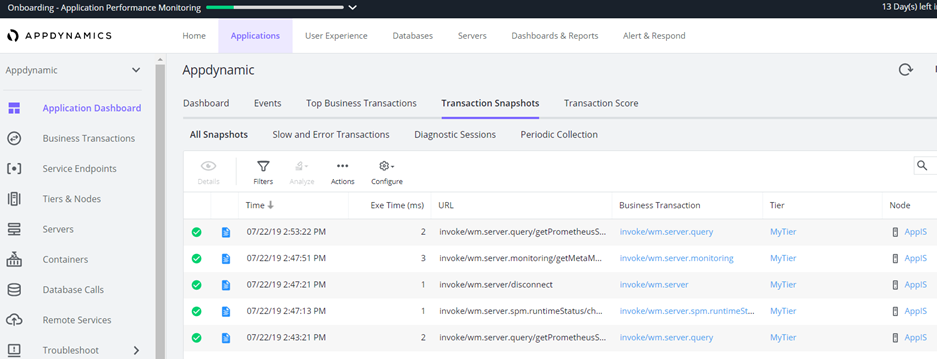
Let us see an example of how the tracing data appears on Appdynamics when you create a solution in Cloud Deployment.
a. Go to https://www.appdynamics.com/ and register in AppDynamics.
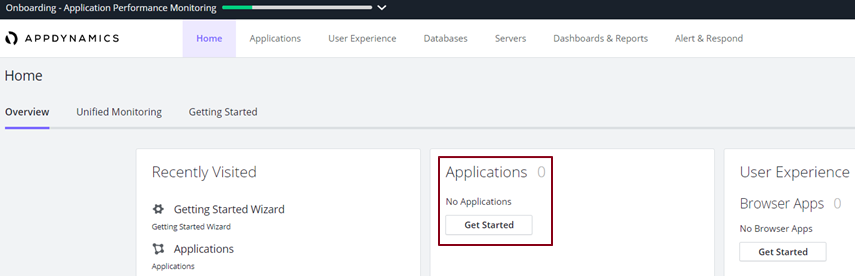
b. On the Overview > Applications panel, click Get Started.
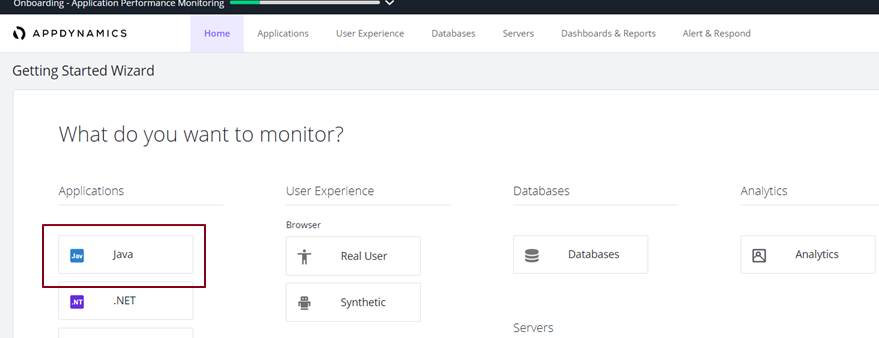
c. On the Getting Started wizard, click Java under the Applications panel.
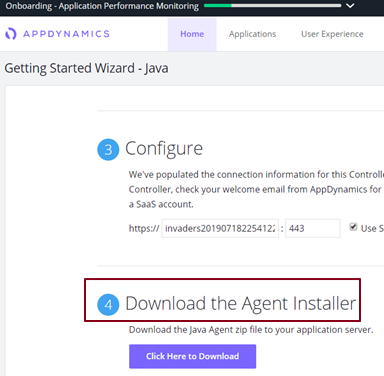
d. Download the Java Agent Installer.
e. Go to the ver<xxx> > conf folder on your local system and view the controller-info.xml and app-agent-config.xml files.
f. Open the controller-info.xml file and provide the following values:
<application-name>MyApplication</application-name
<node-name>AppIS</node-name>
g. Log in to Integration Cloud and switch to Cloud Deployment using the App switcher.
h. Create a new solution in Cloud Deployment and select AppDynamics from the drop-down list to provide the AppDynamics tracing support. Upload the controller-info.xml and app-agent-config.xml files, and save the solution.
i. Log in to AppDynamics. Your application, that is, MyApplication appears on the Applications panel.
j. Click on MyApplication and view the service execution status and execution logs.
8. Click Save to save the solution.
The new solution is created and appears in the Solution List page. You cannot modify the solution after the solution is created. You can configure the solution in subsequent stages but once a solution is configured in a stage, you cannot modify the solution again in that stage.
Note: You can now deploy the solution to the next stage.
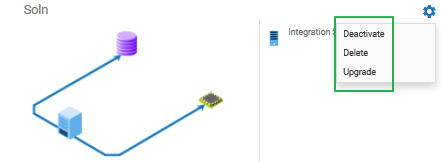
Deactivate, Activate, and Delete a solution
Click the

icon and select
Deactivate to deactivate a solution. All packages and assets will be permanently deleted and cannot be recovered. Click the
icon and select
Activate to activate an inactive solution.
Click the
icon and select
Delete to permanently delete the solution. If a solution is configured in a subsequent stage, it will be permanently deleted from the current stage and cannot be recovered. Further, if you delete the solution, you will not be able to promote assets from the current stage.