Point-to-Point Integrations
Integration Cloud enables you to integrate your cloud-based Software as a Service (SaaS) applications with other cloud-based SaaS applications. It also integrates your SaaS applications with on-premises applications.
Integration between two cloud providers includes the following steps:

Invoking a source Operation on an application, which fetches data from it
Invoking a target Operation on an application, which uploads data into it
Filtering the data fetched from an application, before it is passed on to the target application
Mapping the data fetched from an application, to the structure needed by the target application to which you want to upload the data.

To add or edit an existing Point-to-Point Integration
1. From the Integration Cloud navigation bar, click Projects. The Projects screen appears.
2. Select a project in which you want to create the Integration. You can also create a new project. See Projects for more information. 3. To edit an existing Integration, select an Integration from the Integrations screen and click Edit.
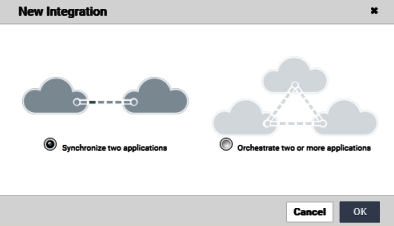
4. To create a new point-to-point Integration, from the Integrations screen, click Add New Integration, select Synchronize two applications, and click OK.
To use an Application, you are required to agree to the summary of terms. Click I agree to use the Application. Click I do not agree if you disagree with the summary of terms and do not want to use the Application. Click Cancel to go back to the Applications page.
5. Provide a name and description of your Integration. Required fields are marked with an asterisk on the screen.
6. Drag and drop your applications to the Source and Target sections. You can also double-click an Application to move it to the required section.
7. Select an Account, and then select a custom or a predefined Operation in both the Source and Target sections. Only active or enabled Accounts are listed in the drop down list.
Note: If you had already done the mapping for a source and target Operation, and you want to change any of the source and target Operations, all the mappings you had performed before will be removed.
8. Click Next to filter the data fetched by the application selected in the source section, before it is passed on to the application selected in the target section. Click Load Data to preview the data as well as view the data filters. The source Operation fetches the data and displays a sample of the data in the preview pane. Out of all the records fetched, you may want to upload only selected records. To do this, you can have a selection or a filter criteria so that you can view only a few records. A sample preview of only a few records can be viewed to analyze the kind of data that exists in the system. After you analyze the records, you can set filters, to upload, for example only Accounts that are based out of California to the target application. After you set the filters, whenever you run the Integration, all records will be fetched from the source application, but only the filtered records will be moved to the target application after mapping and transformation.
9. Click Next to map the data fetched by the application selected in the source section, to the structure needed by the application selected in the target section.
Select a field from the source section and drag and drop it on to a relevant field in the target section. Select a mapping and then click the Unmap icon to unmap only the selected mapping. Click the Clear All icon to unmap all the mapped elements, values set for fields, and transformers. To view only the mapped fields, select the Show Only Mapped Fields option.
You can select a field in the target Operation table, and then choose to set a new value of the selected field in the target Operation. You can assign a value to a field when the field is not linked or when the field is only implicitly linked to another value in the pipeline. You cannot assign values to fields that are explicitly linked to another value in the pipeline or fields that have been dropped from the pipeline.
You can copy a field from the fields panel by clicking the

icon. Depending on the context, you can either paste the field or the field path. For example, if you copy a field and paste the field in the
Set Value window in an Integration (double-click a field to set a value), the field path will be pasted. If you copy an array item, the path that is pasted includes the item index. For example, if the item that is copied is A/B/C[10], then the pasted path will also include the item index [10]. But if it is pasted in the document tree, it will appear as an array, like A[ ]. If there are multiple fields with the same name in a document, and one of the occurrences of such a field is copied, then the path when pasted will contain the occurrence number in brackets, for example, the path will be A/B/C(5) if the copied element C is the 5th occurrence under field B.
Note: The paste option is not applicable for Point-to-Point Integrations.
Click the Add Transformer icon to add a transformer in the Transform Data page. This page allows you to transform the source Operation data, for example, concatenate two strings and map it to a single field. Several built-in services specifically designed to translate values between formats are provided. You can transform time and date information from one format to another, perform simple arithmetic calculations (add, subtract, multiply, and divide) on integers and decimals contained in String fields, or transform String values in various ways. Reference Data is also available while transforming the data.
The
Transform Data screen also allows you to look up and use data from another source Operation to transform the data. After adding a transformer, you can click the

icon and select
Edit Transformer or
Delete Transformer to either modify the transformer or delete it.
10. Click Next to review your Integration.
11. Click Save and then click Finish to create your Integration.
The new Integration appears in the Integrations page.