Import Integrations
Integration Cloud allows you to import Integrations from the Integrations page. You can import Integrations from a zip file that was earlier exported from Integration Cloud. You can export Integrations from one tenant and import those Integrations to another tenant. You can import Integrations provided you have the Create Integration permission.
Note: If you want to import an Integration that has an on-premises Application, before importing the Integration, ensure that you upload the same on-premises Application to Integration Cloud. Else, you will not be able to import the Integration.

To import Integrations
1. From the Integration Cloud navigation bar, click Projects > <Select a Project> > Integrations. The Integrations page appears.
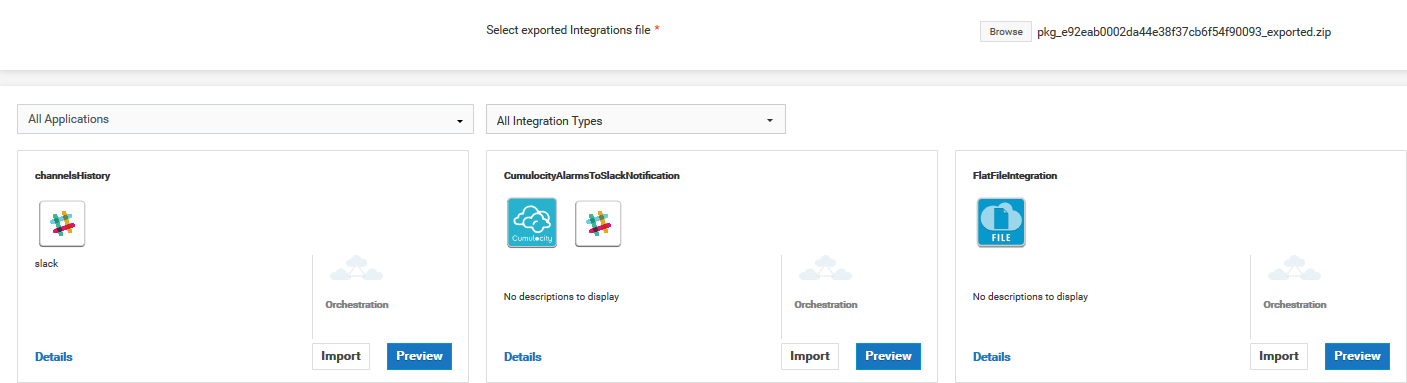
2. Click Import Integrations.
The Import Integrations page appears.
3. Click Browse and select the zip file that contains the exported Integrations. The zip file size must not be greater than 50 MB. The Integrations available in the zip file appears in the pane.
4. Click Preview to view an Integration or click Import to import an Integration.
5. In the Configure Project and Applications screen, select the Account for each Application or create a new Account, and then click Next.
Note: If the Integrations you are importing use SOAP or REST Applications and if those Applications do not exist in your system, you will not be able to create Accounts at this step. Continue importing the Integrations. The Applications will also be imported along with the Integrations. After importing, create the Accounts and then configure them in the imported Integrations.
Note: If an Integration you are importing uses an on-premises Application and if the Application does not exist in your system, you will not be able to select the Account at this step. The Account will appear only after you have uploaded the on-premises Application. See the Configuring On-Premise Integration Servers for webMethods Cloud document for information on how to upload on-premises Applications.
The Overview and Save Integration screen appears.
6. In the Overview and Save Integration screen, provide a name and description for your Integration. By default, the Integration name and description appears.
7. Click Finish. If you have existing references (Reference Data, Document Types, and custom Operations) with the same name in the development stage, the Copy References screen appears. Click Cancel to go back to the Overview and Save Integration screen. By default, all references are selected in the Copy References screen.
8. Deselect the references that you do not want to replace and then click Continue to replace or overwrite all the selected references from the Integration in the development stage.
The Integration details screen appears for the newly created Integration.