
You can install Natural in one of the following two ways:
Using the GUI to Install Natural for an easy user-based installation.
Via a command line interface that is available for automated installation. It is described in Using Software Distribution Tools to Install Natural.
This installation documentation provides just a brief description on how to install Natural directly on the target machine using the Installer GUI. For detailed information on the Installer, see the Software AG Installer documentation.
Important
Make sure all ports you specify on panels or in response to prompts are not
already being used by other products on your machine. The installer cannot detect whether
ports are in use when products are shut down, and the shutting down of products is a
requirement for running the installer. For a list of default ports used by the products,
see "List of Used TCP/IP Ports" at https://empower.softwareag.com/ (go to Products > Download
Components > TCP/IP Ports).
 To install Natural
One or more license files are provided for Natural; the installer prompts for them during a first-time installation. Starting with Natural 9.3.3, however, these files are not required for the installation, so you can leave the corresponding license path fields empty. If you want to install a license at the time of product installation (for example, to avoid manually installing it later), copy it to any temporary location on the machine on which you want to install Natural. The installer will ask for the location of your license files and, if specified, will then copy them to the common/conf directory of your installation directory.
Start the Installer GUI as described in the Software AG Installer documentation.
When the first page of the Installer GUI (the so-called Welcome panel) is shown, choose the button repeatedly (and specify all required information on the shown panels as described in the Software AG Installer documentation) until the panel containing the product selection tree appears. This tree lists the products you have licensed and which can be installed on the operating system of the machine on which you are installing.
To install Natural with all of its product components, expand the Natural Products node and select Natural.
Or:
Expand Natural Products > Natural and select the product
components that you want to install.

Note
Products or product versions which are already installed in the selected
installation directory are shown as disabled.
The following product components are available:
Base Environment
Installs the base environment for Natural.
Extended Environment
Installs the extended (that is, non-runtime) environment for Natural. You will
be prompted to optionally provide the license file later during the installation
(first-time installation only).
Note
Starting with Natural 9.3.3, the Runtime Environment is
no longer available for installation. Therefore, Extended
Environment must be selected.
Development Server
Installs Natural Development Server (NDV) which enables remote development
using Natural Single Point of Development (SPoD).
ApplinX Interface
Installs the Natural runtime environment for ApplinX. ApplinX enables you to
modernize your Natural applications so that they run in a browser. To set the
s-bit for the ApplinX executables, sudoers privileges are required.
Web I/O Interface
Installs the server part of the Natural Web I/O Interface. This enables you to
use a browser as the I/O device for Natural applications. To set
the s-bit for the Natural Web I/O Interface executables, sudoers privileges
are required.
If you want to install Natural Security, select Natural Products > Natural Security in the product selection tree. Natural Security can only be installed together with Natural or after the Natural installation is complete.
Note
If user authentication via an LDAP server is to be used, it is required that the
SSX security libraries (Infrastructure > Libraries > Security
Libraries) are installed as part of the Natural Security installation
procedure. By default, if you select Natural Security in the installation tree, the
SSX security libraries are automatically selected also. Refer to Authentication
Options in the section Administrator
Services of the Natural Security documentation for
further details.
Choose the button.
Read the license agreement, select the check box to agree to the terms of the license agreement, and choose the button.
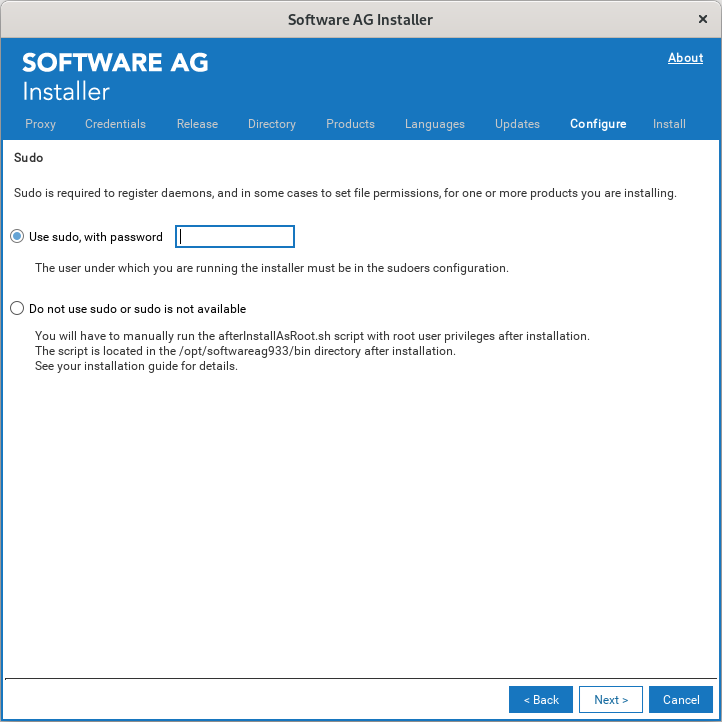
Specify whether to use sudo or not.
You must either have the installer execute the <install-dir>/bin/afterInstallAsRoot.sh script, or you must run the script manually after installation as explained later in Registering Daemons and Setting File Permissions. If you want to have the installer to execute the script, the user under which you are running the installer must be in the sudoers configuration.
For security reasons, the installer does not store the sudo password in installation scripts. If you are creating or installing from an installation script, therefore, the option to use sudo is not available. You must execute the afterInstallAsRoot.sh script manually after the installation.
Choose the button.
First-time installation only.
You can optionally enter the full path to the Natural license file (or use the button to select it from a dialog box). Starting with Natural version 9.3.3, it is possible to install without a license by leaving this field empty.
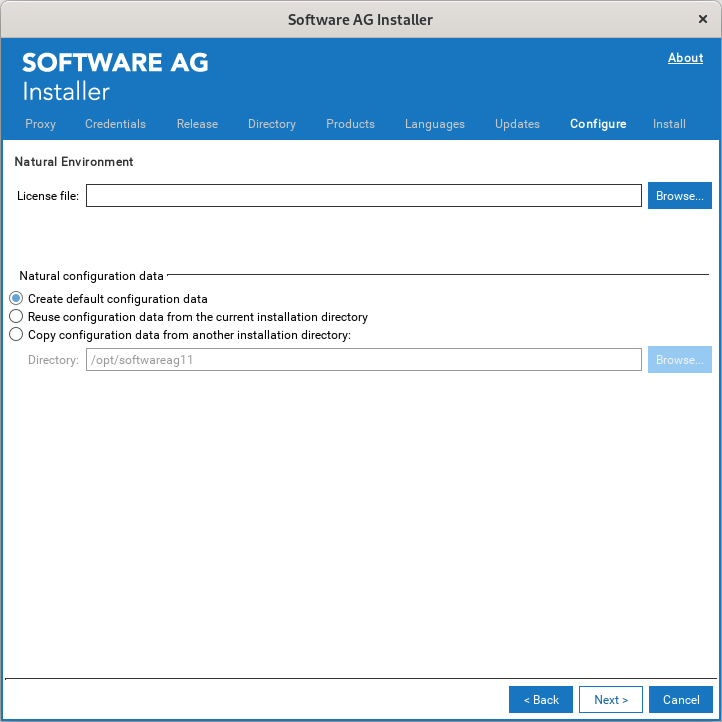
It is only possible to reuse or copy configuration data from a Natural installation which has been installed with the Installer.
- Create default configuration data
Default. All required configuration files are created. These files contain default values.
- Reuse configuration data from the current installation directory
This option is helpful, if you want to reuse the configuration files from a previous uninstallation in the same directory.
- Copy configuration data from another installation directory
This option is helpful if you have side-by-side installations. In this case, you can copy the configuration files from an existing Natural installation directory into the current directory. The existing Natural installation remains unchanged. Enter the full path to the existing root directory (or use the button to select the root directory from a dialog box). At least the NATURAL.INI file is expected in this case.
The following configuration files are reused or copied:
<install-dir>/Natural/etc/NATURAL.INI
1
<install-dir>/Natural/etc/NATCONV.INI
<install-dir>/Natural/etc/NATCONF.CFG
2
<install-dir>/Natural/etc/SAGtermcap
<install-dir>/Natural/prof/
3
<install-dir>/Natural/<host-name>
4
<install-dir>/Natural/nwo/<host-name>
5
All Natural text members INST-<productcode>
within the library SYSPCI
1 For the default buffer pool NATBP, new semaphore
and shared memory keys are generated, and the buffer pool parameter
READONLY is set to NO.
2 The paths of the default system files (22,10 and 22,20) are adapted to the current installation directory.
3 All files except NDVSERVER.PRU.
4 If available and independent from the selection of the ApplinX Interface: All files except log files.
5 If available and independent from the selection of the Web I/O Interface: All files except log files.
Choose the button.
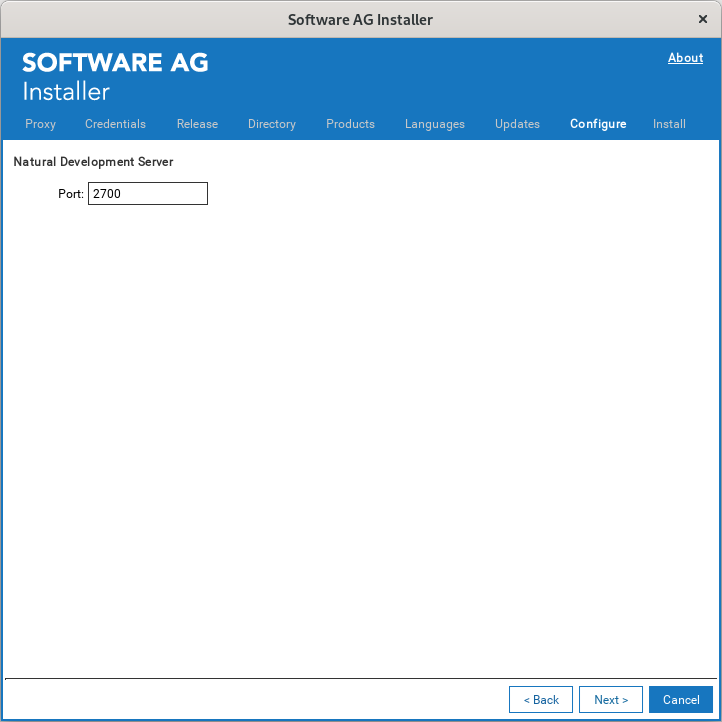
First-time installation only: When Development Server was selected in the product selection tree, you can enter a different value for the Natural Development Server port. Values between 1023 and 65536 are valid. The default value is 2700. If this port is already used, the number of the next free port will be shown.
Choose the button.
First-time installation only: When Web I/O Interface was selected in the product selection tree, you can enter a different value for the port. This port is used by the Natural Web I/O Interface daemon. Values between 1023 and 65536 are valid. The default value is 2900. If this port is already used, the number of the next free port will be shown.

Choose the button.
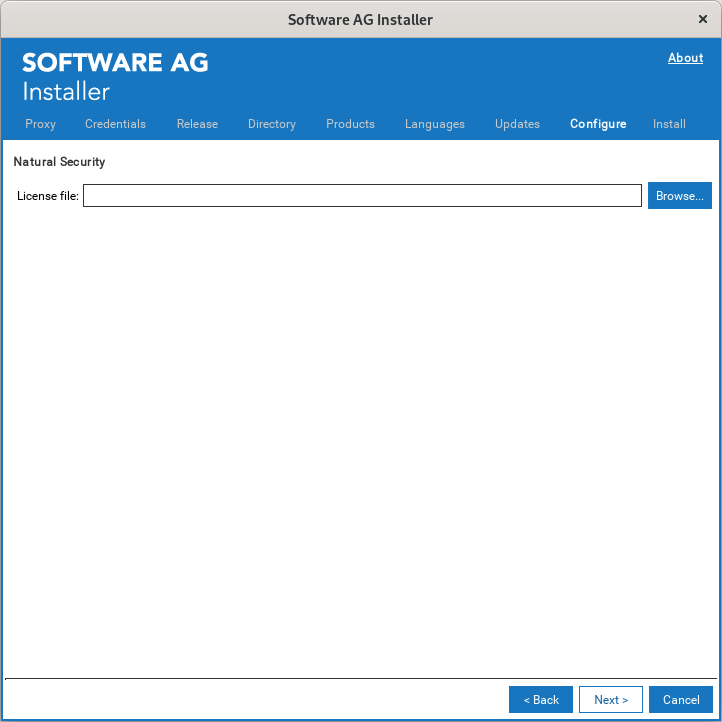
First-time installation only: When Natural Security was selected in the product selection tree, enter the full path to the Natural Security license file (or use the button to select it from a dialog box).
Choose the button.
On the last panel, review the list of products and items you have selected for installation. If the list is correct, choose the button to start the installation process.
When the Installer has completed the first-time installation, additional configuration steps are required. See Completing the Installation for further details.
You can use the Installer to create an installation package which can then be distributed automatically to any number of computers in your environment. You can use third-party distribution tools for this purpose.
To distribute Natural, the following items are required:
Installer.
Installer image containing the products to be installed.
Script file which defines the location of the image file, the products to be installed, and the locations of all required license files.
License files for the products to be installed.
The description below just provides a brief overview on how to create the required files. For more detailed information, see the Software AG Installer documentation.
To create the image and script
Start the Installer GUI as described in the Software AG Installer documentation.
On the Welcome panel, choose the button.
Go to the Images tab and proceed as follows:
Select the Use installation image check box.
Select the Create image option button.
Specify a location and name for the image. The installer will automatically add the extension .zip.
Specify the platform for which you want to create the image. You can create an image for any platform from any platform.
Choose the OK button to return to the Welcome panel.
Choose the button repeatedly in order to:
Select the products to be installed.
Agree to the terms of the license agreement.
Start the installation to create the image.
Note
When creating an image, the panels on which you usually specify the license
files and ports do not appear.
Start the Installer GUI once more, and choose the button again.
Go to the Images tab again and proceed as follows:
Select the Use installation image check box.
Select the Install from image option button.
Specify the name of the image that you have previously created.
Go to the Scripts tab and proceed as follows:
Select the Use installation script check box.
Select the Create script option button.
Select the Do not install products on local machine option button, unless you also want to install on the local machine in the same step.
Specify a location and name for the script.
Choose the OK button to return to the Welcome panel.
Choose the button repeatedly in order to:
Specify the installation directory.
Select the products to be installed.
Agree to the terms of the license agreement.
First-time installation only: Specify the paths to all required license files and, if required, specify the ports for the selected products.
Start the installation to create the script.
Note
It is recommended that you create separate scripts for first-time
installations and update installations.
To adapt the script
Edit the script that you have previously created and adjust the references to the image and license files. For example:
guiNscLicense=__VERSION1__,C%3A%5CUsers%5Cxyz%5CDocuments%5CLics%5Cnsc84.WinDesk.2017.xml
guiNatLicense=__VERSION1__,C%3A%5CUsers%5Cxyt%5CDocuments%5CLics%5Crun84WinDesk.2017.xml
imageFile=C\:\\Users\\xyz\\Documents\\NaturalSec84.zip
For an automated installation, the references to the image and license files need to be adjusted to the actual installation location. You can specify either the full path or a relative path such as file-name, .\\file-name or .\\folder-name\file-name. You can also specify the full path to a file server such as \\\\file-server\\folder-name\file-name. The following examples show the different ways in which a path can be specified:
guiNscLicense=__VERSION1__,nsc84.WinDesk.2017.xml
guiNscLicense=__VERSION1__,.\\Lics\\nsc84.WinDesk.2017.xml
guiNscLicense=__VERSION1__,\\\\Server1\\Lics\\nsc84.WinDesk.2017.xml
You also can use environment variables as part of the path specification. For example:
imageFile=$IMAGEDIR$\\NaturalSec84.zip
If necessary, adjust the parameter values in the script (for example, port numbers).
Note
You can delete the port specification lines for Natural Development Server
(guiNdvPort=..) and the Natural Web I/O Interface
(guiWebioPort=..) from the script if you want to make sure that the
installation does not stop if the specified port number is in use. In this case, the
next free port number will be used.
To start the installation
Start the installation from the command line. Start the installer jar file as follows:
java -jar SoftwareAGInstaller.jar -readScript script-file-name -scriptErrorInteract no
Note
An appropriate Java version must be installed on the machine.
For security reasons, the installer does not store the sudo password in installation scripts. Execute the afterInstallAsRoot.sh script manually after the installation (see also Registering Daemons and Setting File Permissions).
