This section describes how to create a sequence unit test (file extension .seqtst), a type of unit test that executes a sequence of test steps in a specified order. Each test step executes a business service or Natural unit test and, optionally, copies data between steps, applies field overrides, defines validation overrides. and/or applies method overrides (business service unit tests only). These overrides do not physically change the existing unit test files; the values are only changed in memory prior to execution of the files.
For example, a sequence test can have the following two steps:
Invoke a unit test for a Construct-generated object-maintenance subprogram and attempt to retrieve (GET) a data record.
Re-invoke the same test, but apply a field override that attempts to update the record. In addition, copy all data from Step 1 and pre-configure each input field.
There are several methods you can use to create a sequence unit test, depending on your requirements. These methods include:
Create one generic business service or Natural unit test and then create a sequence unit test containing several test steps that reference the same generic unit test, but use a different field override.
For example, you can create a generic Natural unit test called WAREHOUSE.nattst and then create a unit test that reference a sequence of unit tests to override the value of WAREHOUSE.#FUNCTION, such as WAREHOUSE_GET.nattst, WAREHOUSE_NEXT.nattst, etc.
Create several business service and/or Natural unit tests that reference the same subprogram/PDA and then create a sequence unit test that references each unit test in a specified sequence.
For example, you can create a unit test for each warehouse function, such as WAREHOUSE_GET.nattst, WAREHOUSE_NEXT.nattst, etc., and then create a unit test that invokes these tests in a specified sequence.
Create several business service and/or Natural unit tests that reference different subprograms/PDAs and then create a sequence unit test that references each unit test in a specified sequence and copies data from one test to the next.
Create a sequence unit test and one or more unit tests to use for the test.
The following topics are covered:
This section describes how to use the wizard to create a sequence unit test.
 To create a sequence unit test
Open the context menu for one of the following items in the Project Explorer view:
Project folder
Testing-Suites folder or subfolder
One or more business service and/or Natural unit test files (using standard selection techniques). The tests can reference the same subprogram/PDA or different subprograms/PDAs. The wizard will create one test step in the generated sequence unit test for each unit test selected in the Project Explorer view.
Select .
The Define Sequence Unit Test Details panel is displayed. For example:
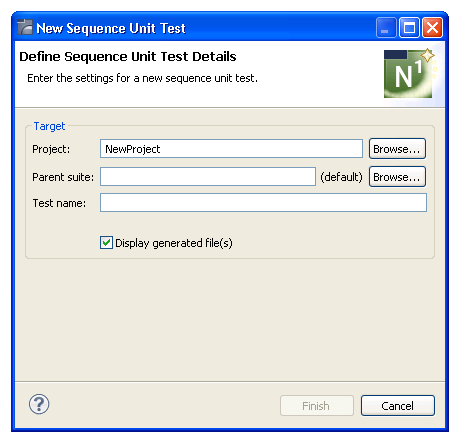
Type the name of the sequence unit test in Test name.
Optionally, you can:
| Task | Procedure |
|---|---|
| Change the name of the project in which to create the sequence unit test. | Type the name of the Natural
project in Project or select
to display a window listing the existing projects for selection.
Note: |
| Provide the name(s) of a subfolder(s) in which to save the sequence unit test. If the folder does not currently exist, it will be generated for you. | Type the name of the folder in
Parent suite or select to
display a window listing the available folders for selection.
By default, the unit test is stored in the Testing-Suites folder in the current project. If you specify a suite folder name, it becomes a subfolder in the Testing-Suites folder and the unit test will be stored in that folder. |
Select .
The sequence unit test file is generated into the Testing-Suites folder (or subfolder) and listed in the Project Explorer view.
The .seqtst file is also displayed in the editor view. For example:
If one unit test file was selected in the Project Explorer view, a default test step is created for that file. For example:

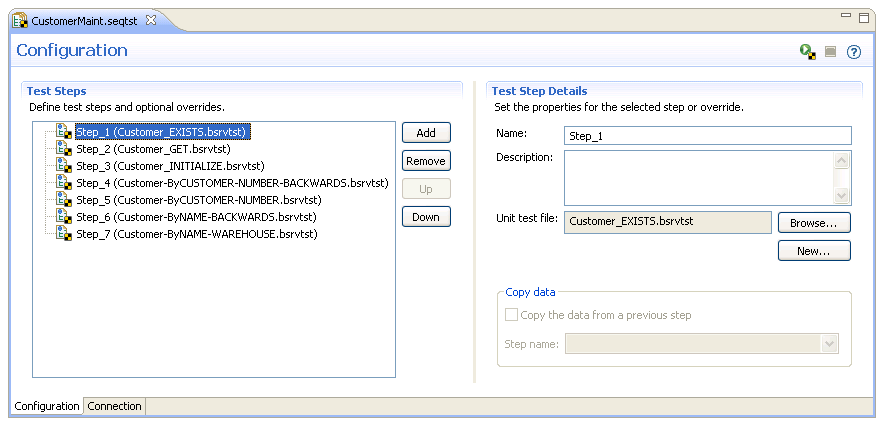
If several unit test files were selected in the Project Explorer view, one test step is created for each test. For example:
This section describes how to use the sequence unit test editor. The following topics are covered:
Notes:
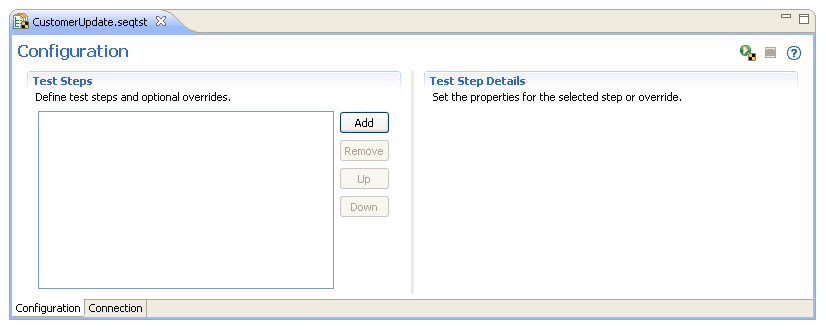
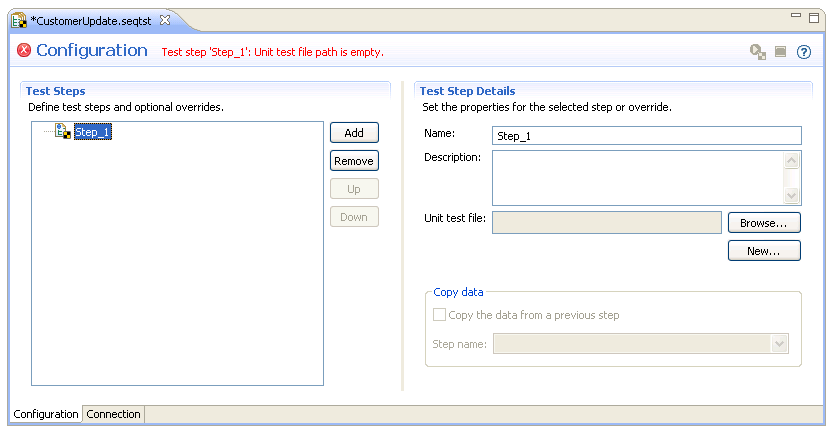
This section describes how to add test steps to execute business service and/or Natural unit tests in a specified order. Each test step executes one existing unit test and, optionally, copies data between steps, applies field overrides, and/or defines validation overrides. In the following example, the sequence unit test is generated from the context menu for a project and no steps are created. For example:
Note:
To resize the editor sections, select the sash and move it left
or right.
To add test steps
Select .
The Test Step Details section is displayed. For example:
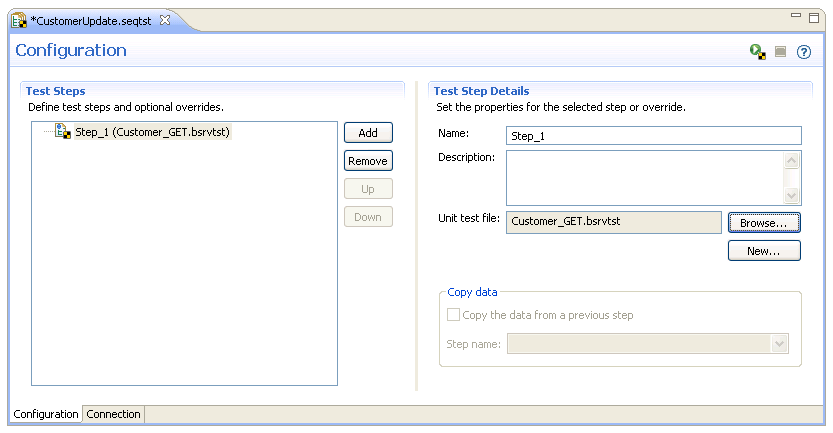
Select for Unit test file.
The Select Unit Test window is displayed. Select the unit test file and . The unit test details are displayed in the Test Steps section and the selected unit test file is displayed in Unit test file. For example:
Or:
Select for Unit test
file.
The Select Unit Test Type panel is displayed. For example:
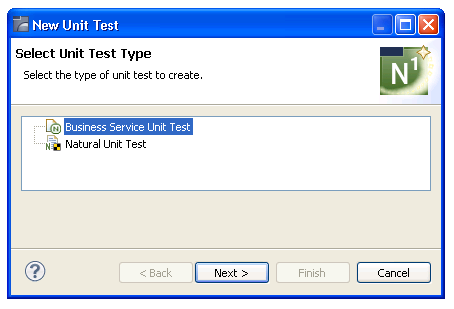
Select one of the following options:
Business Service Unit Test
The Define Business Service Unit Test Details panel is displayed. For information, see Create a Unit Test for a Business Service.
Natural Unit Test
The Define Natural Unit Test Details panel is displayed. For information, see Create a Unit Test for a Subprogram.
Note:
When accessing these panels from the sequence unit test
editor, the project name defaults to the name of the project containing the
sequence unit test and is read-only. The unit test file specified for each test
step must contain a relative path to the Testing-Suites folder in the project
containing the sequence unit test.
After defining the unit test and selecting , the unit test details are displayed in the Test Steps section and the newly created unit test file is displayed in Unit test file.
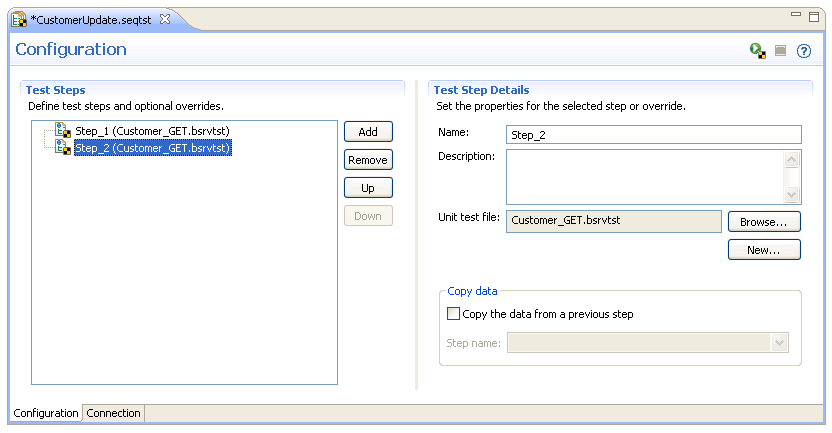
Select .
The second test step is displayed in Test Steps and the Copy data section is enabled. For example:
Select or create the unit test for the second test step.
Repeat steps 1 and 2 until all test steps have been added. Optionally, you can use this editor to:
| Task | Procedure |
|---|---|
| Provide a description of this test step. | Type a description of the test step in Description (maximum of 250 characters). The first 60 characters are displayed as the tool tip for the test step in Test Steps. |
| Copy data from a previous step. | See Copy Data from a Previous Step. |
| Delete a test step. | Select the test step in Test Steps and select or open the context menu for the test step and select . |
| Reorder the test steps. | Select the test step in Test Steps and select or . |
| Provide a name for the test step. | Type the step name in Name. |
| Define an input override for a field used in a test step. | See Add an Input Override. |
| Define a validation override for a field used in a test step. | See Add a Validation Override. |
| Define a method override for a method used in a test step (business service unit tests only). | See Add a Method Override. |
Save the settings.
This section describes how to copy data from a previous test step. When the generated sequence test is run, the test step will attempt to copy the data from the specified test step. If the test steps share the same Natural unit test file, the entire data structure from the previous test step is copied. If the test steps use different Natural unit test files, each field is copied by name and the level 1 name (if present) is compared to the field name.
| Warning: All values are copied, even when the Natural formats are different. This may result in conversion errors (for example, when alpha values are placed in numeric fields). |
To copy data from a previous test step
Select the test step to which you want to copy the data.
Select Copy data from a previous step.
Select the test step from which you want to copy the data in Step name.
You can select any previous test step in the list. Only previous test steps are listed, as data cannot be copied from a test step that has not been run.
Note:
When defining input or validation overrides, you can also
select the field from which to copy the data.
This section describes how to add an input override for a field.
This value will override any input value defined for an input field with the
same name in the original unit test file. For example, if the original unit
test file has an input field and value of FUNCTION=GET and you add
an override to a test step that sets FUNCTION=UPDATE, then
FUNCTION=UPDATE will be used.
To add an input override
Open the context menu for the test step in Test Steps.
Select New > Input Override.
The field details are displayed in Test Step Details. For example:
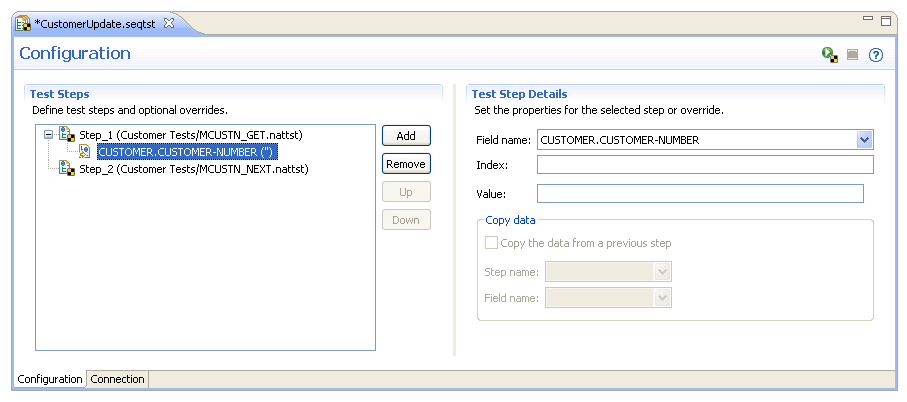
Type the override value in Value.
The input override is displayed in Test Steps. For example:
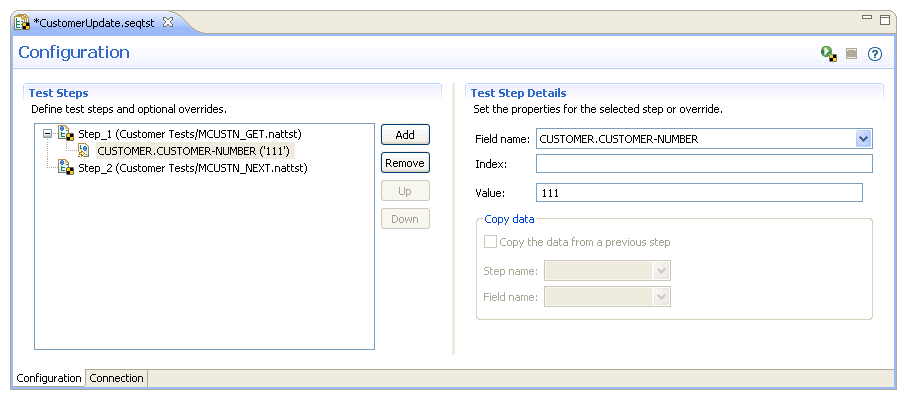
In this example, an override value for the CUSTOMER-NUMBER field has been added.
Notes:
This section describes how to add an override value for a field validation. This value will override any validation defined for an input field with the same name in the original unit test file. For example, if the original unit test file has a field validation of #MSG <> ERROR and you add a validation override of #MSG <> WARNING, then both validations will be used (i.e., the wizard will ensure that the message is not equal to both ERROR and WARNING).
To add a validation override
Open the context menu for the test step in Test Steps.
Select New > Validation Override.
The validation details are displayed in Test Step Details. For example:

Select the field name in Field name.
Select the override value in Validator.
The validation override is displayed in Test Steps. For example:
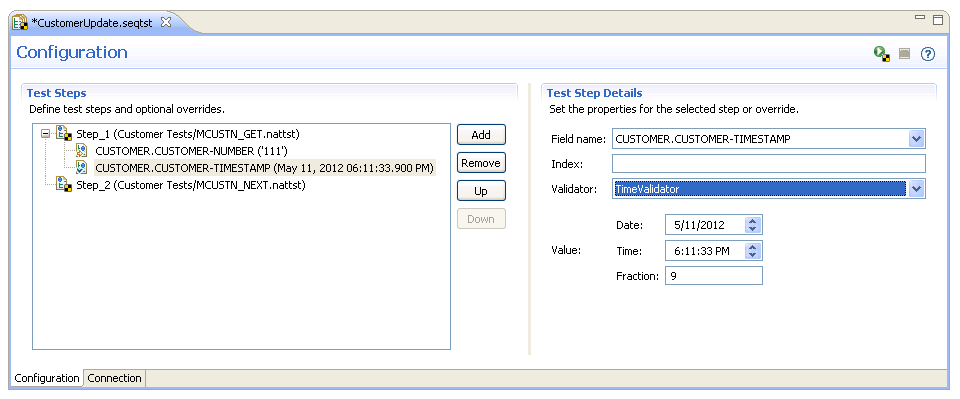
In this example, an override validation for the CUSTOMER-TIMESTAMP field has been added.
Notes:
This section describes how to add a method override value for a business service unit test. This value will override the method name in the original business service unit test. For example, if the original unit test has a method value of "BROWSE" and you add a method override value "EXISTS" to a test step, then the sequence unit test will execute the "EXISTS" method.
To add a method override
Open the context menu for the test step in Test Steps.
Select New > Method Override.
The method details are displayed in Test Step Details. For example:
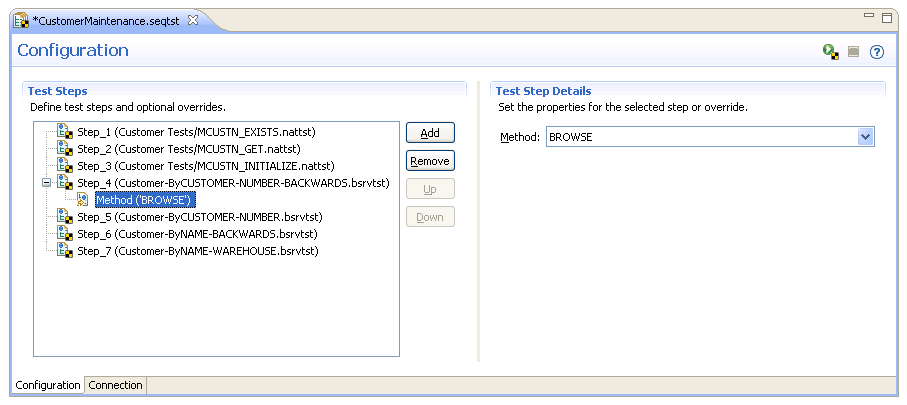
Type the override value in Method.
The method override is displayed in Test Steps. For example:
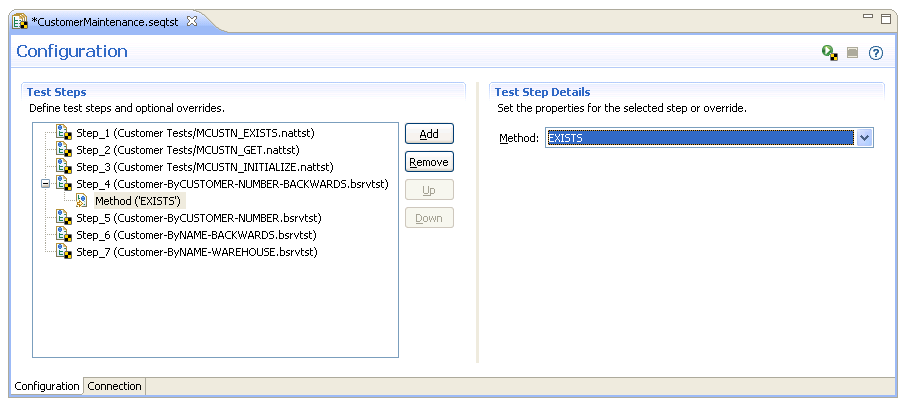
In this example, an override value of METHOD=EXISTS has been added.
Notes:
When a generated module is open in the editor, the Dependencies view displays dependencies between a sequence unit test and the unit tests executed for each test step. This section describes the nodes contributed to the view for these resources. The following topics are covered:
Notes:
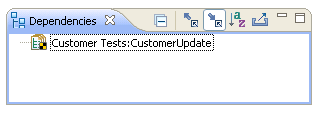
When a sequence unit test is open in the editor view, the root
node displays the name of the sequence unit test. In caller mode
(![]() ), no child nodes are
displayed because no other Dependencies view objects
depend on this sequence unit test file. For example:
), no child nodes are
displayed because no other Dependencies view objects
depend on this sequence unit test file. For example:
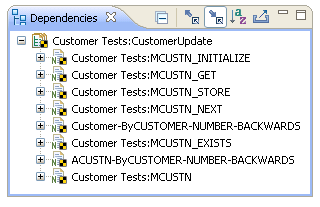
In callee mode (![]() ), the child nodes display one business
service or Natural unit test for each test step in the sequence unit test. For
example:
), the child nodes display one business
service or Natural unit test for each test step in the sequence unit test. For
example:
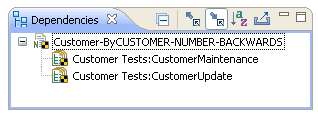
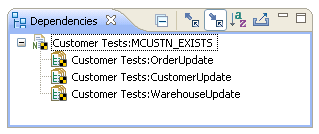
When a business service unit test is open in the editor view, the
root node displays the name of the unit test. In caller mode (![]() ), one child node is displayed for each
sequence unit test that includes this unit test in one of its test steps. For
example:
), one child node is displayed for each
sequence unit test that includes this unit test in one of its test steps. For
example:
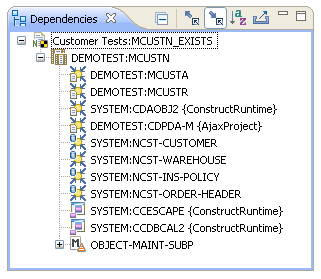
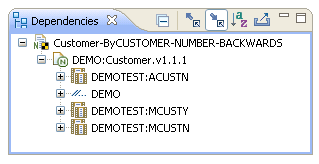
In callee mode (![]() ), the child node displays the name of the
business service that the unit test executes, along with the names of the
supporting Natural resources and the names of the libraries and projects in
which they are located. For example:
), the child node displays the name of the
business service that the unit test executes, along with the names of the
supporting Natural resources and the names of the libraries and projects in
which they are located. For example:
When a Natural unit test is open in the editor view, the root node
displays the name of the unit test. In caller mode (![]() ), one child node is displayed for each
sequence unit test that includes this unit test in one of its test steps. For
example:
), one child node is displayed for each
sequence unit test that includes this unit test in one of its test steps. For
example:
In callee mode (![]() ), the child node displays the name of the
Natural subprogram that the unit test executes, along with the names of the
supporting Natural resources and the names of the libraries and projects in
which they are located. For example:
), the child node displays the name of the
Natural subprogram that the unit test executes, along with the names of the
supporting Natural resources and the names of the libraries and projects in
which they are located. For example: