
This document covers the following topics:
This is a brief introduction to working with the Application Testing component of NaturalONE. It explains how to test a simple subprogram, how to save it as a unit test file, and how to generate an Ant script from the unit test file. You can then use the Ant script, for example, with your automated nightly tests. It is assumed that you use the local RPC server which is automatically started when you start NaturalONE.
Note:
Testing business services is not in the scope of this
introduction. However, this works similarly.
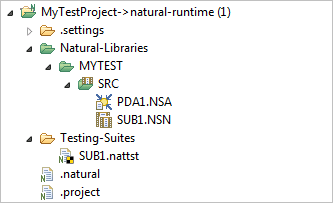
The topics below assume that you have created a Natural project which uses the local Natural runtime. This Natural project contains a library with two objects, a subprogram and a parameter data area (PDA).

Testing is illustrated using the following simple subprogram:
DEFINE DATA PARAMETER
USING PDA1
END-DEFINE
#result := #var1 + #var2
END
where the subprogram calls the following PDA:
DEFINE DATA PARAMETER
 1 #var1 (I4)
 1 #var2 (I4)
 1 #result (I4)
END-DEFINE
Do not forget to build your Natural project before you start testing.
When you test a subprogram directly, you can analyze the parameters in a test editor. You can change the input values, run the test, and verify the return values.
 To test a subprogram
In the Project Explorer view, select the subprogram.
Invoke the context menu and choose .
The test editor appears.
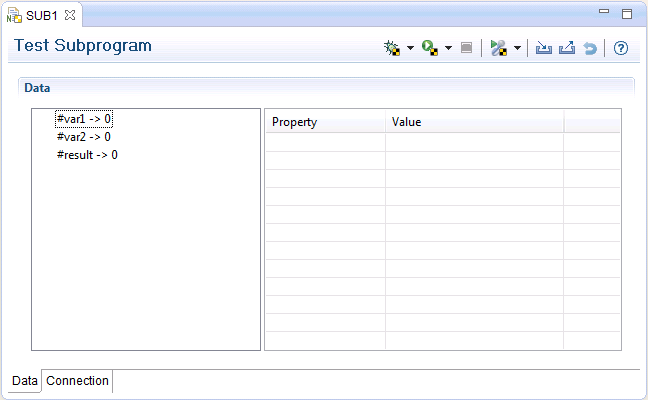
Select the entry for #var1 on the left side of
the test editor.
Properties are now shown on the right side of the test editor.
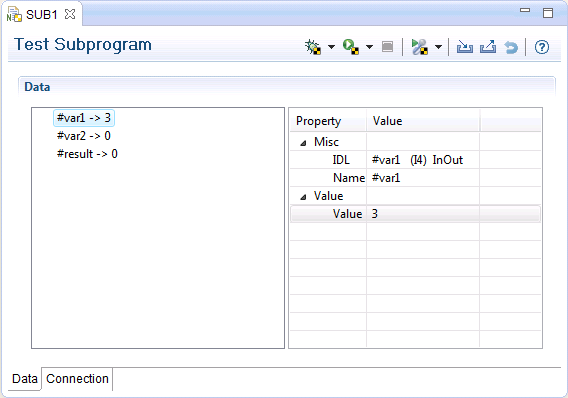
Define a value for #var1 on the right side.
Example:
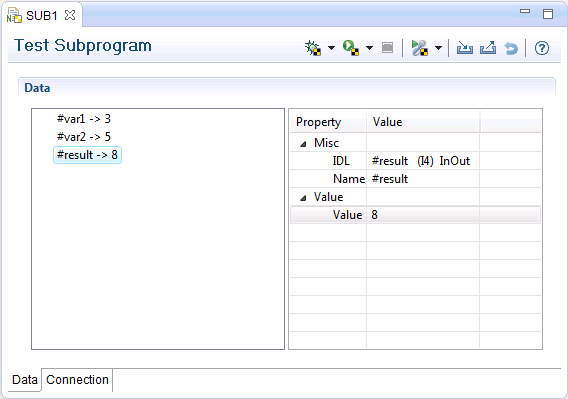
Select the entry for #var2 on the left side of
the test editor, and define a value on the right side.
Choose the
![]() (Run Test) button in the local toolbar of the test editor.
(Run Test) button in the local toolbar of the test editor.
The result value is now shown. Example:
After defining the input and output parameters for the test, you can save this as a unit test.
To create a unit test
Make sure that the editor with your previous test is active.
From the menu, choose .
The New Natural Unit Test dialog appears.
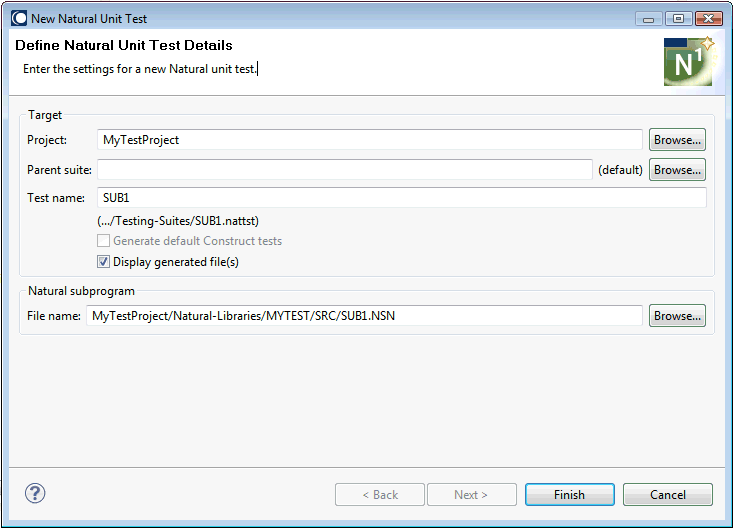
The name of the subprogram is automatically provided as the name for the unit test. For now, you need not change any information.
Choose the button.
A folder named Testing-Suites is automatically created in the project. This folder is always created when you create the first unit test in a project.
The unit test is stored in the new Testing-Suites folder. Unit tests for subprograms (also called "Natural unit tests)" have the extension .nattst.
The generated unit test file is automatically shown in the unit test editor (provided that you have not deselected the Display generated file(s) in the New Natural Unit Test dialog).
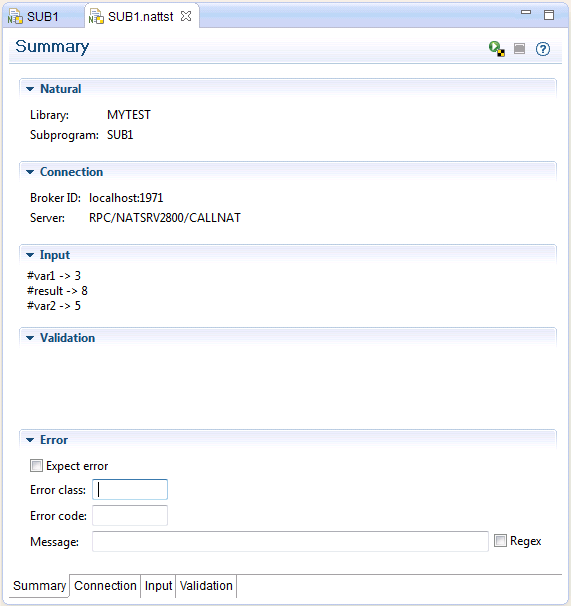
The Summary tab shows the information that will be used for the test.
You can save the test for later reuse. For example, you can use it as the basis for an Ant script. Before you save the test, however, you have the possibility the change information on the following tabs:
Summary
You can allow a test to pass with an expected error.
Connection
You can define a different RPC environment for your
test.
Input
You can change the input fields that are to be sent to the
server.
Validation
You can configure the fields that are to be tested after
the call to the server has been made.
Detailed information these tabs is provided later in this documentation.
Use the standard Eclipse functionality to save your changes. For example, press CTRL+S.
After you have created the unit test, you can run it in order to check whether it works as expected.
To run a unit test
Choose the
![]() button in the local toolbar of the unit test editor.
button in the local toolbar of the unit test editor.
Or:
In the Project Explorer view, select the
file with the extension .nattst, invoke the context menu
and choose Testing > Run Unit Test(s).
The Natural Unit Test view is automatically opened the first time you run a unit test. Example:
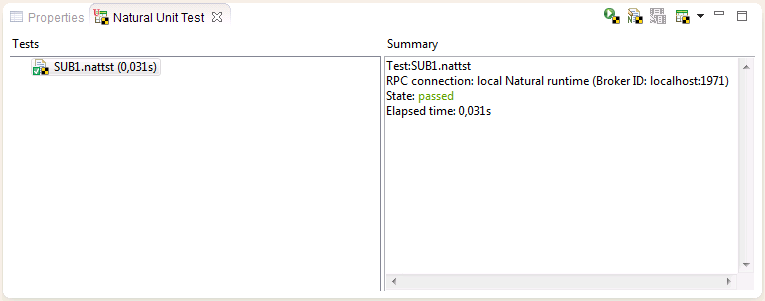
When the test was successful, the state "passed" is shown.
You can generate XML-based Ant scripts which run your unit test files.
To generate an Ant script
In the Project Explorer view, select the project where your test was created.
Invoke the context menu and choose .
In the resulting dialog box, expand Software AG > Testing and then choose Natural Unit Test Ant Script.
The following dialog appears.
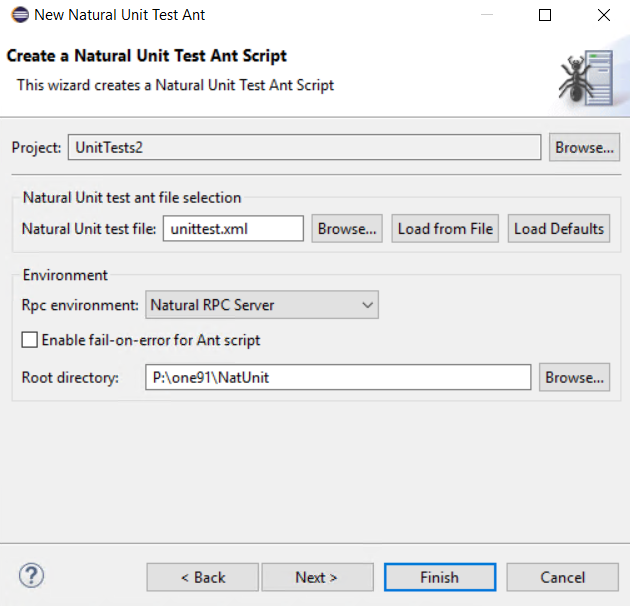
For now, leave the provided settings as they are.
Choose the button.
As a result the unittest.xml file is created in the Natural project folder. This file contains the Natural Unit Test Ant script. Detailed information on the available properties is provided later in this documentation under Creating Ant Scripts to Run Unit Tests. Usually, you run this file outside of Eclipse via the command line.