We will now open our tutorial_popup page (PART2) from our tutorial_main page (PART1). We will create a Natural subprogram for our pop-up. When our TUTMAIN-P receives a specific event – an icon is clicked - it will call the Natural subprogram. This will open the pop-up window.
Right click on the TUTPOP-A adapter and select Generate Main Program. In the opened dialog select Subprogram and enter TUTPOP-N as Object name.
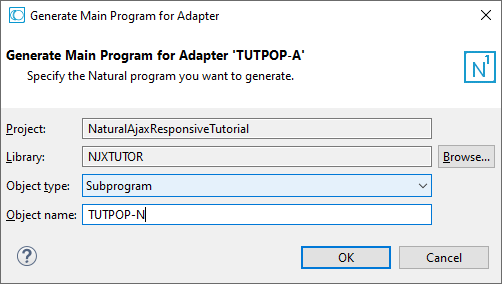
We want to pass all values from our TUTMAIN-P program. To do so, apply the code in bold:
DEFINE DATA PARAMETER
1 P_EMAIL (A) DYNAMIC
1 P_FIRSTNAME (A) DYNAMIC
1 P_LASTNAME (A) DYNAMIC
1 P_USERID (A) DYNAMIC
LOCAL
1 ALERTTEXT (A) DYNAMIC
1 ALERTTYPE (A) DYNAMIC
1 EMAIL (A) DYNAMIC
1 FIRSTNAME (A) DYNAMIC
1 LASTNAME (A) DYNAMIC
1 USERID (A) DYNAMIC
END-DEFINE
*
EMAIL:=P_EMAIL
FIRSTNAME:=P_FIRSTNAME
LASTNAME:=P_LASTNAME
USERID:=P_USERID
*
…
We want that our tutorial_popup page is opened as pop-up (modal). To do so, apply the code in bold:
PROCESS PAGE MODAL
PROCESS PAGE USING "TUTPOP-A"
….
END-PROCESS
END
We want to close the pop-up when our button is clicked. When our button is clicked, we want to pass back the changed values. To do so, apply the code in bold:
VALUE U'onCancel'
  IGNORE
VALUE U'onSave'
  P_EMAIL:=EMAIL
  P_FIRSTNAME:=FIRSTNAME
  P_LASTNAME:=LASTNAME
  P_USERID:=USERID
  PROCESS PAGE UPDATE FULL
Open the tutorial_main.xml layout in Layout Painter. We will now add an icon column to our grid. When the icon is clicked, we want to pass an event to our Natural program so that it can open the pop-up.
In the Layout Area (left) select the bmobile:simpleheaderrow node. From the Controls palette (right) drag and drop a Simple Header Column as first sub node of the bmobile:simpleheaderrow.
From the Controls palette (right) drag and drop an Icon Grid Column as first sub node of the bmobile:simplerow.
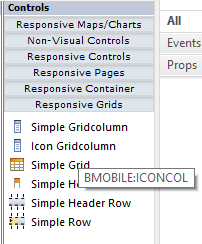
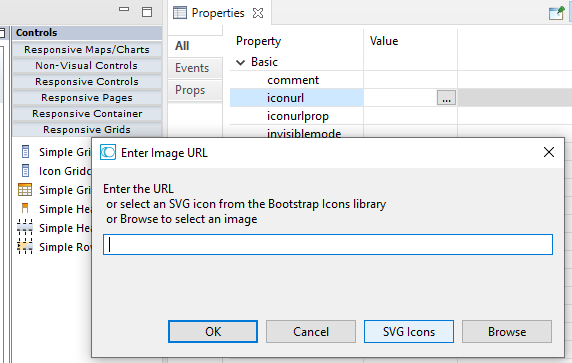
In Properties view click on the small button right of the iconurl property. In the opened dialog click the button and select the pencil-fill.svg icon.
Set the following method and styleclasses property values:
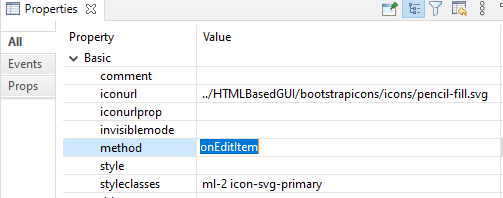
The event onEditItem will be sent to our Natural program when the icon is clicked. The styleclass ml-2 adds some space left of the icon. This is important for small devices because on small devices a plus icon to see all columna is automatically shown. The ml-2 styleclass makes sure that there is enough space between our pencil icon and the plus icon.

The icon-svg-primary styleclass renders our pencil in our primary color (blue).
When our icon is clicked, we want to automatically know the index of the item for which the icon is clicked. To get this support, drag and drop a Natural Event Data control as sub node of the natpage node.
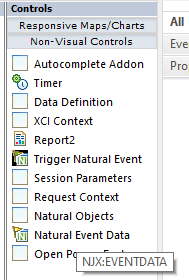
This is an invisible control. It generates Natural fields which will tell us the index of the item for which the icon is clicked.
Drag and drop an Open Popup Features control as sub node of the natpage node.
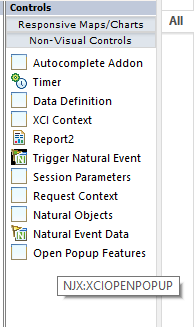
This is an invisible control. It generates Natural fields which allow us to set the title, height, width, etc. of the pop-up dynamically at runtime. Be sure that you saved your layout (<ctrl-s>).
We now adapt our TUTMAN-P to initialize the pop-up and call our subprogram TUTPOP-N.
Double-click the file TUTMAN-P. It will open in the Natural editor. You see that it has errors. In the editor select TUTMAN-A and press .

This will open the TUTMAN-A adapter in the Natural editor. You see that in the adapter some additional fields exist. The reason is that for the Natural Event Data and the Open Popup Features controls additional Natural fields were generated. We need to adapt our program. Select all the fields in the adapter.
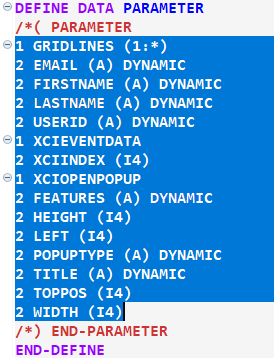
In the Natural program replace the old fields with these new fields. Also copy the lines for the onEditItem event. Your code should look like this:
DEFINE DATA LOCAL
1 GRIDLINES (1:*)
2 EMAIL (A) DYNAMIC
2 FIRSTNAME (A) DYNAMIC
2 LASTNAME (A) DYNAMIC
2 USERID (A) DYNAMIC
1 XCIEVENTDATA
2 XCIINDEX (I4)
1 XCIOPENPOPUP
2 FEATURES (A) DYNAMIC
2 HEIGHT (I4)
2 LEFT (I4)
2 POPUPTYPE (A) DYNAMIC
2 TITLE (A) DYNAMIC
2 TOPPOS (I4)
2 WIDTH (I4)
1 #II (I2)
END-DEFINE
EXPAND ARRAY GRIDLINES TO (1:30)
FOR #II:=1 TO 30
    COMPRESS 'First ' #II INTO GRIDLINES.FIRSTNAME(#II) LEAVING NO
    COMPRESS 'Last ' #II INTO GRIDLINES.LASTNAME(#II) LEAVING NO
    COMPRESS 'First'#II '.Last' #II '@email.com' INTO GRIDLINES.EMAIL(#II) LEAVING NO
    COMPRESS 'User' #II INTO GRIDLINES.USERID(#II) LEAVING NO
END-FOR
*
PROCESS PAGE USING "TUTMAN-A"
*
DECIDE ON FIRST *PAGE-EVENT
 VALUE U'nat:page.end', U'nat:browser.end'
  /* Page closed.
  IGNORE
 VALUE U'gridlines.onEditItem'
  PROCESS PAGE UPDATE FULL
 NONE VALUE
  /* Unhandled events.
  PROCESS PAGE UPDATE
END-DECIDE
*
END
We want to set a title for our pop-up. We also want to specify the pop-up size when it is opened. Add the following code to your Natural program before the PROCESS PAGE statement:
XCIOPENPOPUP.TITLE:='Edit User Information'
XCIOPENPOPUP.FEATURES:='sizetocontent:true'
*
PROCESS PAGE USING "TUTMAN-A"
In the XCIOPENPOPUP.FEATURES field you can set several features – like height width, whether a close button should appear etc, - separated be a semicolon. We just set one feature (sizetocontent) which means that if possible our pop-up should automatically adapt to the size of the opened page (tutorial_popup).
The last setting we need to add is just a technical one: In the XCIOPENPOPUP.POPUPTYPE we need to set the opened popup should be rendered using the responsive controls set (bmobile:*). Add the line in bold:
XCIOPENPOPUP.TITLE:='Edit User Information'
XCIOPENPOPUP.FEATURES:='sizetocontent:true'
XCIOPENPOPUP.POPUPTYPE:='BMPOPUP'
*
PROCESS PAGE USING "TUTMAN-A"
When our new icon is clicked, we will receive the event gridlines.onEditItem. The field XCIINDEX will contain the index of the item, for which the icon is clicked. Add the line in bold:
VALUE U'gridlines.onEditItem'
  CALLNAT 'TUTPOP-N' EMAIL(XCIINDEX) FIRSTNAME(XCIINDEX) LASTNAME(XCIINDEX) USERID(XCIINDEX)
  PROCESS PAGE UPDATE FULL
Don’t forget to press <ctrl-s>.
Right-click on TUTMAIN-P and select Run As > Natural Application.
We have added an BMOBILE:ICON, an NJX:XCIOPENPOPUP and NJX:EVENTDATA control to the tutorial_main page. We have initialized the XCIOPENPOPUP fields for opening the pop-up. We have called our TUTPOP-N subprogram and passed the data of the selected item. We used the XCIEVENTDATA.XCIINDEX field to know which item was clicked. We could run the completed application immediately.