
This section describes how to create a REQUEST-DOCUMENT client. The following topics are covered:
The REQUEST-DOCUMENT Client code generator allows Natural to access Web services by generating a REQUEST-DOCUMENT subprogram based on a Web service WSDL and XSD. In addition, the generator creates a subprogram for each operation (method) in the WSDL and parameter data areas (PDAs) containing parameters that represent the request and response portions of the Web service operation.
The generated REQUEST-DOCUMENT subprogram uses Natural REQUEST DOCUMENT and PARSE XML statements to call the Web service and interpret the response. The subprogram then maps the input parameters to an XML file, which is sent to the Web service via a REQUEST DOCUMENT statement. The response is verified and parsed in the REQUEST-DOCUMENT subprogram and the data is placed into the appropriate output parameters of the PDA. In addition, the generated error PDA informs users of any errors.
A wizard also performs a pre-analysis of the WSDL. If an associated operation requires more than three dimensions, the operation will be disabled on the selection panel because Natural can only handle up to three dimensions. The pre-analysis wizard also checks for cyclic types (a type that is defined in the WSDL and then referenced by another type in the same WSDL). If a cyclic type is found, all operations that reference it will also be disabled.
You can use a REQUEST-DOCUMENT subprogram to perform various functions, such as retrieve the current exchange rate for orders, verify that a postal code and address match, or retrieve inventory information from another application (within or outside the company). The generated subprogram supports Unicode characters, binary arrays and complex structures (arrays of ANY, detailed arrays, etc.).
Note:
To use this feature, the Natural nucleus/profile must be set up
to correctly handle XML. For information, see Activate REQUEST
DOCUMENT Statement and Activate PARSE XML
Statement in the Natural documentation.
 To generate a REQUEST-DOCUMENT subprogram and data areas
Open the context menu in the Navigator view for the NaturalONE project into which you want to generate the modules.
Or:
Open the context menu in the Navigator
view for the library into which you want to generate the modules.
Select .
The Define Request Document Client Details panel is displayed. For example:
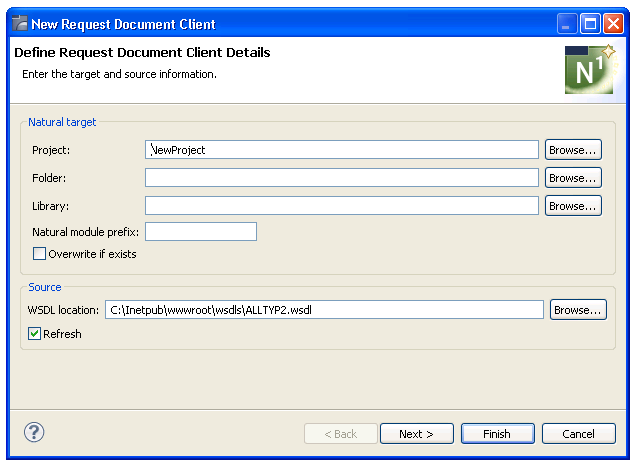
Using this panel, you can:
| Task | Procedure |
|---|---|
| Select another NaturalONE project in which to generate the REQUEST-DOCUMENT client modules. | Type the name of the project in Project or select to display a window listing the existing projects for selection. The project must currently exist. |
| Select a folder in which to generate the REQUEST-DOCUMENT client modules. | Type the name of the folder in
Folder or select to display
a window listing the existing folders for selection. The folder must currently
exist within the selected NaturalONE project.
Note: |
| Assign a prefix to the generated Natural module names. | Type the prefix in
Natural module prefix.
Several Natural modules are created during generation, such as PDAs, subprogram(s), and LDA(s). This prefix will be used as the first character in the module names to help identify them as belonging to this REQUEST-DOCUMENT client. |
| Replace an existing subprogram with the same name in the same library with the one you are creating. | Select Overwrite if exists. |
Type the location of the Natural library in which to generate the subprogram and associated modules in Library.
The library must currently exist.
Or:
Select to display a window
listing the existing libraries for selection.
Note:
The libraries listed for selection are based on the
current project.
Type a valid WSDL path (HTTP location) in WSDL location.
Or:
Select Browse to display a window
listing WSDL locations for selection.
The code generator will scan the selected WSDL file for each Web service operation and generate a separate subprogram for each one.
Notes:
Select to generate the REQUEST-DOCUMENT client with all default operations.
Or:
Select to select which
operations to generate.
The wizard reads the specified WSDL, determines which operations it contains, and displays the Select Web Services Operations panel, showing the operations defined for the Web service. Each operation is represented by a line in a table. For this example, "C:\Inetpub\wwwroot\wsdls\ALLTYP2.wsdl" was used as the WSDL location:
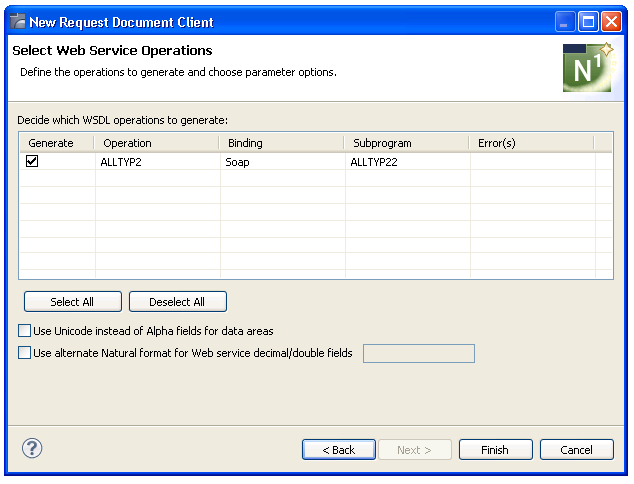
The Select Web Service Operations panel displays the following details for each operation:
Whether a subprogram will be generated (yes)
Which operation will be generated (ALLTYP2)
Which binding will be used (SOAP)
What the generated subprogram will be named (ALLTYP21)
Using this panel, you can:
| Task | Procedure |
|---|---|
| Suppress the generation of one or more operations. | Deselect the operation(s) in
Generate and a REQUEST-DOCUMENT subprogram will not be
generated for that operation. A subprogram will only be generated for each
operation that is selected in Generate.
Note: |
| Change the type of binding used. | Select another type of binding in
Binding.
Note: |
| Change the name of the subprogram to be generated. | Type the new name in Subprogram. |
| Select all operations. | Select . This option allows you to quickly select all operations. |
| Deselect all operations. | Select . This option allows you to quickly deselect all operations.
Note: |
| Use Unicode format instead of alphanumeric format for variables in the data areas. | Select Use Unicode
instead of Alpha fields for data areas. Select this option if the
Web service passes Unicode data. With Natural, this is determined by whether
the Natural server is configured to use Unicode variables. If the Natural
server is not configured to use Unicode, do not select this option and the
generator will generate a REQUEST-DOCUMENT client that contains no Unicode
variables.
Note: |
| Generate data areas using an alternate Natural format for decimal or double Web service fields. | Select Use alternate
Natural format for Web service decimal/double fields. Select this
option if you want to generate data areas using an alternate Natural format for
Web service fields of type decimal or double and then type the new format in
the input field.
Note: |
Note:
If desired, a Generation Progress
window can be displayed during generation. For information, see
Set Code Generation
Preferences.
Select .
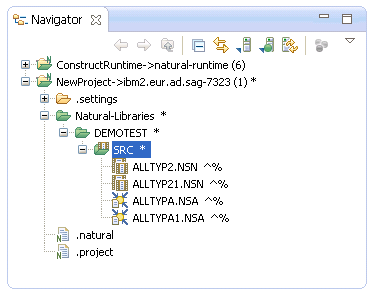
The subprogram is generated using the current specifications. When generation is complete, the available user exits are displayed in the Outline view (see User Exits for the REQUEST-DOCUMENT Subprogram) and the generated modules are displayed in the Navigator view. For example:
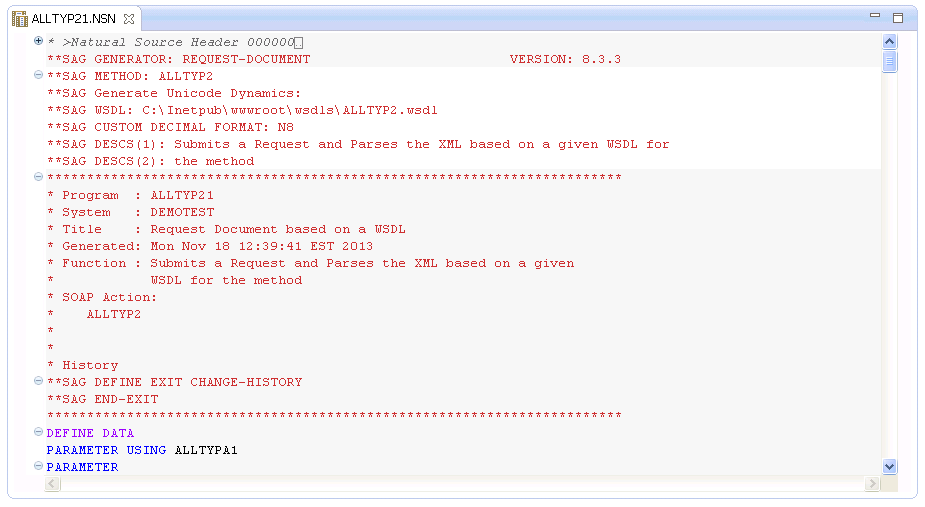
The generated subprogram is displayed in the editor view. For example:
Save the generated module.
At this point, you can:
Define user exits for the subprogram. For information, see Defining User Exits.
Use the NaturalONE Testing option to test the subprogram. For information, see Test a Subprogram Directly in Application Testing.
Use NaturalONE functionality to upload the generated subprogram to the server.
The Outline view for the REQUEST-DOCUMENT subprogram displays the available user exits. For example:
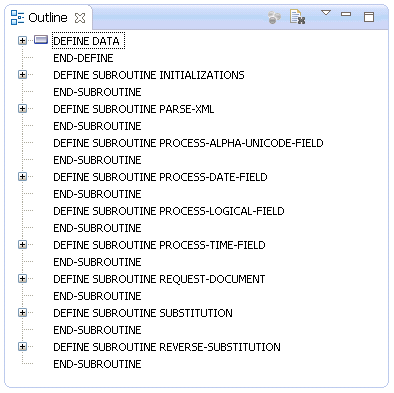
You can use these exits to define additional processing.
Notes:
The generated REQUEST-DOCUMENT subprogram translates special characters (such as xml tags) in and out of the data it passes. To determine the substitutions for these characters, the REQUEST-DOCUMENT subprogram uses the CDXMLSU2 subprogram and CDRDOCA2 parameter data area (PDA) in the SYSTEM library. The REQUEST-DOCUMENT subprogram calls CDXMLSU2 to set up the XML substitution characters. Both of these modules are shipped with the Construct runtime project.
Note:
For information about adding this project, see
Add the Construct Runtime
Project.
The following example shows CDXMLSU2 in the editor view:
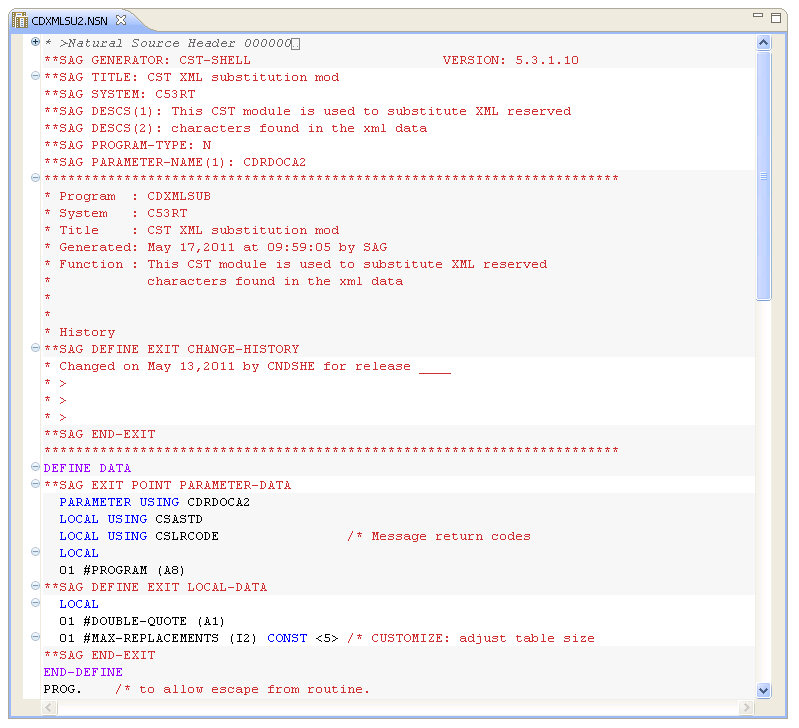
Tip:
Within the editor, you can quickly find locations that must be
changed by searching for "/* CUSTOMIZE".
To change settings for the XML substitution characters, use the GENERATE-CODE user exit. For example:

In this example, the LOCAL-DATA user exit defines the Natural format for the #DOUBLE-QUOTE and #MAX-REPLACEMENTS values and the size of the #REPLACEMENT-TABLE array. The GENERATE-CODE user exit resizes the #REPLACEMENT-TABLE array and defines the logic and substitution values for #DOUBLE-QUOTE.
This section covers the following topics:
To add xml substitution characters
Select and open CDXMLSU2 in the Construct runtime project.
Increase the size of the #MAX-REPLACEMENTS value for the #REPLACEMENT-TABLE array by "n" in the LOCAL-DATA user exit, where "n" is the number of substitution characters you are adding.
Assign the #SEARCH-STRING and #REPLACE-STRING values and indexes for each substitution character you are adding.
Stow the CDXMLSU2 subprogram in the SYSTEM library.
To modify xml substitution characters
Select and open CDXMLSU2 in the Construct runtime project.
Change the #SEARCH-STRING and #REPLACE-STRING values and indexes for each substitution character you are modifying.
Stow the CDXMLSU2 subprogram in the SYSTEM library.
To delete xml substitution characters
Select and open CDXMLSU2 in the Construct runtime project.
Decrease the size of the #MAX-REPLACEMENTS value for the #REPLACEMENT-TABLE array by "n" in the LOCAL-DATA user exit, where "n" is the number of substitution characters you are deleting.
Delete the #SEARCH-STRING and #REPLACE-STRING values and indexes for each substitution character you are deleting.
Stow the CDXMLSU2 subprogram in the SYSTEM library.