This document describes the wizard that is used for schema generation.
The wizard provides several pages in which you have to specify information. The number of pages and the information on these pages depends on the object type that has been selected on the first page of the wizard.
For detailed information on the object type-specific information that can be specified using this wizard, see Generation of External Objects in External Objects in Predict.
The wizard uses edit controls such as text boxes, check boxes or drop-down list boxes. For the description of check boxes, the reference documentation External Objects in Predict uses the abbreviations Y (yes) and N (no). Y means that the check box is selected, and N means that the check box is not selected.
![]() To generate an external schema
To generate an external schema
-
From the menu, choose .
Or:
Choose the following toolbar button:
The schema generation wizard appears, providing several pages.
Note:
If DB2 is not installed at your site, the generation functions for DB2 objects are not available. -
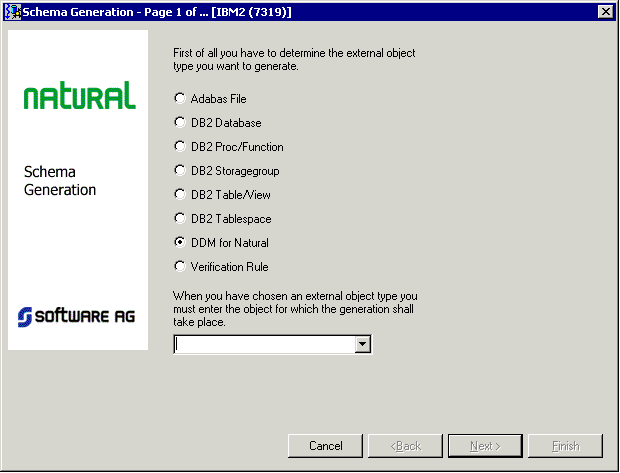
Select the option button for the type of external object that you want to generate.
-
From the drop-down list box, select the object for which generation is to take place.
Or:
If you know the name of the object, you can also type its name in the drop-down list box. -
Choose the button to proceed to the next page.
Note:
The button is only available when all required information has been provided.The number of pages and the information on the next pages depends on the object type that has been selected on the first page.
Example - generate DDM for Natural:
Note:
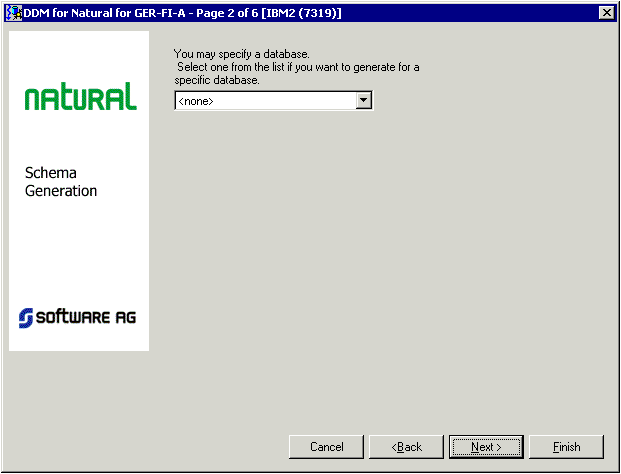
This type of page, on which you can select information from a drop-down list box, is only shown for specific types of external objects. Its appearence also depends on specific defaults defined by the administrator and/or the object that has been selected on the first page of the wizard. -
Specify the required information and choose the button to proceed to the next page.
Example - generate DDM for Natural:

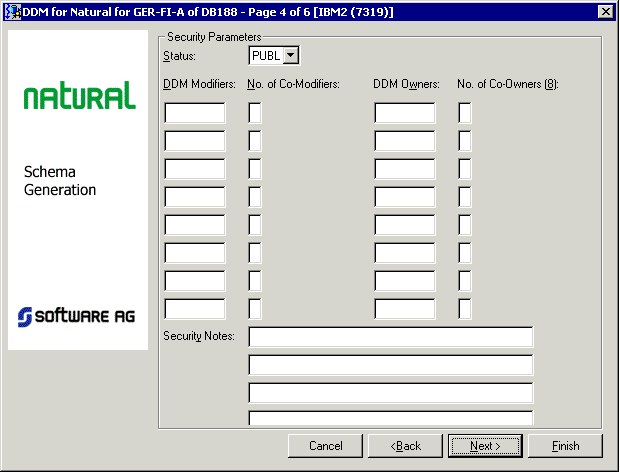
The Define in security check box is only shown when you are working in an environment in which Natural Security is active.
-
Specify the required information and choose the button to proceed to the next page.
The following page is only shown when you generate a DDM for Natural, and only when the Define in security check box has been selected in the previous page. When this check box is not selected, you proceed directly to page 5.
For information on the security parameters on this page, see the Natural Security documentation.
-
Specify the required information and choose the button to proceed to the next page.
Example - generate DDM for Natural:
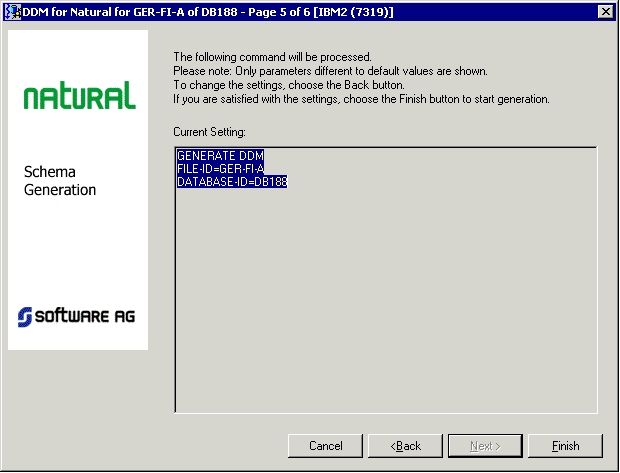
This page shows only the settings which have been modified on the previous page.
-
If all required information has been specified, choose the button to start generation.
Note:
As long as you do not choose the button, you can go back to the previous pages by choosing the button.When the generation process has completed, the last page of the wizard is shown. If the List option has been selected previously, a report is shown. If this option has not been selected, the corresponding text box is empty.
However, if an error occurs during the generation process, an error report is shown in the text box. The error report is always shown. The setting of the List option is not considered in this case.
Note:
The complete name for the List option depends on the selected object type. For example, if you have selected a DDM for Natural, the name of the option is List generated code.Example - generate DDM for Natural:
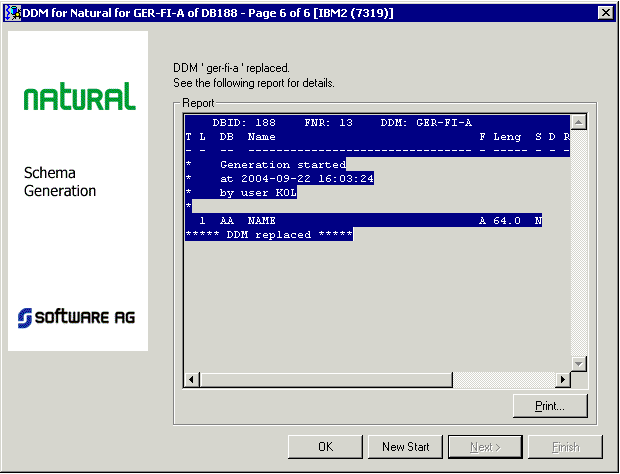
When you choose the button, you can print the report on a printer that is defined under Windows.
-
Choose the button to close the dialog box.
Or:
If you want to start generation for another object, choose the button and proceed as described above.