Before You Start
This plug-in is automatically installed when you install the Natural development environment for Windows (see the Natural for Windows installation documentation for further information). Before you can use this plug-in, however, you have to activate it using the Plug-in Manager.
This document covers the following topics:
Enabling the Use of Plug-ins
When the use of plug-ins has already been enabled in Natural Studio, the command is available in the menu . In this case, you can skip this section.
If the command is not available in Natural Studio, you have to enable the use of plug-ins as described below.
![]() To enable the use of plug-ins
To enable the use of plug-ins
-
From the menu, choose .
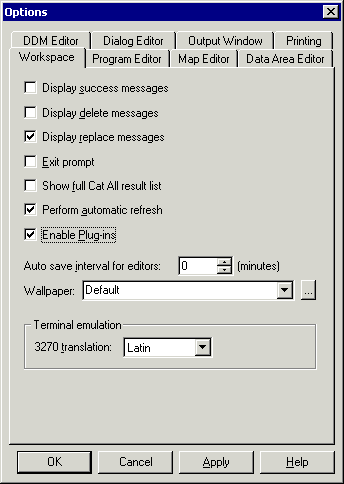
The Options dialog box appears.
-
Choose the Workspace tab.
-
Activate the Enable Plug-ins check box.
-
Choose the button.
The command and the corresponding toolbar button are now available (see below). When the use of plug-ins is not enabled, this command and toolbar button are not shown.
Activating a Plug-in
A plug-in is not active by default. It can be activated when the Plug-in Manager has been enabled.
Two types of activation mode are available:
-
Automatic
The plug-in is automatically activated each time Natural is started. -
Manual
The plug-in must be activated manually on demand (default).
![]() To activate a plug-in
To activate a plug-in
-
From the menu, choose .
Or:
Choose the following toolbar button:
Note:
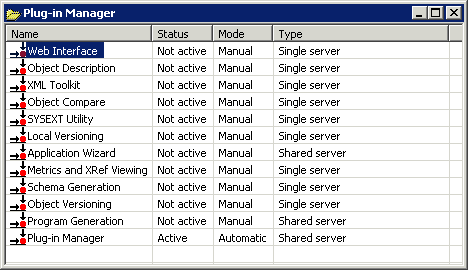
The display of the toolbar containing this button can be switched on and off by choosing from the menu.The Plug-in Manager window appears.
-
Select the entry for the plug-in that you want to activate.
-
Click the right mouse button or press SHIFT+F10 and from the resulting context menu, choose .
This does not automatically activate the plug-in for the current session. To activate it, you can either restart Natural or proceed as described with the next step.
-
Click the right mouse button or press SHIFT+F10 while the entry for the plug-in is still selected and from the resulting context menu, choose .
Connecting to a Development Server
In order to work with a plug-in, you have to connect to a mapped Natural development server.
Once a development server has been mapped, a node for this development server session is shown in the tree. To connect to a mapped development server, simply expand the node (or double-click the node, or select the node and press ENTER). If required, specify a password in the resulting Map Environment dialog box (detailed information on this dialog box is provided below).
When the required development server has not yet been mapped, proceed as described below.
![]() To map to a development server
To map to a development server
-
From the menu, choose .
Or:
Choose the following toolbar button:
Note:
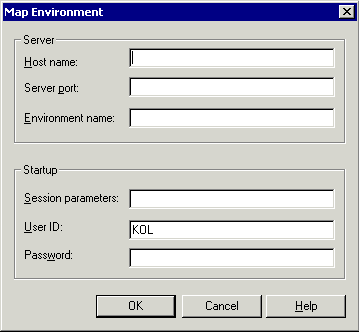
The display of the toolbar containing this button can be switched on and off by choosing from the menu.The Map Environment dialog box appears. Your user ID is automatically provided.
-
In the Host name text box, enter the name of the development server.
-
In the Server port text box, enter the TCP/IP port number of the development server.
-
Optionally. In the Environment name text box, enter the name that is to appear in the tree. If you leave this text box blank, a combination of server name and port number is shown in the tree.
-
If dynamic parameters are required for your development server, specify them in the Session parameters text box. Otherwise, leave this text box blank.
-
If Natural Security is installed on the development server, specify the required password in the Password text box. Otherwise, leave this text box blank.
-
Choose the button.
When the connection has been established, all libraries (according to the security profile) for this session are shown in your library workspace. You are automatically logged on to your default library.