This document tells you how to get started with the Configuration Manager of Entire Connection.
If you do not specify otherwise during installation, an Entire Connection folder automatically appears in the folder of the Start menu after Entire Connection has been installed. It contains the shortcuts for the Entire Connection components, including the Configuration Manager.
 To start the Configuration Manager
From the Start menu, choose .
It is assumed that you logon as an administrator. Therefore, the following default settings are used:
"SYSTEM" as the default name.
"PASSWORD" as the default password.
If you are an administrator, you should rename the user SYSTEM, define another password and then create a shortcut on your desktop.
If user information is required, the Entire Connection - Logon dialog box appears and you must proceed as described below.
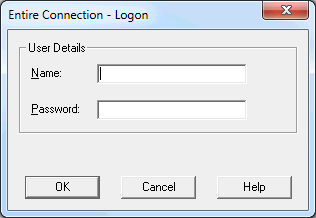
Enter your name.
Enter your password (if required).
Choose the button.
The Configuration Manager is now started with the rights that are defined for you.
When you start the Configuration Manager, the share file is automatically loaded.
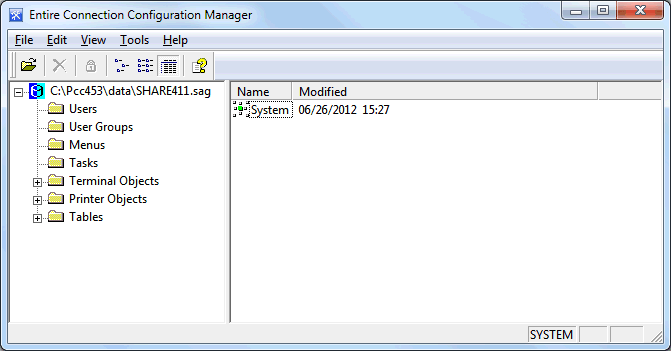
The name with which you are currently logged on is shown in the status bar.
The application window contains two panes. To modify the size of a pane, move the mouse pointer over the border separating the panes until the pointer changes, showing two arrows pointing into opposite directions. Then drag the border using the mouse until one of the panes has the desired size. When working with the keyboard, press CTRL+ALT+S and then use RIGHT-ARROW or LEFT-ARROW to modify the size.
The following topics are covered below:
The following menus are available:
| Using the commands in this menu you can open another share file or quit the Configuration Manager. | |
| Using the commands in this menu, you can manage the objects that are shown in the right pane of the application window. | |
| Using the commands in this menu, you can show or hide the toolbar or status bar. You can also specify how the objects in the right pane of the application window are to be presented and whether private objects are shown. | |
| Using the commands in this menu, you can reorganize or upgrade the share file, or merge an older share file with the currently active share file. | |
| When you choose from this menu, you access the Entire Connection
documentation.
When you choose from this menu, information about Entire Connection is shown. When you choose from this menu, you can check the Software AG web site for the latest information on products or events. |
You can execute the most important Configuration Manager functions using the toolbar. The toolbar buttons represent the following menu commands:
|
|
( menu) |
|
|
( menu) |
|
|
( menu) |
|
|
( menu) |
|
|
( menu) |
|
|
( menu) |
|
|
( menu) |
To switch the toolbar display on and off
From the menu, choose .
When the toolbar is displayed in the application window, a check mark is shown next to this menu command.
The status bar is used to display system messages and help texts for the currently selected menu command or toolbar button.
To switch the status bar display on and off
From the menu, choose .
When the status bar is displayed in the application window, a check mark is shown next to this menu command.
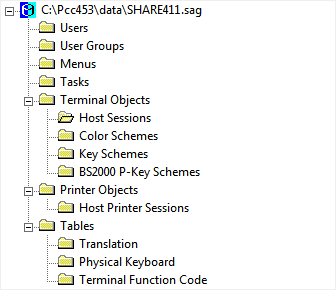
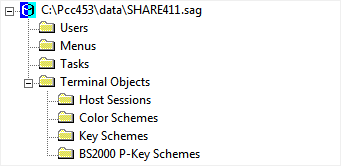
The left pane of the application window shows a tree structure. It contains the path to the active share file and all available object types.
The administrator can see all object types:
The general user can only see the following object types:
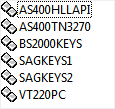
The right pane of the application window shows the objects that are defined for the currently selected object type.
Using the following commands in the menu, you determine how the objects in the right pane are to be presented. These commands are also available from the toolbar or from the context menu which appears when you click the right mouse button in the right pane of the application window.
|
|
The command presents the objects as follows:
|
|
|
The command presents the objects as follows:
|
|
|
The command (default) presents the objects as follows:
The column headings change according to the type of object shown. You can modify the width of each column. To do so, move the mouse pointer to the line in the heading which separates two columns. The pointer now changes, showing two arrows pointing into opposite directions. Using the mouse, you can now drag the column until it has the desired size. |
|
|
The command is only available to the administrator. It also shows the
objects which are privately owned by other users. When the objects are
presented in the Details view, the name of the owner is shown.
Using the command , the administrator can change a private object into a public object which is then available to all users. This command only applies to the following object types:
|
In the left pane of the application window, you can expand or collapse the tree structure by clicking the plus or minus sign in front of the share file name or folder name. When using the keyboard, select the name and press RIGHT-ARROW or LEFT-ARROW. Alternatively, you can double-click the share file name or a folder name preceded by a plus or minus sign to expand/collapse the tree structure.
To display all object types (when only the share file is shown)
Double-click the name of the share file.
Or:
Click the plus sign in front of the share file name.
Or:
Select the share file name and press
RIGHT-ARROW.
Some object types are contained in folders (indicated by a plus or minus sign in front of the folder). In this case, you must click the plus sign, or double-click the folder name, or select the folder name and then press RIGHT-ARROW to display the object types.
To display all objects defined for a specific object type
In the left pane of the application window, select the desired object type.
All objects defined for this object type are now shown in the right pane of the application window.
To display the system preferences (System) in the right pane of the application window, select the name of the share file.
To display/modify the object properties
In the right pane of the application window, double-click the desired object.
Or:
Select the object and press ENTER.
An object-specific dialog box appears. See the Overview of Object Properties for detailed information on these dialog boxes.
It is not possible to display a dialog box for a table.
The complete Entire Connection documentation is available as an HTML help file.
To access the documentation
From the menu, choose .
Or:
Choose the following toolbar button:
![]()
To invoke context-sensitive help
In a dialog box, choose the button.
Or:
Press F1.
Information about the Configuration Manager is provided in the About dialog which provides the following tabs:
About
Shows information about Entire Connection (such as version
number and copyright).
Version
Shows information about the Entire Connection modules. This is
useful if you need to contact your technical support. Using the
button, you can save the displayed information in
the file P-level.log. This file will then be created in
the log/trace
directory. Using the button, you can
copy the displayed information to the Clipboard.
Share File
Shows information about Entire Connection's share file (such as
licence number and installation date).
To access the About dialog
From the menu, choose .
When you quit the Configuration Manager, the settings in the menu as well as position and size of the application window are stored in the Windows Registry. The next time, you start the Configuration Manager, its application window is restored as it appeared when you last used it.
To quit the Configuration Manager
From the menu, choose .
Or:
Choose from the Control
menu.
Or:
Click the corresponding standard button in the title bar.
The Configuration Manager is started by invoking Pccadmin.exe.
If you create a shortcut for Pccadmin.exe, you can modify its properties in order to define the user name and password with which the Configuration Manager is to be started.
Note:
This information applies only to shortcuts on your desktop (it
does not apply to the shortcut in the Start menu or a copy of it).
The syntax for starting the Configuration Manager is the following:
[drive:\path\]Pccadmin.exe username password
User name and password are optional parameters.