The DROPICON control is an icon that can be used in order to build drag-and-drop scenarios. A DROPICON can be defined as the starting point of a drag-and-drop operation or as the target point of a drag-and-drop operation.
The following topics are covered below:
Example
Have a look at the following screen:
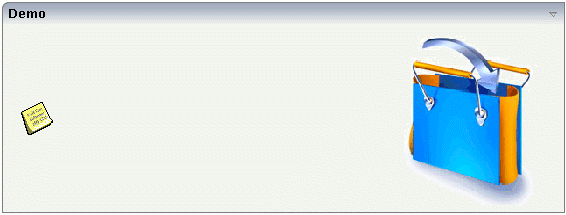
The user can click the left mouse button on the left icon (drag), move the mouse to the right icon and then release the mouse button (drop).
The configuration of drag and drop is quite simple: the icon that is used for starting drag-and-drop operations leaves a certain drag information - a plain string. The receiving icon, on which the user performs the drop operation, receives both an event and the string which was left by the icon from where the operation was started.
Properties
| Basic | |||
| image |
URL that points to the image that is shown as icon. The URL either is an absolute URL or a relative URL. If using a relative URL then be aware of that the generated page is located directly inside your project's directory. Example: "images/icon.gif" points to an icon in an images-folder that is parallel to the page itself. "../HTMLBasedGUI/images/new.gif" point to a URL that is located inside a different project. |
Obligatory |
gif jpg jpeg |
| draginfo |
String containing any kind of application data to identify the source DROPINFO control within a drag and drop process. Use property DROPINFOPROP to return this data on runtime. |
Optional | |
| draginfoprop |
Name of the adapter parameter that provides for information that is passed to the adapter when dropping this control over another DROPICON. Do not use this property (or property DROPINFO respectively) if you do not want the user to drag this control. |
Optional | |
| dropinfoprop |
Name of the adapter parameter to that the "drag info" of the dragged DROPICON control is set. Do not use this property if this control should not accept other DROPICON controls within a drag and drop process (i.e. is not a drop target). |
Optional | |
| dropmethod |
Name of the event that is sent to the adapter when the user is dragging another DROPICON control over this control and drops it there. Do not use this parameter if this control should not accept other DROPICON controls within a drag and drop process (i.e. is not a drop target). |
Sometimes obligatory | |
| method |
Name of the event that is sent to the adapter when clicking on the control. |
Sometimes obligatory | |
| comment |
Comment without any effect on rendering and behaviour. The comment is shown in the layout editor's tree view. |
Optional | |
| Binding | |||
| draginfoprop | (already explained above) | ||
| dropinfoprop | (already explained above) | ||
| dropmethod | (already explained above) | ||
| imageprop |
Name of adapter parameter that provides as value the URL of the image that is shown inside the control. |
Optional | |
| method | (already explained above) | ||
| visibleprop |
Name of the adapter parameter that provides the information if this control is displayed or not. As consequence you can control the visibility of the control dynamically. |
Optional | |
| titleprop |
Name of the adapter parameter that dynamically defines the title of the control. The title is displayed as tool tip when ther user moves the mouse onto the control. |
Optional | |
| Appearance | |||
| image | (already explained above) | ||
| invisiblemode |
If the visibility of the control is determined dynamically by an adapter property then there are two rendering modes if the visibility is "false": (1) "invisible": the control is not visible. (2)"cleared": the control is not visible but it still occupies space. |
Optional |
invisible cleared |
| imageinactive |
If the visibility is dynamically controlled by using the INVISIBLEPROP then there are two ways the icon reacts if the corresponding property passes back "false". If you want the icon to switch into an inactive status then define inside this property the URL of the image that is the inactive counter part to the normal icon image. Maybe the image is a grayed version of the normal icon image. If you do not define a value for this property then the icon is made invisible. |
Optional | |
| imagewidth |
Pixel width of the image that is shown inside the icon. If not defined then the icon is rendered with its normal width. |
Optional | |
| imageheight |
Pixel height of the image that is shown inside the icon. If not defined then the icon is rendered with its normal height. |
Optional | |
| withdistance |
If set to "true" then 2 pixels of distance are kept on the left and on the right of the icon. Reason behing: if arranging several icons inside one table row (ITR, TR) then a certain distance is kept between the icons when this property is set to "true". |
Optional |
true false |
| align |
Horizontal alignment of control in its column. Each control is "packaged" into a column. The column itself is part of a row (e.g. ITR or TR). Sometimes the size of the column is bigger than the size of the control itself. In this case the "align" property specifies the position of the control inside the column. In most cases you do not require the align control to be explicitly defined because the size of the column around the controls exactly is sized in the same way as the contained control. If you want to directly control the alignment of text: in most text based controls there is an explicit property "textalign" in which you align the control's contained text. |
Optional |
left center right |
| valign |
Vertical alignment of control in its column. Each control is "packaged" into a column. The column itself is part of a row (e.g. ITR or TR). Sometimtes the size of the column is bigger than the size of the control. In this case the "align" property specify the position of the control inside the column. |
Optional |
top middle bottom |
| colstyle |
CSS style definition that is directly passed into this control. With the style you can individually influence the rendering of the control. You can specify any style sheet expressions. Examples are: border: 1px solid #FF0000 background-color: #808080 You can combine expressions by appending and separating them with a semicolon. Sometimes it is useful to have a look into the generated HTML code in order to know where direct style definitions are applied. Press right mouse-button in your browser and select the "View source" or "View frame's source" function. |
Optional |
background-color: #FF0000 color: #0000FF font-weight: bold |
| spanstyle |
CSS style definition that is directly passed into this control. With the style you can individually influence the rendering of the control. You can specify any style sheet expressions. Examples are: border: 1px solid #FF0000 background-color: #808080 You can combine expressions by appending and separating them with a semicolon. Sometimes it is useful to have a look into the generated HTML code in order to know where direct style definitions are applied. Press right mouse-button in your browser and select the "View source" or "View frame's source" function. |
Optional |
background-color: #FF0000 color: #0000FF font-weight: bold |
| tabindex |
Index that defines the tab order of the control. Controls are selected in increasing index order and in source order to resolve duplicates. |
Optional |
-1 0 1 2 5 10 32767 |
| Online Help | |||
| title |
Text that is shown as tooltip for the control. Either specify the text "hard" by using this TITLE property - or use the TITLETEXTID in order to define a language dependent literal. |
Optional | |
| titletextid |
Text ID that is passed to the multi lanaguage management - representing the tooltip text that is used for the control. |
Optional | |
| titleprop | (already explained above) | ||