In the First Steps tutorial, you have developed a small rich internet program step by step. In this tutorial, you have already performed most of the steps required to develop a rich internet application.
The general procedure to develop a rich internet application with Natural for Ajax is as follows:
Use Application Designer to design the web pages that form the user interface of your application.
Generate a Natural adapter for each page (by saving the page). The adapter is a Natural object that forms the interface between the application code and the web page.
Use Natural Studio to write the Natural application programs that contain the business logic and use adapters to exchange data with the web pages.
In this document, the first two steps (design and adapter) are explained in more detail. Step 3 (business logic) is described in the section Developing the Application Code which also addresses advanced topics that are not covered in the tutorial.
This document covers the following topics:
For detailed information on how to use the Application Designer development workplace, see Development Workplace in the Application Designer documentation. The latest version of the Application Designer documentation is available at http://documentation.softwareag.com/webmethods/application_designer.htm (Empower login required). The information which is provided below describes the most important differences which pertain to Natural for Ajax.
The Application Designer development workplace is the central point for starting tools for layout development.
![]() To start the development workplace
To start the development workplace
Make sure that your application server is running.
Invoke your browser and enter the following URL:
http://<host>:<port>/cisnatural/HTMLBasedGUI/workplace/ide.html
where <host> is the name of the machine on which your application server is installed and <port> is the port number of your application server.
Note:
If you have not defined another port number during installation,
the default port number is "8080".
First you create an Application Designer project using the Project Manager. The project contains the layouts of the web pages you design, the files that are generated from the layouts and are required to run your application and additional files that make your application multi language capable and supply help information. See also Creating a Project in the tutorial.
Note:
Detailed information on the Project Manager is provided in the Application Designer
documentation at
http://documentation.softwareag.com/webmethods/application_designer.htm
(Empower login required).
All files in your Application Designer project are stored in one directory on the application server where Natural for Ajax is installed. The name of the directory corresponds to the project name you have chosen. The location of the directory depends on the application server. Example for JBoss Application Server:
<installdir>/server/default/deploy/njx<nnn>.ear/cisnatural.war
where <installdir> is the directory in which your application server is installed and <nnn> is the current Natural for Ajax version.
In order to create the layout of your web pages, you use Application Designer's Layout Painter.
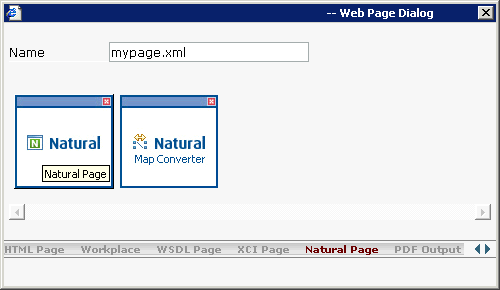
Add a page layout to your project as described in Creating a New Layout in the tutorial (select the template for the Natural page).

Note:
More detailed information on creating a layout is
provided in the Application Designer documentation at
http://documentation.softwareag.com/webmethods/application_designer.htm
(Empower login required).
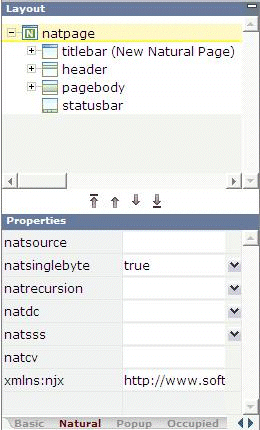
In order to specify generation options for the new page, you specify values for certain properties that are specific for Natural pages.
To define properties, you select the node natpage in the layout tree of the Layout Painter. The properties for this control are then shown in the properties area at the bottom. When you select the Natural tab in the properties area, you can see the Natural-specific properties.

For information on the properties that are available for a Natural page, see NATPAGE.
Design your Natural page by dragging controls and containers from the controls palette onto the corresponding node in the layout tree or to the HTML preview. This has already been explained in the section Writing the GUI Layout of the tutorial.
Note:
More detailed information on defining the layout is
provided in the Application Designer documentation at
http://documentation.softwareag.com/webmethods/application_designer.htm
(Empower login required).
Many of the controls you use on your page have properties that can be controlled by the application. Also the controls can raise events that your application may wish to handle. The next step is therefore assigning identifiers to each of these properties and events under which your application can later address them. This procedure is called "binding".
To get an overview which properties and events are bindable to application variables and events, select a control in the layout tree and open the Event Editor as described in the Application Designer documentation at http://documentation.softwareag.com/webmethods/application_designer.htm (Empower login required).
The Event Editor displays only those properties of controls that can be bound to application variables and events. It indicates also which properties must be bound mandatorily. The usage and meaning of each of the properties and events is described for each control in the following sections of this Natural for Ajax documentation:
As an example for property and event binding, see the following sections in the First Steps tutorial:
To find out how the current layout definitions are rendered on the page, preview the layout as described in the Application Designer documentation at http://documentation.softwareag.com/webmethods/application_designer.htm (Empower login required).
The protocol contains warnings and error messages that might occur while you design and preview your page. For further information, see the Application Designer documentation at http://documentation.softwareag.com/webmethods/application_designer.htm (Empower login required).
Save the page layout as described in Saving Your Layout in the tutorial.
Other than with Java adapters (which are described in the Application Designer documentation), you do not use the Code Assistant (which is part of the Layout Painter) to generate adapter code interactively. For Natural pages the adapter code is generated completely from the page properties and the property and event bindings that you specified previously. An adapter is generated automatically when you save the layout for the first time. It is updated each time you save the layout.
When you save the layout, a Natural adapter is generated according to the following rules:
| Location |
The adapter is generated into the subdirectory nat of your project directory. The name of the project directory corresponds to the project name. The location of the directory depends on the application server. See Creating an Application Designer Project. |
|---|---|
| Name |
The name of the adapter is determined by the properties you have set. See Specifying Properties for the Natural Page. |
| Property identifiers |
For each control property that has been bound to an identifier (as described in Binding Properties and Methods) a parameter in the parameter data area of the adapter is generated. The identifier is therefore validated against the Natural naming conventions for user-defined variables and translated to upper-case. If an identifier does not comply to these rules, a warning is generated into the protocol and as a comment into the adapter code. Additionally, the name must comply to the naming conventions for XML entities. This means especially that the name must start with a character. To achieve uniqueness within 32 characters, the last four characters are (if necessary) replaced by an underscore, followed by a three-digit number. |
| Event identifiers |
For each event that can be raised by a control on the page, an event handler skeleton is generated as a comment into the adapter. Caution: The event identifiers are not validated. |
Several Application Designer controls have properties for which a data type can be
specified. An example is the FIELD control. It has a
valueprop property which can be restricted to a
certain data type. The data type is used at runtime to validate user input. At
generation time (that is, when a Natural adapter is generated for the page),
the data type determines the Natural data format of the corresponding adapter
parameter.
The following table lists the data types used in Application Designer and the corresponding Natural data formats.
| Application Designer | Natural |
|---|---|
color |
A or U (depending on
the NATPAGE property natsinglebyte). The string
must contain an RGB value, for instance "#FF0000"
for the color red.
|
date |
D (YYYYMMDD) |
float |
F4 |
int |
I4 |
long |
P19 |
time |
T (HHIISS) |
timestamp |
T (YYYYMMDDHHIISST) |
N
n.n |
Nn.n |
P
n.n |
Pn.n |
string (default)
|
A or U dynamic
(depending on the NATPAGE property
natsinglebyte).
|
string
n |
An or
Un (depending on the NATPAGE property
natsinglebyte).
|
xs:double |
F8 |
xs:byte |
I1 |
xs:short |
I2 |