This section describes how to create a DDM by either copying DDMs or creating DDMs directly from the field definitions in a database. In addition, it provides information on how to generate multiple DDMs from an SQL database.
This section covers the following topics:
This section describes how to create a new DDM from an existing one.
 To copy a DDM
From a DDMs node or subnode, choose a DDM and open the object.
The DDM editor is invoked with the DDM source displayed in the editing area.
From the menu, choose .
The Save As dialog box appears.
In the Name text box, enter a new DDM name and, in the Libraries combo box, select a library if required.
The new DDM is saved as a source object and is added to the corresponding DDMs node or subnode.
From the menu, choose to save the new DDM as a cataloged object. See also Saving and Cataloging a DDM.
You can also copy single or multiple objects by using the copy-and-paste or drag-and-drop feature of Natural Studio as described in Copying Objects in Natural Studio documentation.
If you want to copy DDMs between different libraries, database files, and/or hardware platforms, see also Maintaining DDMs in Different Environments.
 To create a DDM from an Adabas database
Select the DDMs node or subnode or log on to the library where you want to create the DDM.
From the menu, choose .
Or:
Choose the
![]() toolbar button.
toolbar button.
The New DDM - Select Database dialog box appears as shown in the example below:
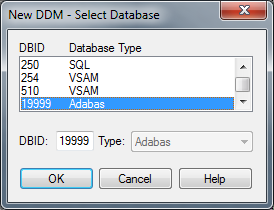
Select an Adabas database. The DBID (database ID) and database type are then shown in the corresponding DBID and Type boxes.
Or:
In the DBID text box, enter a numeric
value in the range from 0 to 65535 (except
255).
If you enter a 0 (zero), the database ID
specified with the Natural profile parameter UDB (see the
Parameter Reference documentation) of the NATPARM
parameter file is used.
If you enter a DBID that is not yet contained in the list box, from the Type combo box, select Adabas if required.
Choose .
If the specified DBID identifies an Adabas database, the New Adabas DDM dialog box appears as shown in the example below:
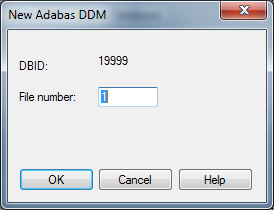
In the File number text box, enter a
numeric value in the range from 1 to 5000 and choose
.
If the specified database and the file are available, the DDM editor is invoked and the fields contained in that database file are read into the editing area.
If the specified database is not active or cannot be accessed or if the file does not exist, a corresponding error message is issued. Nevertheless, if you press ENTER, you can still open an empty DDM editor screen, enter new field attribute definitions and save the DDM source. However, in this case you cannot check any definitions against the database file description.
If required, edit the DDM source: see the section Using the DDM Editor.
After editing, from the menu, choose and, in the Stow As dialog box, enter the name of the new DDM.
The syntax of the DDM source is checked and the DDM is saved as a source and a cataloged object. See also Saving and Cataloging a DDM.
 To create a DDM from an SQL database
Select the DDMs node or subnode or log on to the library where you want to create the DDM.
From the menu, choose .
Or:
Choose the
![]() toolbar button.
toolbar button.
The New DDM - Select Database dialog box similar to the example below appears:
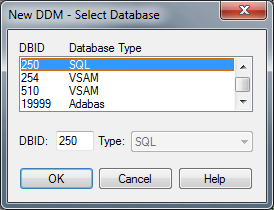
Select an SQL database. The DBID (database ID) and database type are then shown in the corresponding DBID and Type boxes.
Or:
In the DBID text box, enter a numeric
value in the range from 0 to 65535 (except
255).
If you enter a 0 (zero), the database ID
specified with the Natural profile parameter UDB (see the
Parameter Reference documentation) of the NATPARM
parameter file is used.
If you enter a DBID that is not yet contained in the list box,
from the Type combo box, select SQL if
required.
Choose .
If the specified DBID identifies an SQL database, the New SQL DDM dialog box appears as shown in the example below:
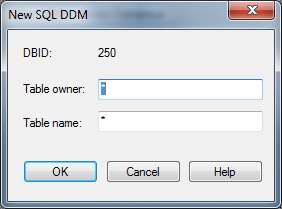
Select the SQL table for which a DDM is to be created:
To list all SQL tables for selection, use the asterisks (*) in the text boxes Table owner and Table name. The asterisks (*) are entered by default.
To list a particular range of SQL tables, use asterisk (*)
notation, for example, AB* selects all SQL tables with names that
start with AB.
Note:
A table catalog is not provided for an SQL database that is
accessed through an ODBC interface. In this case, you can only specify a table
name but not a table owner.
Choose .
The Select SQL Table list box appears with the selection list of SQL tables specified in Step 4 as shown in the example below:
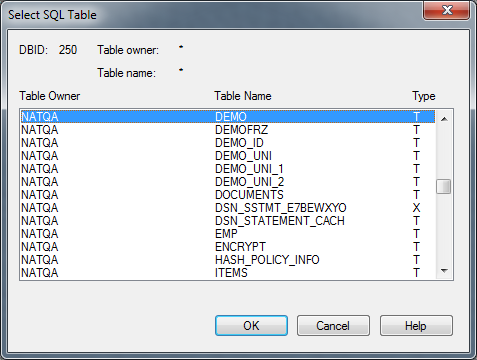
From the list box, select the required SQL table and choose .
Depending on your SQL database settings, the Database Logon window appears if you access this SQL database for the first time in this session. Enter the user ID and the password specified for the database and choose .
If the specified database and the file are available, the DDM
editor is invoked and the SQL table selected is read into the editing area. A
name is generated automatically for the DDM. It is a combination of the table
owner and the table name and cannot be changed. For example, if the table
owner's name is SAG and the table name is TEST, the
DDM name is SAG-TEST.
If the specified database is not active or cannot be accessed or if the file does not exist, a corresponding error message is issued. Nevertheless, if you press ENTER, you can still open an empty DDM editor screen, enter new field attribute definitions and save the DDM source. However, in this case you cannot check any definitions against the database file description.
If required, edit the DDM source: see the section Using the DDM Editor.
After editing, from the menu, choose and, in the Stow As dialog box, enter the name of the new DDM.
The syntax of the DDM source is checked and the DDM is saved as a source and a cataloged object. See also Saving and Cataloging a DDM.
The following section only applies to a local environment.
The Natural program DDMGEN (supplied in the Natural system library SYSTEM) provides the option to generate multiple DDMs simultaneously from SQL tables without using the DDM editor.
 To execute DDMGEN
In the command line of Natural Studio, enter the following:
DDMGEN
The SQL DDM Generation screen appears where you can fill the fields required to generate a DDM from an SQL table as demonstrated in the example below:
 SQL DDM Generation
 ==================

 DDM Library  : DDMTEST
 DDM DBID     : 210
 Table Owner  : QA*
 Table Name   : *
 Replace (Y/N): N
|
Enter the name of the library where you want to create the DDMs and enter the name of a table and/or specify a range as described in the previous section.
Press ENTER to execute the program.
Status messages appear at the bottom of the screen that indicate which DDM is generated from which SQL table. The DDMs generated are saved as source and cataloged objects in the specified library.
 To create a new DDM from a Tamino database
Select the DDMs node or subnode or log on to the library where you want to create the DDM.
From the menu, choose .
Or:
Choose the
![]() toolbar button.
toolbar button.
The New DDM - Select Database dialog box appears as shown in the example below:
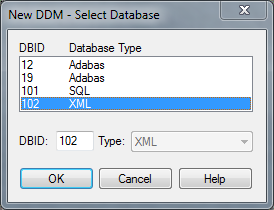
Select an XML database. The DBID (database ID) and database type are then shown in the corresponding DBID and Type boxes.
The file number (FNR) of the DDM is
always 1. The file number cannot be modified.
Or:
In the DBID text box, enter a numeric
value in the range from 0 to 65535 (except 255).
If you enter a 0 (zero), the database ID
specified with the Natural profile parameter UDB (see the
Parameter Reference documentation) of the NATPARM
parameter file is used.
If you enter a DBID that is not yet contained in the list box,
from the Type combo box, select XML if
required.
Choose .
If the specified DBID identifies a Tamino database, the Select Doctype window appears with a list of available doctypes as shown in the example below:
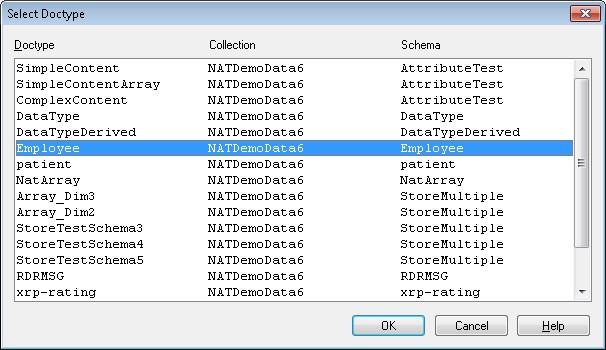
From the list, select a doctype and choose .
If you are accessing this Tamino database for the first time in this session, the Database Logon window appears. Enter the user ID and password for the database and choose .
The DDM editor is invoked and the DDM generated from the selected doctype is read into the editing area.
If required, edit the DDM source: see the section Using the DDM Editor.
After editing, from the menu, choose and, in the Stow As dialog box, enter the name of the new DDM.
The syntax of the DDM source is checked and the DDM is saved as a source and a cataloged object. See also Saving and Cataloging a DDM.
DDMs for VSAM files are not generated by Natural. Therefore, instead of selecting VSAM file definitions from a list, you enter DDM field attribute definitions directly in the editing area by using the option of the menu.