
You will now learn how to prompt the user for data, that is: a starting name and an ending name for the output.
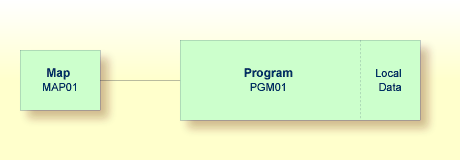
When you have completed the exercises below, your sample application will consist of the following modules:
This document contains the following exercises:
You will now modify your program so that input fields for the
starting name and ending name will be shown in the output. This is done using
the INPUT statement.
 To define input fields
Insert the following below END-DEFINE:
INPUT (AD=MT)
  "Start:" #NAME-START /
  "End:  " #NAME-END
The session parameter AD stands for
"attribute definition", its value "M"
stands for "modifiable output field", and the value
"T" stands for "translate lowercase to
uppercase".
The "M" value in
AD=MT means that the default values defined with
INIT (that is: "ADKINSON" and
"BENNETT") will be shown in the input fields.
Different values may be entered by the user. When the
"M" value is omitted, the input fields will be empty
even though default values have been defined.
The "T" value in
AD=MT means that all lowercase input is translated to
uppercase before further processing. This is important since the names in the
demo database file have been defined completely in uppercase letters. When the
"T" value is omitted, you have to enter all names
completely in uppercase letters. Otherwise, the specified name will not be
found.
"Start:" and "End:" are text fields
(labels). They are specified in quotation marks.
#NAME-START and #NAME-END are data
fields (input fields) in which the user can enter the desired starting name and
ending name.
The slash (/) means that the subsequent fields are to be shown in a new line.
Your program should now look as follows:
DEFINE DATA
LOCAL
  1 #NAME-START        (A20) INIT <"ADKINSON">
  1 #NAME-END          (A20) INIT <"BENNETT">
  1 EMPLOYEES-VIEW VIEW OF EMPLOYEES
    2 FULL-NAME
      3 NAME (A20)
    2 DEPT (A6)
    2 LEAVE-DATA
      3 LEAVE-DUE (N2)
END-DEFINE
*
INPUT (AD=MT)
  "Start:" #NAME-START /
  "End:  " #NAME-END
*
READ EMPLOYEES-VIEW BY NAME
  STARTING FROM #NAME-START
  ENDING AT #NAME-END
*
  DISPLAY NAME 3X DEPT 3X LEAVE-DUE
*
END-READ
*
END
Run the program.
The output shows the fields you have just defined.
Start: ADKINSON
End:   BENNETT
Use the default names and press ENTER.
The list of employees is now shown.
Press ENTER repeatedly until you return to the
program editor, or enter EDIT at the MORE
prompt.
Stow the program.
You are now introduced to a different way of prompting the user for input. You will use the map editor to create a map which contains the same fields that you have previously defined in your program. A map is a separate object and is used to separate the user interface layout from the business logic of an application.
The map you will create now will look as follows:
XXXXXXXXXX                                                           TT:TT:TT


                         Start XXXXXXXXXXXXXXXXXXXX

                           End XXXXXXXXXXXXXXXXXXXX
|
The first line of the map contains system variables for the current date and time. There are two data fields (input fields) in which the user can specify a starting name and an ending name. The data fields are preceeded by text fields (labels).
The following steps are required for the above map:
You will now invoke the map editor in which you will design your map.
To create a map
In the program editor's command line, enter one of the following:
EDIT MAP
E M
The Natural Map Editor menu appears.
+------------------------------------------------------------------------------+
¦                    NATURAL MAP EDITOR (Esc to select field)                  ¦
¦Create   Modify    Erase     Drag      Info OFF  Lines     Ops. Map  Quit     ¦
+------------------------------------------------------------------------------+


Create a new field definition |
You will now add two text fields (also called constants or labels) to the map.
To define the text fields
On the Natural Map Editor menu, select and press ENTER.
A window appears listing all items that you can create.
+------------------------------------------------------------------------------+
¦                    NATURAL MAP EDITOR (Esc to select field)                  ¦
¦Create   Modify    Erase     Drag      Info OFF  Lines     Ops. Map  Quit     ¦
++-----------------------+-----------------------------------------------------+
 ¦ A Parameter Data Area ¦
 ¦ G Global Data Area    ¦
 ¦ H Help Routine        ¦
 ¦ L Local Data Area     ¦
 ¦ M Map                 ¦
 ¦ N Subprogram          ¦
 ¦ P Program             ¦
 ¦ S Subroutine          ¦
 ¦ T Text Constant       ¦
 ¦ U User Defined        ¦
 ¦ V View Defined        ¦
 ¦ 1 Parm Defined        ¦
 ¦ 2 Local Defined       ¦
 +-----------------------+


Take variable definition from parameter data area |
Use the arrow keys to select and press ENTER.
Or:
Press T.
An empty screen appears. A message prompts you to position the cursor and to enter text.
Move the cursor to the first position of the fourth line (line and column number are shown at the bottom of the screen) and type in the following:
Start
Do not yet press ENTER.
Press PF2.
A window appears in which you can set the attributes for this text field.
Start


+-Text Attribute/Color Definition: --------------+
¦ Attribute: <No Attribute> Color: <No Color>    ¦
+------------------------------------------------+
MAP0083: Use cursor keys (UP, DOWN) for Attribute. (Esc=Cancel, Enter=OK) |
The Attribute field is automatically selected.
Note:
Using LEFT-ARROW and RIGHT-ARROW,
you can toggle between the fields for attribute and color definition. This
tutorial does not use colors.
Use UP-ARROW or DOWN-ARROW to scroll through the available attributes. When "Default" is shown in the window, press ENTER. "Default" means that the field is neither intensified nor in any way highlighted.
The field is now selected in the screen. This is indicated by a highlighted background.
Press ESC to redisplay the menu.
ESC is used as a toggle to display and hide the menu. The text field you have just defined is no longer shown. It has not been deleted. It has just disappeared behind the menu. When you press ESC once more, the menu disappears and your field is shown again.
Add a second text field in the same way as you have added the first text field (that is: define a second text constant and set the Default attribute). Place it in the line below the Start field (that is in line 5) and name it as follows:
End
When you have added the second text field, press ESC to redisplay the menu.
You should now see the new End field right below the menu.
You will now add two data fields to the map. These are the input fields in which the user can specify the starting name and ending name.
To define the data fields
From the menu, choose .
The Extended Field Editing window appears:
Start
End


+-Extended Field Editing-------------------------------------------------------+
¦Field :                                                                       ¦
¦Format: A Len:            AL:             PM:                  ZP: N  SG: N   ¦
¦Rules : 0 Rule Editing: N Array:          Array Editing: N     Mode:          ¦
¦AD:            CD:        CV:                                  DY: N  HE: N   ¦
¦EM:                                                                           ¦
+------------------------------------------------------------------------------+

MAP0079: Position cursor and press Enter or format char.(Esc=Cancel) (012,019) |
Position the cursor behind the Start field (leave a blank space between text field and data field) and press ENTER.
The following window appears.
+---------------------+ ¦ A Alphanumeric ¦ ¦ B Binary ¦ ¦ D Date ¦ ¦ F Floating Point ¦ ¦ I Integer ¦ ¦ L Logical ¦ ¦ N Numeric ¦ ¦ P Packed Numeric ¦ ¦ T Time ¦ ¦ * System ¦ +---------------------+ |
Choose A Alphanumeric.
The selected format is shown in the Format field of the Extended Field Editing window. The cursor is automatically positioned in the AL field.
Enter "20" in the AL field.
This means that the data field is defined with a length of 20 characters.
Press TAB.
In the map, the length of the field is now indicated by "X" characters.
Press TAB repeatedly until the AD field is highlighted.
You will now define the I/O characteristics and the filler character. The following attribute definition characters are currently shown in the AD field:
ILMFHT'_'
The I/O characteristics are indicated by the letter
"M". The filler character is indicated by
'_'. This tutorial uses these default settings. The following
steps are just provided to illustrate the usage of this function. At this
point, you can also close the Attribute Definition window
and the Extended Field Editing window as described further
below.
Note:
The sequence in which the attribute definition characters
are arranged in the AD field may change, that is: an
attribute may occur in a different position.
Press PF2 to edit the attribute definitions.
The Attribute Definition window appears.
+-Attribute Definition--+ ¦Representation ¦ ¦Alignment ¦ ¦I/O Characteristics ¦ ¦Mandatory Characters ¦ ¦Length Characteristics ¦ ¦Upper/Lower Case ¦ ¦Filler Character ¦ +-----------------------+ |
Choose I/O Characteristics.
The following window appears.
+------------------------+ ¦ A Input, non_protected ¦ ¦ M Output, modifiable ¦ ¦ O Output, protected ¦ +-Esc=Quit, Enter=Toggle-+ |
When the character "M" is already shown in the AD field, press the ESC key to leave this window.
Or:
When the character "M" is not
shown in the AD field, choose M Output,
modifiable.
Note:
When you choose the same attribute several times, a
toggle effect occurs: the attribute is then either defined or removed.
In the Attribute Definition window, choose Filler Character.
You are prompted to enter a new filler character.
The filler character is used to fill any empty positions in input fields in the map, allowing the user to see the exact position and length of a field when entering input.
Enter an underscore (_) at the current cursor position.
It is not necessary to press ENTER. The message disappears immediately after you have entered the underscore character.
Press ESC to close the Attribute Definition window.
Press ENTER to close the Extended Field Editing window and to store the field in the map.
Caution:
When you press ESC instead of
ENTER, your definitions for the new data field are not saved and the
field is not stored in the map.
Add a second data field in the same way as described in the above steps: place it next to the End field, define a length of 20 characters and define the same attribute definition characters as described above.
When you create a new data field for a user-defined variable, Natural assigns a field name to it. This field name contains a number. You have to adjust the names of the newly created fields to the variable names defined in your program.
You will now make sure that the same names are used as in your
program: #NAME-START and #NAME-END. The output of
these fields (that is: the user input) will be passed to the corresponding
user-defined variables in your program.
To define names for the data fields
Use the arrow keys to select the data field for the starting name.
Press ESC to redisplay the menu.
In the menu, choose .
The Extended Field Editing window appears.
+-Extended Field Editing-------------------------------------------------------+ ¦Field : #1 ¦ ¦Format: A Len: 20 AL: 20 PM: ZP: N SG: N ¦ ¦Rules : 0 Rule Editing: N Array: None Array Editing: N Mode: Undef ¦ ¦AD: ILMFHT'_' CD: CV: DY: N HE: N ¦ ¦EM: ¦ +------------------------------------------------------------------------------+ |
The Field field contains the field name that has been assigned by Natural: "#1".
In the Field field, enter "#NAME-START".
Press ENTER.
Repeat the above steps for the data field for the ending name and enter "#NAME-END" as the field name.
Natural system variables contain information about the current Natural session, such as the current library, user, or date and time. They may be referenced at any point within a Natural program. All system variables begin with an asterisk (*).
You will now add system variables for the date and time to the map. When the program is run, the current date and time will be displayed in the map.
To add system variables
Press ESC to redisplay the menu.
From the menu, choose .
The Extended Field Editing window appears.
Position the cursor in the top left corner of the screen (row 001, column 001) and press ENTER.
The following window appears.
+---------------------+ ¦ A Alphanumeric ¦ ¦ B Binary ¦ ¦ D Date ¦ ¦ F Floating Point ¦ ¦ I Integer ¦ ¦ L Logical ¦ ¦ N Numeric ¦ ¦ P Packed Numeric ¦ ¦ T Time ¦ ¦ * System ¦ +---------------------+ |
Choose * System.
The following window appears.
+-----------------------------+ ¦ *APPLIC-ID A8 ¦ ¦ *APPLIC-NAME A32 ¦ ¦ *COM A128 ¦ ¦ *CONVID I4 ¦ ¦ *CPU-TIME I4 ¦ ¦ *CURRENT-UNIT A32 ¦ ¦ *CURSOR N6 ¦ ¦ *CURS-COL P3 ¦ ¦ *CURS-LINE P3 ¦ ¦ *DAT4D A10 ¦ ¦ *DAT4E A10 ¦ ¦ *DAT4I A10 ¦ ¦ *DAT4J A7 ¦ ¦ *DAT4U A10 ¦ +-----------------------------+ |
You can use DOWN-ARROW and UP-ARROW to scroll through the list of system variables.
Select *DAT4I and press ENTER.
A number of "X" characters is now shown.
Press ENTER to close the Extended Field Editing window.
Repeat the above steps and add the system variable *TIMX. Place it in the top right corner of the screen (row 001, column 070). TT:TT:TT will be shown for this system variable. Do not forget to press ENTER to close the Extended Field Editing window.
You will now reposition the fields you have added.
To move a field
When the menu is currently shown, press ESC to hide it.
Use the arrow keys to select the data field for the starting name (which is indicated by "X" characters).
The data field is now highlighted.
Press ESC to redisplay the menu.
Choose .
The menu disappears.
Use the arrow keys to move the highlighted field to the middle of the line.
Press ENTER to end drag mode.
Move the remaining text and data fields for the starting and ending names to the middle of the line as described above. Leave an empty line between the fields for the starting and ending names.
The map should now look as shown at the beginning of this section.
You will now test your map to check whether it works as intended.
To test the map
Press ESC to redisplay the menu, and from the menu, choose .
The following output is shown.
2009-06-30                                                          13:39:55


                           Start  ____________________

                             End  ____________________
|
The input field for the starting name is automatically selected since it is the first input field in the map. Both input fields contain the filler character.
Note:
When working in insert mode, the user has to delete the
filler characters before it is possible to enter text. This is not necessary in
overwrite mode which is the default.
Press ENTER to return to the map editor.
When the map has successfully been tested, you have to stow it so that it can be found by your program.
To stow the map
Press ESC to redisplay the menu.
From the menu, choose .
The following window appears.
+--Stow Map As: ---+ ¦Name...: ¦ ¦Library: TUTORIAL ¦ +------------------+ |
Enter "MAP01" as the name of the map and press ENTER.
Once a map has been stowed, it can be invoked by a Natural program
using a WRITE or INPUT statement.
To invoke the map from your program
Press ESC to redisplay the menu and choose .
Natural's main menu is shown again with the Direct Command window prompting for input.
Return to the program editor by entering one of the following.
EDIT PGM01
E PGM01
Replace the previously defined INPUT lines with
the following line:
INPUT USING MAP 'MAP01'
This will invoke the map you have just designed.
The map name must be enclosed in single quotation marks to distinguish the map from a user-defined variable.
Your program should now look as follows:
DEFINE DATA
LOCAL
  1 #NAME-START        (A20) INIT <"ADKINSON">
  1 #NAME-END          (A20) INIT <"BENNETT">
  1 EMPLOYEES-VIEW VIEW OF EMPLOYEES
    2 FULL-NAME
      3 NAME (A20)
    2 DEPT (A6)
    2 LEAVE-DATA
      3 LEAVE-DUE (N2)
END-DEFINE
*
INPUT USING MAP 'MAP01'
*
READ EMPLOYEES-VIEW BY NAME
  STARTING FROM #NAME-START
  ENDING AT #NAME-END
*
  DISPLAY NAME 3X DEPT 3X LEAVE-DUE
*
END-READ
*
END
Run the program.
Your map is now shown.
Press ENTER repeatedly until you return to the
program editor, or enter EDIT at the MORE
prompt.
Stow the program.
As your program is coded now, no data will not be found if an ending name is not specified.
You will now remove the initial values for the starting name and ending name; then the user always has to specify these names. To ensure that an ending name is always used, even if it has not been specified by the user, you will add a corresponding statement.
To use the ending name
In the DEFINE DATA block, remove the default
values (INIT) for the fields #NAME-START and
#NAME-END so that the corresponding lines look as follows:
1 #NAME-START        (A20)
1 #NAME-END          (A20)
Insert the following below INPUT USING MAP
'MAP01':
IF #NAME-END = ' ' THEN
MOVE #NAME-START TO #NAME-END
END-IF
When the #NAME-END field is blank (that is: when
an ending name has not been entered by the user), the starting name is
automatically used as the ending name.
Note:
Instead of using the statement MOVE #NAME-START TO
#NAME-END it is also possible to use the following variant of the
ASSIGN or COMPUTE statement: #NAME-END :=
#NAME-START.
Your program should now look as follows:
DEFINE DATA
LOCAL
1 #NAME-START (A20)
1 #NAME-END (A20)
1 EMPLOYEES-VIEW VIEW OF EMPLOYEES
2 FULL-NAME
3 NAME (A20)
2 DEPT (A6)
2 LEAVE-DATA
3 LEAVE-DUE (N2)
END-DEFINE
*
INPUT USING MAP
                                           'MAP01'
*
IF #NAME-END = ' ' THEN
    MOVE #NAME-START TO #NAME-END
END-IF
*
READ EMPLOYEES-VIEW BY NAME
STARTING FROM #NAME-START
ENDING AT #NAME-END
*
DISPLAY NAME 3X DEPT 3X LEAVE-DUE
*
END-READ
*
END
Run the program.
In the resulting map, enter "JONES" in the field which prompts for a starting name and press ENTER.
In the resulting list, only the employees with the name "Jones" are now shown.
Press ENTER to return to the program editor.
Stow the program.
You can now proceed with the next exercises: Loops and Labels.