Changing Source Tables
If the shape of a source table from a deployed replication changes (columns are added or deleted, or a data type is changed), the source table will need to be re-imported into the CDD and the column mappings for the replication will need to be updated to reflect the new shape of the source table.
This is a sample showing the steps for adding a column to a source table and deploying that change to the replication server. The same concepts apply for removing columns or changing data types.
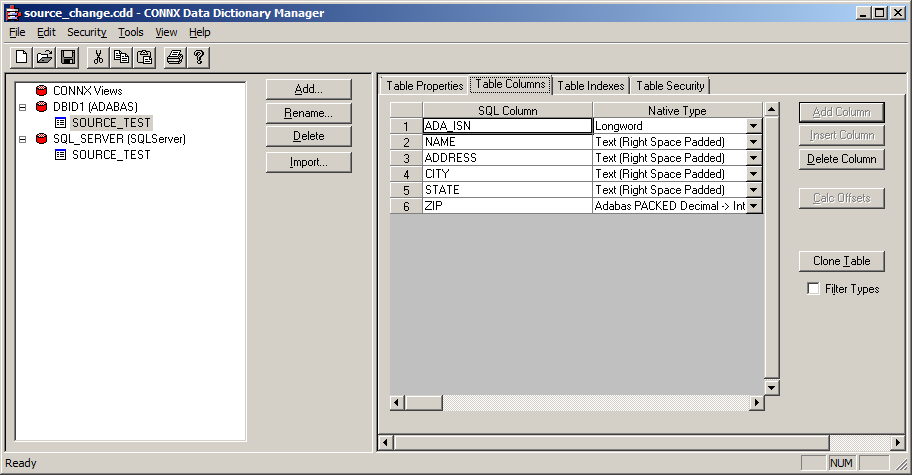
In this example, we have a source table with the following definition:
This table is deployed and replicating to a target table of the same name on a SQL Server. If the column PHONE is added to the Adabas file, the table will need to be re-imported to reflect this new column.
After re-importing the table, save the CDD and exit the CDD Manager. Open the CDD in the Replication Administrator. On the Replication Design tab, select the replication that contains the source table that was changed and press the Map Columns button.
On the Map Columns dialog, the new PHONE column appears on the source side but is not mapped to anything on the target.
Since the target table exists and does not contain a corresponding column, it needs to be dropped and re-created. To drop the target table, press the Drop Target Table button. This will create new default metadata for the new target table and automatically map the new column to the target.
Press Done to accept the new column mapping. On the Replication Design screen, the target table will have the Create check box checked.
You will now need to re-deploy the replications. The target table will be created as part of the deploy process. Alternatively, pressing the Build Targets button will create the new target table.
If you are not using the Replication Administrator to create the target table, you will need to manually make the same change on the source table and re-import that table as well. In this case, skip the step of dropping the target table and map the new column manually. The target table will not be created at deploy time.
Note:
Due to the internal record keeping mechanisms, it is possible that the Replication Administrator does not recognize an altered table as one that was already deployed. In this situation, it will recognize the replication or replications that contain the old form of the table or tables and will remove those replications. A message will appear when the Replication Administrator is started, that informs you that there are replications that cannot be resolved to existing tables and will be removed. You have to press Add Tables to re-add these replications. After adding the replication, you must adjust the target table to the existing table name and then map the new column.

