Exporting to a deployment script
You can export an application’s launch configuration to create a deployment script. This generates the build files, configuration files, property definition files, scripts, and EPL files from scenarios and copies other resources such as dashboards that are used by Ant to build and launch the project on a different machine.
To export an Apama launch configuration to a deployment script:
1. In the Project Explorer view, right-click the name of the project and select Export from the pop-up menu. This displays the Export dialog.
2. In the Export dialog, expand Software AG.
3. Select Apama Ant Export and click Next. The Ant Export dialog appears.
4. In the Ant Export dialog, specify the settings as follows:
 Launch configuration
 — The export operation uses the project’s default launch configuration, but if a project has multiple launch configurations, you can select which one to export. If you want to select a different launch configuration, click
Browse. This will display the
Choose Launch Configuration dialog.
 Destination directory
 — The name of the directory for the exported files.
 Generate initialization list during launch
 — Dynamically creates the file injection list from the project directory when the exported deployment script is executed, rather than during the export process.
When you select this option you need to export your project's launch configuration only once. The generated scripts specify the location of your project directory and then use the content of your project directory to create the file injection list at deployment time. If you do not select this option, then you must re-export the configuration each time you add, remove or edit a file in your application.
For JMon applications that you develop in Software AG Designer, Software AG Designer creates the required
.jar files whenever you modify your Java files. If you do not develop your JMon application in Software AG Designer, see
Generating deployment descriptor files from annotations for information about building the
.jar file for your application. Ensure that your application's
.jar file is in your project directory before export.
If you selected a shared location when you created the launch configuration that you are exporting then Software AG Designer generated two files that contain the launch information (.deploy and .launch) and put them in the specified shared location. After you create the launch configuration, any changes you make to the launch configuration are reflected in these files. Since the exported deployment script uses these files at deployment time, any launch configuration changes will also be reflected upon deployment. Except, if you change the shared location then you must re-export the launch configuration to a new Ant deployment script. If you do not, the old Ant deployment script fails because it cannot find the .deploy file.
When Generate initialization list during launch is selected the option to Generate Scenario EPL during export is not available. Instead, EPL .mon files are always created from scenario files upon deployment. Also, Copy resources to destination is not available because the script points to the project directory.
 Copy resources to destination
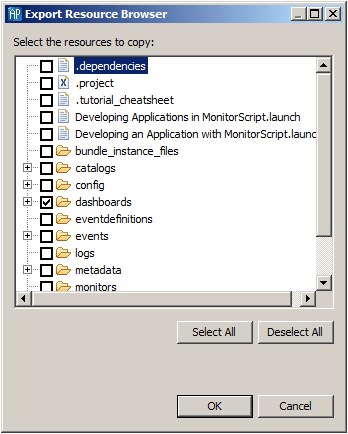
 — By default, the export operation copies only the project’s dashboard definitions. To change the specific resources that Software AG Designer exports, click
Browse to display the
Export Resource Browser dialog and specify the resources you want.
For an Apama query application, if you are not selecting Generate initialization list during launch, then you will need to use the Apama macros for Ant to inject the query application files. See the apama-macros.xml file is in the etc folder of your Apama installation directory.
 Use relative paths
 — By default, the generated
build.xml file uses relative pathnames for the application’s monitors, events, scenarios, jars, and adapter configurations and properties. Uncheck this box if you want to use absolute pathnames.
 Include custom file
 — If you want the exported launch configuration to perform other operations, select this option to generate a stub
custom.xml file. The
custom.xml file has
pre-custom and
post-custom targets where you can add the desired operations.
 Batch resources when possible
 — By default, the
build.xml file generated by the export operation specifies that all monitors in the project will be injected in a batch when the application is launched. If you want to inject each monitor separately when the application is launched, uncheck this check box.
 Launch correlator in separate console
 — By default, the exported launch configuration will launch the correlator in a separate console. Uncheck this check box if you want to start the correlator in the console where the launch is started.
 Generate Windows scripts
 — Exports all scripts used by the launch configuration in Windows form.
 Generate Unix scripts
 — Exports all scripts used by the launch configuration in UNIX form.
 Generate Scenario EPL during export
 — Generates EPL files for scenarios during the export operation. If you do not select
Generate initialization list during launch and you want to copy the scenario definition files instead of generating EPL files, uncheck this check box. Note that when you select
Generate initialization list during launch any scenarios are converted to EPL
.mon files when the launch configuration injects the files into the correlator. Consequently, this option is not available when
Generate initialization list during launch is selected.
 Generate export log
 — By default the export operation generates a log file that records the export operation. Uncheck the check box if you do not want to record the log file.
Click Finish. The files are generated in the specified destination directory.
