Adding a JMon event
To add a new JMon event to an Apama project:
1. If you are in the Apama Workbench perspective, click the Show All Folders icon  if necessary to display the enhanced view that shows all the project’s resources.
 2. In the Project Explorer view or the Workbench Project view, right click the name of the project where you want to add the monitor and select New >
Java Event >
Other. You can also select File >
New from the Apama Studio menu and then select Apama > Java Event from the Select a wizard dialog. The New Apama Java Event wizard is displayed. 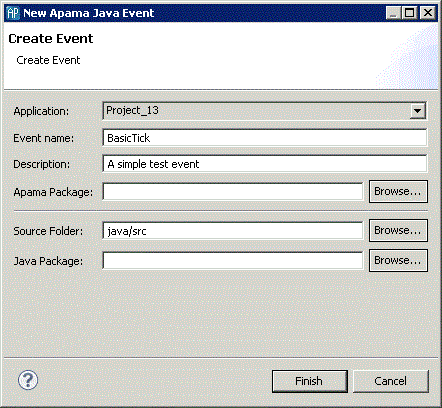
3. In the New Apama Java Event wizard, enter information in the following fields:
a. The Application field is the application to which you are adding the event.
b. In the Monitor name field, specify the name of the new event. This will become the name of the class and the Java file.
c. The Description field is optional.
d. The Apama Package field is optional; this is the package of the event inside the correlator.
e. The Source Folder field specifies the folder in the project to contain the file; by default this is java/src.
f. The Java Package field is optional; this is the package of the created Java class.
4. Click Finish. The name of the new class file now appears in the Project Explorer viewor the Workbench Project view under the project that contains it and the .java file opens in the editor.
For more information about JMon applications, see
Overview of Apama JMon Applications.