Switching blocks
Consider the situation where you wish to replace a block in your scenario with another one. A common occurrence of this is if you wish to upgrade your block, for example by replacing version 1 of a block with a newer version 2.
The problem with this is that if you delete the version 1, all references to its parameters, feeds and operations will be reverted or reset. You would then have to add the new block of the more recent version and re-establish all the references.
To facilitate this operation you can switch blocks as follows:
1. In the Catalogs tab, add the newer block to the scenario.
2. In the Blocks tab, select the block you want to replace.
3. In the Blocks tab’s toolbar, click on  to be prompted for which block you want to use to replace the selected block.
 4. Select the name of the replacement block from the choice list, and click OK.
Event Modeler tries to replace all references to the old block with the corresponding interface elements of the new one. Event Modeler also replaces the wiring of the old block with wiring for the new block.
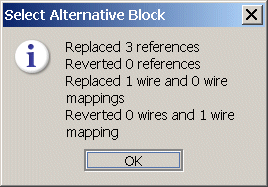
At the end of the switching operation, a dialog appears that summarizes how many elements were replaced and which had to be reverted. For example:
Event Modeler can replace only those parameters, feeds and fields, and operations of the same name. If any elements do not have a corresponding element in the replacement block they will be reverted or removed, as follows:

References are reverted to their non-terminals.

In a wire mapping for which the source block output field has changed, the destination block input field is reverted to the default value for its type. For example, if the destination block input field is an integer, the field is reverted to
0. The mapping itself is not removed even though it no longer has a source field.

For a wire mapping for which the destination block input field has changed, the wire mapping is removed.
 to be prompted for which block you want to use to replace the selected block.