Setting the background properties
Background properties control the size, color, and an optional background image for a dashboard.
To set background properties:
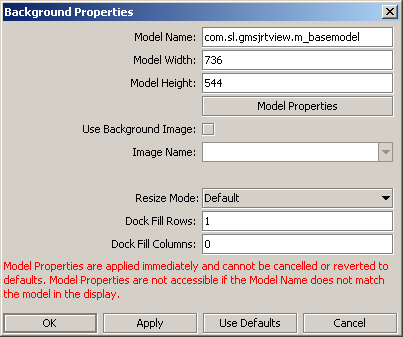
1. Select Background Properties from the File menu in the menu bar.
The Background Properties dialog appears.
2. Set the fields Model Width and Model Height to specify the size of the dashboard. If the dashboard is made smaller than its current size, and the resize mode is crop (see below), one or more objects may no longer be visible.
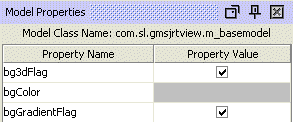
3. Click on Model Properties.
The Object Properties panel displays additional properties for the dashboard background.
Use resizeHeightMin and resizeWidthMin to set the minimum display size. For Web-based dashboards, scrollbars are present when the size is below the minimum. In Viewer, dashboards cannot be resized below the minimum.
4. To use an image as the background for a dashboard, check the Use Background Image check box, and either type in the relative path name to a .gif, .jpg, or .png image file or select an image file from the Image Name drop down list.
The drop down list includes Image files that are located either in the same directory as the dashboard or in a subdirectory of the dashboard’s directory.
If an image is used as the background for a dashboard, the dashboard is resized to the dimensions of the image, and the Model Width and Model Height fields are disabled.
5. To set a non-default resize mode, select an item from the Resize Mode drop down list. Resize modes are explained in About resize modes. 6. To set a non-default number of grid rows (which is used in Layout resize mode when an object’s dock property is set to Fill), enter a value greater than 1 in the Dock Fill Rows field. See About resize modes for detailed information. 7. To set a non-default number of grid columns (which is used in Layout mode when an object’s dock property is set to Fill), enter a value greater than 0 in the Dock Fill Columns field. See About resize modes for detailed information. 

