Setting data options
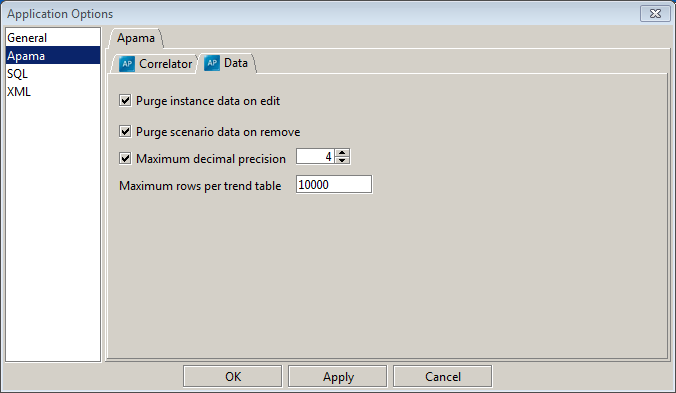
Dashboard Builder provides several options for managing the data stored in data tables. To set data options:
1. Select Options item in the Tools menu.
The Application Options dialog appears.
2. Select the Apama tab and the Data sub tab to see the data options.
3. Check the Purge instance on edit check box to purge all trend and OHLC data for a scenario instance or DataView item whenever an input variable or field is modified. When an input variable of a scenario or field of a DataView item is modified, it may invalidate all previous trend and OHLC data.
4. Check the Purge scenario data on remove to purge all data for a scenario or DataView when it is removed from a correlator.
5. Check the Maximum decimal precision and specify a maximum number of decimal places to be displayed for any numeric data in a dashboard.
6. Check the Maximum rows per trend table to set the maximum number of rows for each trend and OHLC table. The higher the value, the more data that will be available for charting and the greater the memory utilization.

