Specifying playback queries
You create and modify Data Player queries with the Data Player Query Editor. The information for the queries is stored in the project’s dataplayer_queries.xml file. To create or modify a Data Player query:
1. In the Project Explorer view, expand the project and then expand the config folder. Double click on the dataplayer_queries.xml file. Apama Studio opens the Query Editor. If the project is running, you will be able to make selections from the Datasource, Database, and Query drop-down lists. If the project is not running, most of the controls are disabled.
If the project is not running the Query Editor will report that it is offline; in this mode, you cannot select Data Sources or Databases and all the controls are disabled.
If you are creating a new query, you can also right-click on the name of the project and select New > Data Player Query from the pop-up menu. Use this method if you are working on an imported project that does not yet contain a dataplayer_queries.xml file.
2. Click the Add Query button( ). The New Query dialog is displayed.
 3. Provide a name for the new query and click OK.
4. In the General Settings section, specify the following properties for the query:
 Description
 — Provide a description of the query.
Data Source — Select an available Data Source from the drop down list.
Database — Select an available Database from the drop down list.
Return Type — The choices are
Native or
Wrapped. When
Native is selected, each matching event will be sent as-is to the correlator. When
Wrapped is selected, each matching event will be “wrapped” in a container event. The container event will be named using the event name. For example a
Tick event would be wrapped in a
WrappedTick event. Event wrapping allows events to be sent to the correlator without triggering application listeners. A separate user monitor can listen for wrapped events, modify the contained event, and reroute it such that application listeners can match on it.
5. In the Query section, the Use Query Template check box specifies whether you want to use a Query Template (checked) or a Raw Query (unchecked).
If you are using a Query Template:
a. Select a Query Template from the drop-down list. The choices are the canned queries supplied with the Apama installation: findAll, findEarliest, findLatest, and getCount. You can add your own Query Templates; see Creating query templates. b. If the Query Template uses replacable parameters, they will be displayed in the Name and Value table in the Query section of the editor.
6. Double click a cell in the Value column and type the entry the to use for the query, for example the name of a database table or column.
If you are using a Raw Query, in the Query String text area specify the statement to execute as follows:
For ODBC and JDBC data sources, use SQL syntax.
For an Apama Sim data source, use the following keywords (keywords are case insensitive):
TIME with =, <, >, >=, and <= comparators and the time. Use one or two TIME statements. If two TIME statements are used, only data that matches both statements will be returned.
INCLUDE plus the event type to retrieve.
EXCLUDE plus the event type to not retrieve.
Examples of this syntax are:
TIME=12345
TIME=12345;INCLUDE=(com.apama.something)
TIME=12345;INCLUDE=(com.apama.something);EXCLUDE=(com.apama.something.abc)
TIME>12345;TIME<20000
7. In the Advanced Settings section specify the Extra Parameters.
a. Right click in the Name column and select Add from the pop up menu (or double click in the Name column).
b. Specify the Name of the Extra Parameter.
c. In the Value column, specify the value of the Extra Parameter.
8. If the query will return data in the form of Apama event strings, specify _ADBCType in the Extra Parameters column and give it the value of unmapped-sql. This specifies that no mapping rules are to be used and that the contents of the column eventString containing the Apama event string should be returned as an event. 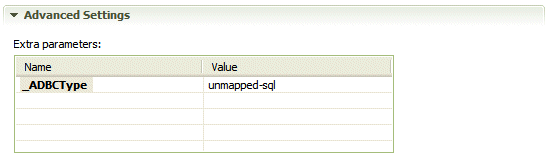
9. Save the query.
When you save the query, the query name is added to the Data Player Control view’s drop down query list.
The Query Editor tool bar contains the following buttons:
 Configure Credentials
 — This displays the
Credential for selected data source dialog where you add a user name and password for the current query if they are required for accessing the data source and select the scope of the credentials from a drop-down list. You can specify if the credentials apply globally, to a specific data source, or to a specific query. Credentials entered here are shared by the Query Editor and the Data Player.
 Clone Query
 — Select this if you want to make a copy of the current query. The
Clone Query dialog prompts you for the name of the copy. You can then edit the specifications for the query.
Add Query — Select this if you want to add a new query. The
New Query dialog prompts you for the name of the new query.
 Rename Query
 — Select this if you want to rename the query. The
Rename Query dialog prompts for the new name of the query.
 Delete Query
 — Select this if you want to delete the query. The
Delete Query dialog prompts you to confirm that this is what you want to do.
Copyright © 2013
Software AG, Darmstadt, Germany and/or Software AG USA Inc., Reston, VA, USA, and/or Terracotta Inc., San Francisco, CA, USA, and/or Software AG (Canada) Inc., Cambridge, Ontario, Canada, and/or, Software AG (UK) Ltd., Derby, United Kingdom, and/or Software A.G. (Israel) Ltd., Or-Yehuda, Israel and/or their licensors.