Bundle instances
Many bundles and adapters contain only EPL or Java files; adding these bundles means that references to the bundle files will be added to the project build path, but does not involve copying any files into the project. However, when you add a bundle that contains customizable files such as .evt or adapter configuration files, Apama Studio physically copies these files into the project, in addition to the changes made to the project build path.
If you add more than one instance of a particular bundle or adapter to the project, Apama Studio creates separate copies of these files for each instance (except for bundles where it only makes sense to have one copy of the instance files per project). If a bundle contains instance files, you can change and customize those files in any manner. It is possible to add multiple instances of such bundles to a given project, to allow different customizations of the same instance files, for example if your application needs to run with two instances of a particular adapter, each connected to a different data provider.
If a bundle contains instance files, the
Add Bundle Instance dialog will prompt for a unique
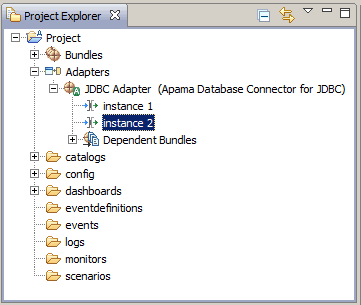
bundle instance name to identify the instance, to distinguish it from any other instances of the same bundle. This instance name will be included in the filename of the bundle instance files when they are copied into the project. If only one instance of a given bundle will be required, it is fine to use the default bundle instance name. Each bundle or adapter instance is represented in the
Project Explorer.

After adding a bundle that contains instance files, the instances can be removed or updated independently (right-click the instance name and select Remove Instance from the pop-up menu). After a bundle with instance files is removed, a dialog will appear to confirm whether you also wish to delete the instance files that were copied to the project. Usually you will want to delete these files at the same time as removing the bundle, as long as backup copies of any important customizations have been made.
It is never necessary to have more than one instance of a bundle that does not contain any instance files, so this option is disabled in the Add Bundle Instance dialog.
To add a bundle to an Apama project:
1. There are two ways of adding a bundle to a project.
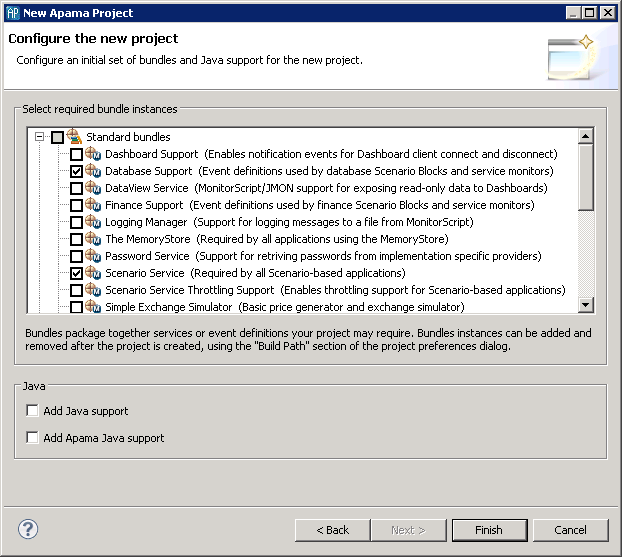
 If you are creating a new Apama project
, select
File Project >
New >
Apama, give it a name, and click
Next. The
New Apama Project dialog opens.
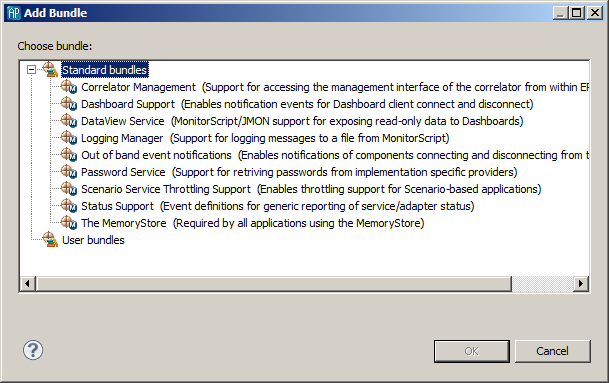
 If you are adding a bundle to an existing project
, in the
Project Explorer right-click the project and select
Apama > Add Bundle. The
Add Bundle dialog opens.
2. Select the bundle that is appropriate for your application. Click Finish or OK.
Apama Studio adds the bundle to the Bundles folder in your project along with the supporting monitors such as DatabaseSupport.mon. If a bundle contains a Correlator Deployment Package you can see this in the bundle's hierarchy in the project's Bundles folder in Project Explorer.
Copyright © 2013
Software AG, Darmstadt, Germany and/or Software AG USA Inc., Reston, VA, USA, and/or Terracotta Inc., San Francisco, CA, USA, and/or Software AG (Canada) Inc., Cambridge, Ontario, Canada, and/or, Software AG (UK) Ltd., Derby, United Kingdom, and/or Software A.G. (Israel) Ltd., Or-Yehuda, Israel and/or their licensors.


