Defining commands for editing a scenario instance
Adding the Edit function to a dashboard is similar to you adding the Create function. You need to add control objects such as text fields and check boxes to the dashboard to prompt the user for the values of scenario input variables. Then you need to create dashboard variables to hold the values of the control objects and the objects bound to the variables via their varToSet property.
You next need to add a control object, such as a push button, to the dashboard to perform the command.
The differences are that when defining the command in the Define Apama Command dialog, you need to identify which instance of the scenario to edit. You also need to identify which scenario variables are to be edited. Unlike the Create command, a subset of scenario variables can be changed with the Edit command. Users cannot edit scenario variables that have been declared immutable.
1. Open the file tutorial-edit.rtv by selecting Edit Instance in the tutorial main page.
2. Double click on the object labeled Test to display the dashboard in a new window such that the control objects are enabled..
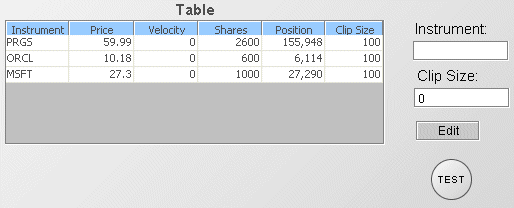
This dashboard displays a summary table of all instances of the tutorial scenario and a form for editing them.
3. Double click on the APMA row in the table. This will cause the scenario instance for APMA to become selected and its input variables to be displayed in the form.
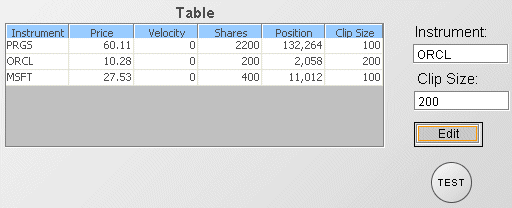
4. In the form change the Clip Size to 200 and press the Edit button. The value of Clip Size will change for APMA in the table indicating the scenario instances has been edited.
As in the Create sample, this dashboard has the dashboard variables $instrument and $clipSize defined. The text fields are bound to these such that the variables are set when text is entered in the fields. The actionCommand property for the Edit button is set to perform the Edit command and use the value of the variables as command parameters.
5. Select the Edit button and in the Object Properties panel, double click on the actionCommand property.
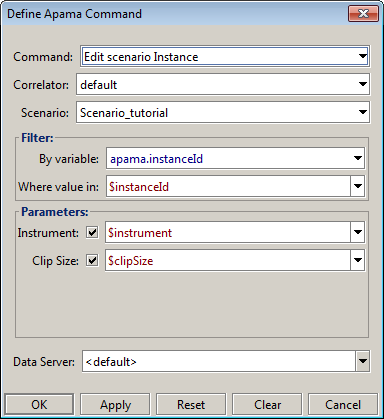
Here the command is defined to edit the instance of the tutorial scenario whose instance id equals $instanceId. You can see that the values for the scenario input variables Instrument and Clip Size are set to the value of the dashboard variables $instrument and $clipSize.
The checkbox next to each scenario variable field is used to specify that the variable is to be edited. When performing an Edit you do not need to specify values for all scenario variables; only those you want to change.
The Filter fields are used to identify the instance to be edited. In this sample $instanceId is set when you select a row in the table to the apama.instanceId of the selected scenario instance.
The properties of table and other objects in Dashboard Builder are preconfigured to set $instanceId when a drilldown is performed. However, you can use dashboard variables other than $instanceId to hold the apama.instanceId of a scenario instance.
Copyright © 2013
Software AG, Darmstadt, Germany and/or Software AG USA Inc., Reston, VA, USA, and/or Terracotta Inc., San Francisco, CA, USA, and/or Software AG (Canada) Inc., Cambridge, Ontario, Canada, and/or, Software AG (UK) Ltd., Derby, United Kingdom, and/or Software A.G. (Israel) Ltd., Or-Yehuda, Israel and/or their licensors.


