Specifying the block interface
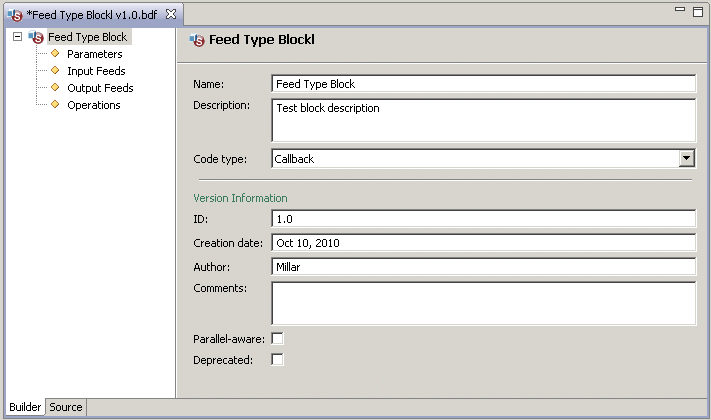
After you create a block, Apama Studio displays your new block in the Block Editor with the Builder tab selected:
Initially, the name of the block is selected and Apama Studio displays general information about the block. Most of the fields are self-explanatory and you can use them to help you maintain your blocks. Use the
ID field to distinguish versions of your block. Select the
Parallel-aware checkbox if you want to be able to use this block in a parallel scenario. See
Creating parallel-aware blocks.
The Deprecated checkbox indicates whether this is an older version of the block. All Apama standard blocks that use the old-style block implementation (Apama releases prior to 4.2) are deprecated. They will not be supported in a future release.
If you have any custom blocks that use the old-style implementation, you should convert them to the new implementation and mark the old-style version as deprecated. To convert a block, open it in the Block Builder editor, select Callback or Callback (DEBUG) as the code type, and click the Source tab. See the Apama 5.0 migration guide for details about how you must manually edit the re-generated block file to correctly use the new implementation that Apama Studio generates for you. Apama Studio never automatically converts a block to use the new implementation.
Event Modeler uses the setting of the Deprecated checkbox to determine how to display the block in the Block Wiring panel. Deprecated blocks have an orange border while current blocks have a black border.
Also, suppose you write a custom block that uses the new-style implementation and you then revise that block. You can select the Deprecated checkbox for the older version to encourage use of the new version.
At this point, if you are creating a new block based on an existing event definition, the code for the block’s input and output feeds, along with the fields associated with the feeds, and the block’s operations has been generated.
If you are creating a new block from scratch, the block does not contain any of the parameters, input feeds, output feeds, and operations that provide the interface of the block. When you add these elements, Apama Studio generates the EPL code that defines the action that implements the element.
To add a parameter, input feed, output feed, or operation:
1. Right click the element you want to add and select Add Parameter, Add Input Feed, Add Output Feed, or Add Operation. The right side of the Builder tab displays the item’s properties.
2. Fill in the values for the properties.
3. For input feeds and output feeds, right click the element and select Add Field.
4. In the Properties panel for the field you added in the previous step, fill in the values for the properties and field validation specifications.
When you save a block, Apama Studio generates the underlying code that defines the block’s interface and saves it as a
block definition file with a
.bdf extension. To this file, you then add EPL code to implement the necessary behavior. To add code to the block, see
Adding EPL code to the block definition.
Copyright © 2013
Software AG, Darmstadt, Germany and/or Software AG USA Inc., Reston, VA, USA, and/or Terracotta Inc., San Francisco, CA, USA, and/or Software AG (Canada) Inc., Cambridge, Ontario, Canada, and/or, Software AG (UK) Ltd., Derby, United Kingdom, and/or Software A.G. (Israel) Ltd., Or-Yehuda, Israel and/or their licensors.

