Configuring tree control type icons
Type icons indicate the type of node in the tree. The type icon for each node is determined either by the value of a column in the valueTable property, or by the node position in the tree. By default, the type icon appears to the left of the node label.
This section describes how to configure type icons using the Node Properties dialog. You can also configure type icons by attaching the nodeTypeProperties property to data.
To configure the type icon, use the
nodeTypeProperties property to define a two-column table of data. Select the
nodeTypeProperties property in the property sheet, then click the

button to open the
Node Properties dialog.
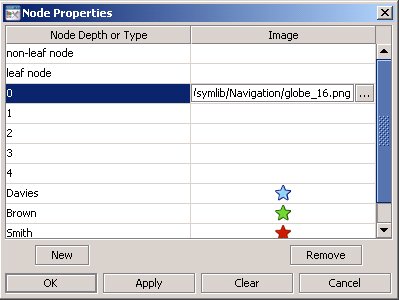
In the
Node Properties dialog, the
Node Depth or Type column lists the available nodes. The first two rows,
non-leaf node and
leaf node, indicate the default settings: non-leaf nodes in the tree use a folder image and leaf nodes use a document image. To change the default setting, click the
button in the
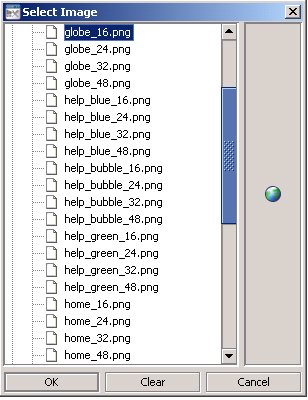
Image column for the node and choose an icon from the
Select Image dialog.
The next five rows, numbered 0 - 4, represent the node depth or level, zero (0) being the root node. The Image column lists the icons being used for each node. By default, the Image column for all of those rows is <blank>, indicating that the non-leaf node and leaf node icon assignments are used. Icon assignments override non-leaf node and leaf node assignments.
You can also assign an image icon based on node level. Such an icon provides a visual indication of where you are while navigating in the tree. To assign an image to a specific node level in the tree, click the
button for one of the rows numbered
0 - 4 in the
Image column and choose an icon from the
Select Image dialog. Repeat for each node level.
You can assign an image icon based on node labels you create that describe the nodes as a group. For example, suppose the
Node Depth or Type column contains the string
Davies with the

image selected.
This means that all nodes whose label matches the
Davies string display the
image in the tree.
To assign an image to a specific node type in the tree, assign a column name in the nodeTypeColumnName property. Select the nodeTypeProperties property in the property sheet, then click on the button to open the Node Properties dialog. Click New to add a custom row to the table. A drop-down list of values for the column assigned to the nodeTypeColumnName property appears in the Node Depth or Type column. Select a column name from the drop-down list. Click the button in the Image column and choose an icon (to use for all nodes that have that column name in the valueTable row that corresponds to the node) from the Select Image dialog.
You can also type a string in the Node Depth or Type column and the Image column.
To not use an icon, in the Node Properties dialog, select the icon in the Image column, then click Clear.
Note that the root node is invisible if the rootNodeLabel property is blank.
Copyright © 2013
Software AG, Darmstadt, Germany and/or Software AG USA Inc., Reston, VA, USA, and/or Terracotta Inc., San Francisco, CA, USA, and/or Software AG (Canada) Inc., Cambridge, Ontario, Canada, and/or, Software AG (UK) Ltd., Derby, United Kingdom, and/or Software A.G. (Israel) Ltd., Or-Yehuda, Israel and/or their licensors.