This document covers the following topics:
SQL Gateway Configuration of the Adabas Demo Files (Employees and Vehicles)
Connecting Simple Data Masking™ to the Adabas Employees and Vehicles Files
Simple Data Masking™ and GTMapper™ are Grid-Tools products which provide all the tools needed to de-identify, scramble and obfuscate your test data from a variety of sources. These products have been extended to support the masking of Adabas databases via the ConnX SQL Gateway. For more information, please refer to the Simple Data Masking™ User Guide.
To install the software, follow the instructions provided in the
Simple Data Masking™ User
Guide. If you are not using the Windows
setup_gtsdm.exe, simply unpack your downloaded file and save the
GTSDM folder to an appropriate directory on your machine.
Simple Data Masking™ is a Java application which connects to Adabas via the ConnX SQL Gateway using JDBC. Before attempting to connect to Adabas, via Simple Data Masking™, it is recommended that you first test the SQL Gateway using JDBC. To do this, run the JDBC Sample Application supplied with the SQL Gateway. To connect successfully, you will need to have correctly configured the ConnX Data Dictionary, started the ConnX JDBC Server service and started the Adabas databases to which you wish to connect. If you are unsure as to how to set any of these components, please refer to the SQL Gateway documentation.
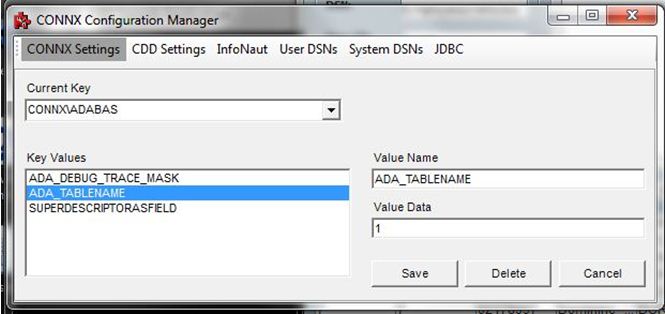
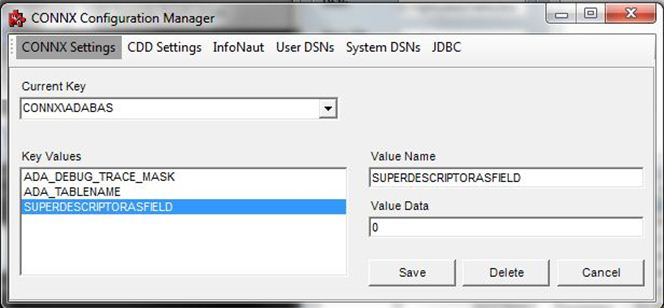
CONNX\ADABAS.ADA_TABLENAME = 1
	CONNX\ADABAS.SUPERDESCRIPTORASFIELD = 0
	CONNX\ADABAS.ADA_ISNNAME = 1

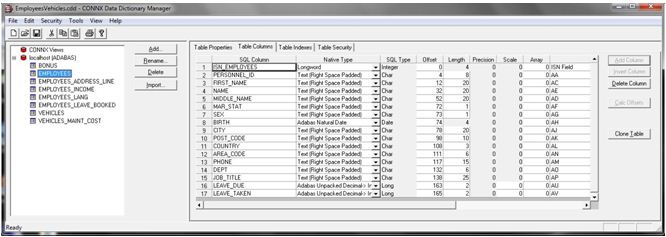
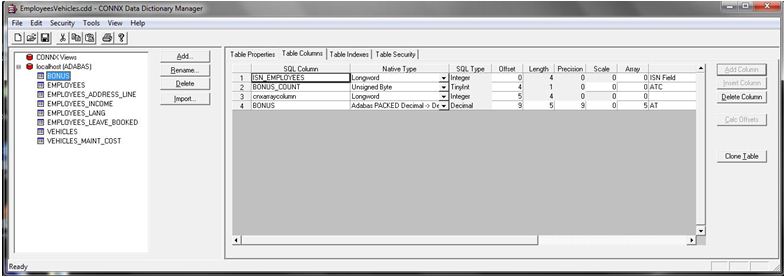
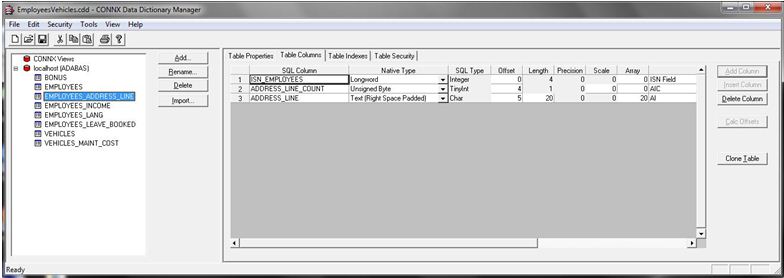
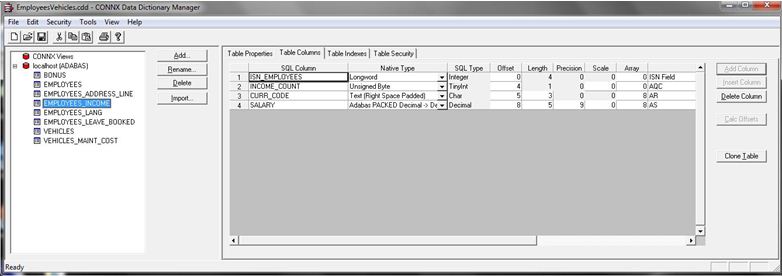
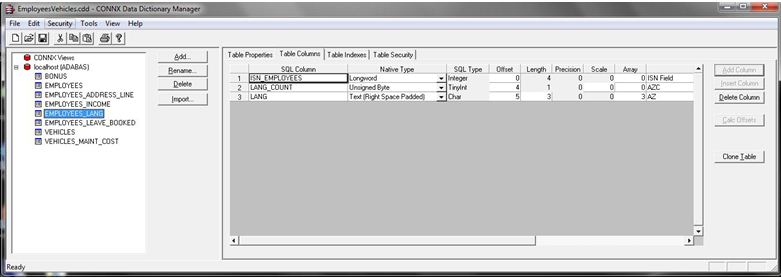
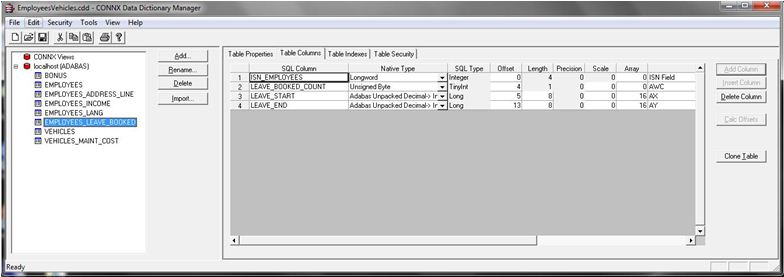
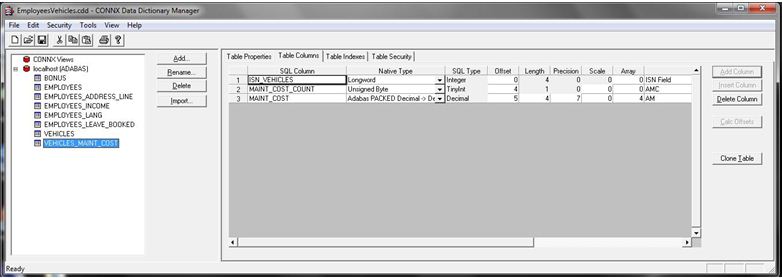
The following screen shots show the ConnX Data Dictionary (CDD) descriptions of the Employees and Vehicles files as used in the examples given in this guide.

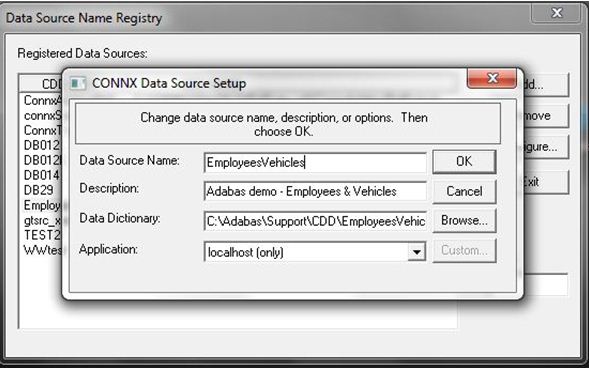
The SQL Gateway DSN connection used for the Employees and Vehicles files is as follows:
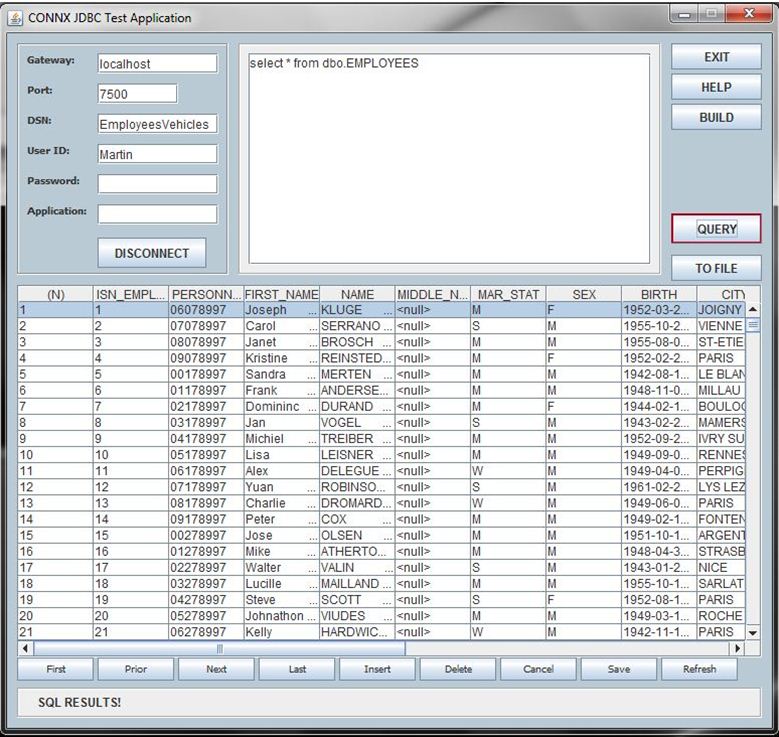
To test the connection to the above data source run the ConnX JDBC Test Application to connect and execute a simple query:
Simple Data Masking™ takes three input parameters:
The name of a connection profile file
The name of a mapping .csv file
The name of an options file
The connection profile file is a .txt file which for the SQL Gateway definition given above would contain the following lines:
DBMS=ADABAS
datasource=localhost
username=Martin
defaultschema=dbo
host=EmployeesVehicles
The parameter host corresponds to the Data Source
Name used in the SQL Gateway DSN. If a password has been set for the given
username, an extra parameter
password=yourpassword should
be added to the connection file.
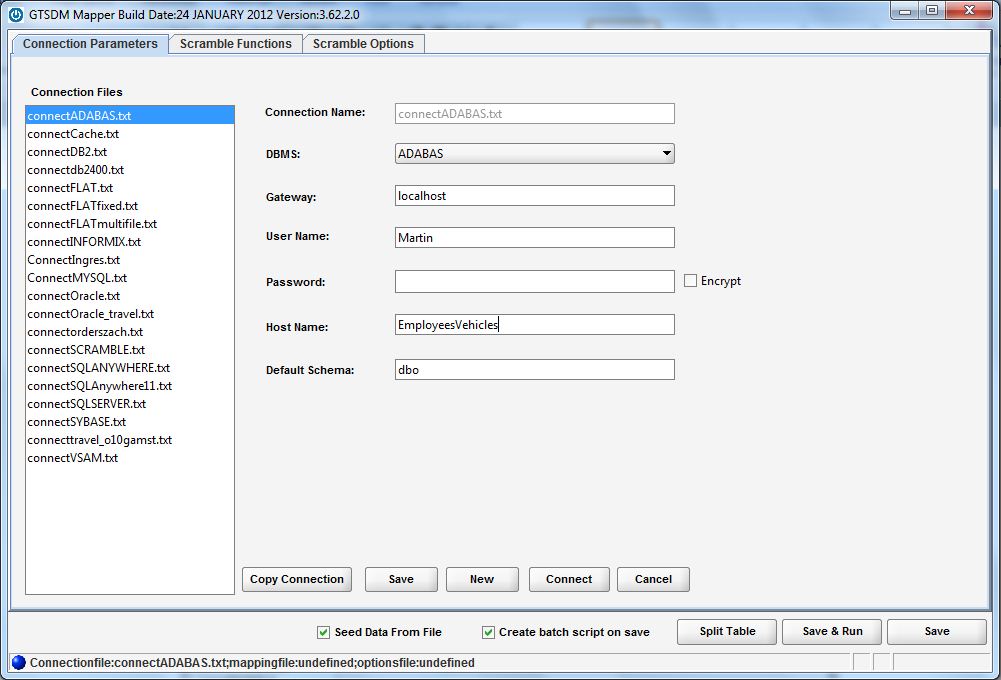
GTMapper™ helps you to create the input parameter files to GTSDM. To
create a connection profile file run GMAPPER.exe (or
GTMAPPER.jar), the following screen is presented:

![]() To create the required input parameter files
To create the required input parameter files
In the DMBS dropdown select ‘ADABAS’
Enter values for Gateway, User Name and Password (if applicable), Host Name and Default Schema (if required). The values for these correspond to those supplied to the SQL Gateway JDBC Sample Application, which the exception that this application does not use a default schema option, and “Host Name” in Simple Data Masking™ corresponds to “DSN” in the Sample Application.
To save your connection profile, you can click on the button in the bottom-right corner of the window.
Press the button.
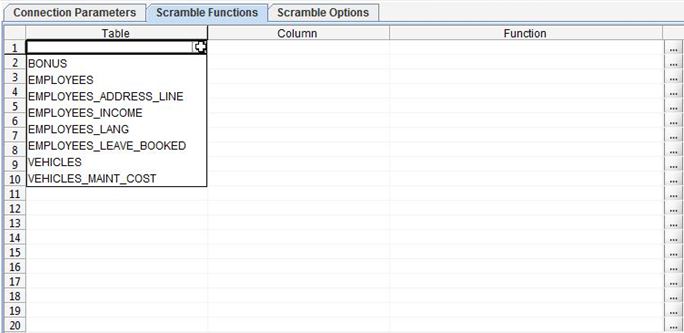
If your connection parameters have been correctly specified and the SQL Gateway and Adabas are running, GTMapper™ will display the Scramble Functions tab. The first column in the Scramble Functions table provides drop-downs displaying all the tables available in your current connection:
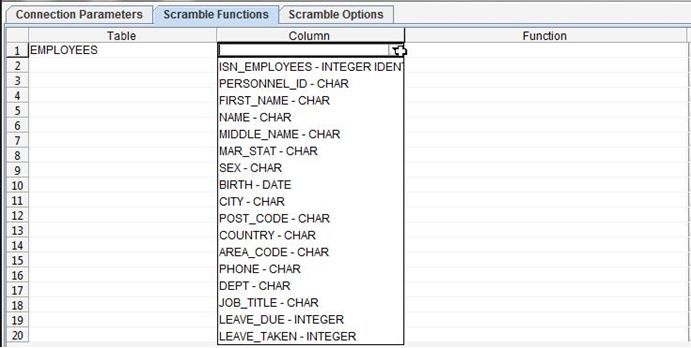
Once you have selected a table, click in the corresponding row in the Column column. This will present a drop-down menu showing all available columns within the table and their data types:
Having selected a table and column, the Function column also provides a drop-down containing all applicable masking functions (the masking functions shown depend on the data type of the column, for example, some functions are only applicable to date columns):
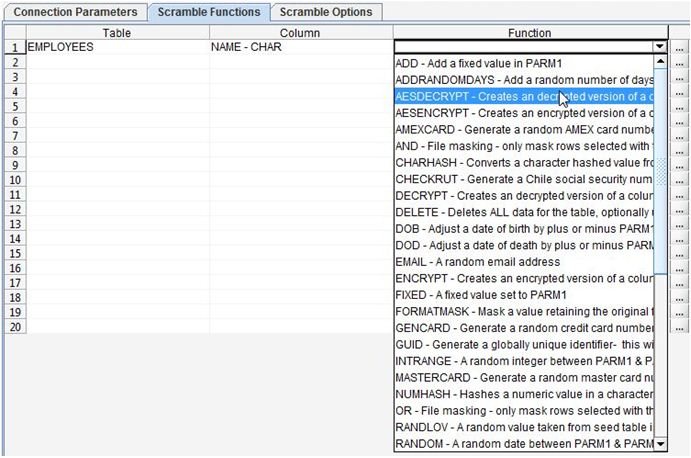
Different functions require different parameters, which should be entered in other columns in the Scramble Functions window. For more details on the available masking functions and what parameters they require, please see the Simple Data Masking™ User Guide.
The Scramble Options tab provides a list of run options which will be applied when you run Simple Data Masking™ to perform a masking run. For example, if you wished to produce an audit file detailing all masking performed you could populate the option as below:
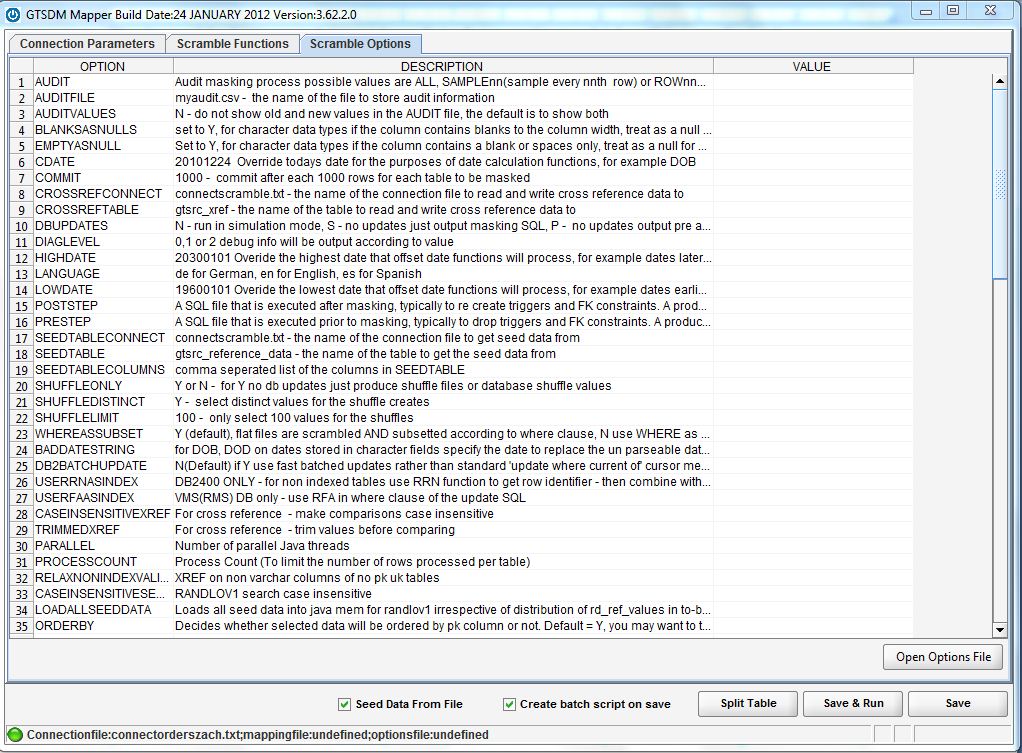
For more details on Scramble Options, please see the corresponding section in the Simple Data Masking™ User Guide.
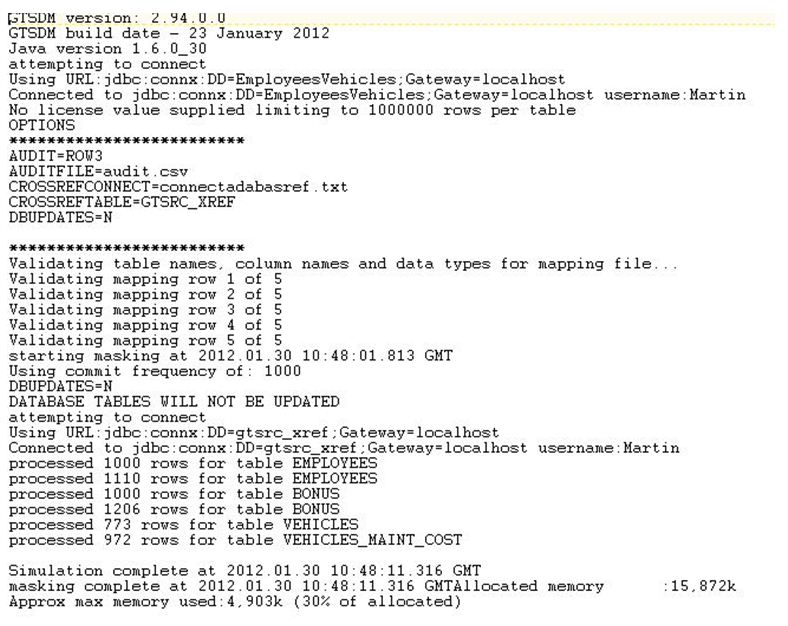
Once you have defined your Connection Profile, Scramble Functions and Scramble Options, click the button to save the files created and run Simple Data Masking™. When Simple Data Masking™ runs, it will produce a log file giving informational, warning and error messages.
Having created the parameter files to Simple Data Masking™, you can run the program via a command executed at a command prompt or by a batch script:
GTSDM.exe connection.txt mapping.csv options.txt
or
java -jar GTSDM.jar connection.txt mapping.csv options.txt
Cross-referencing allows you to maintain data integrity across tables/files and across databases. This functionality is provided by using a cross-reference table residing on a database. The cross-reference table can reside on any DBMS supported by Simple Data Masking™, including Adabas.
The connection to an Adabas cross-reference table is made via the SQL Gateway and consequently, the table should be defined in the ConnX Data Dictionary and DSN registry:
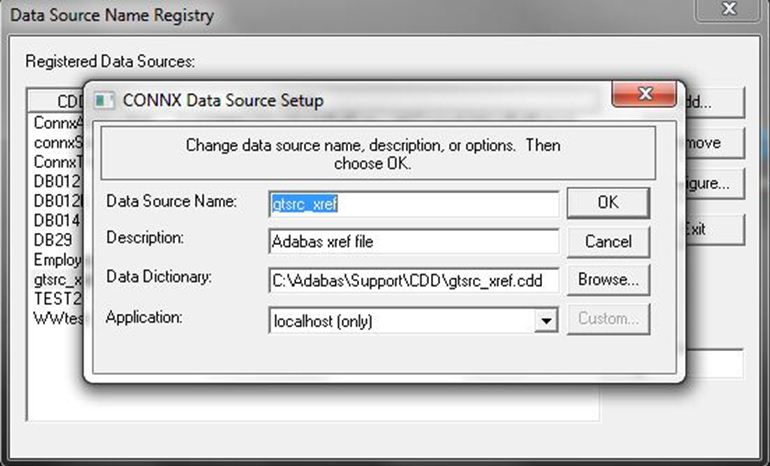
Simple Data Masking™ is notified of the location of the cross-reference table by the following lines in the options file:
crossreftable=GTSRC_XREF
crossrefconnect=connectadabasref.txt
The first option names the cross-reference table; the second option names the connection file for the table. This connection file is in the same format as the connection file for the target database to be masked, for example:
datasource=localhost
username=Martin
DBMS=ADABAS
host=gtsrc_xref
defaultschema=dbo
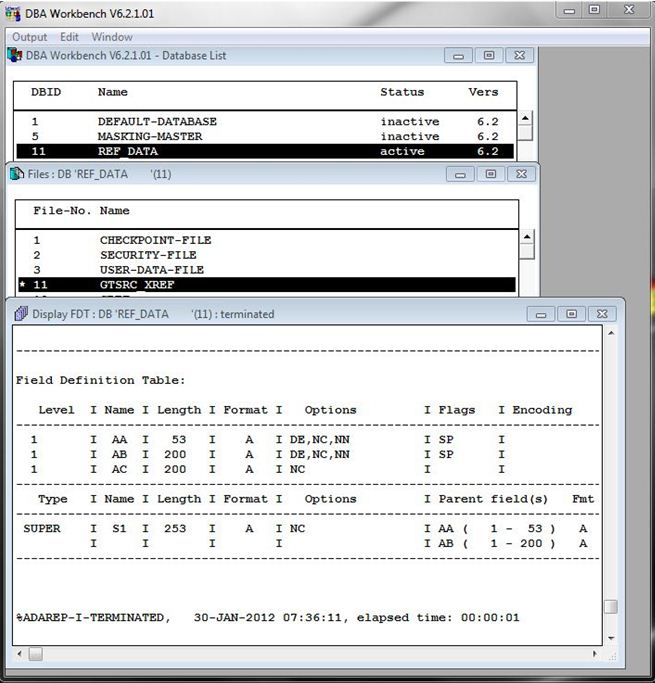
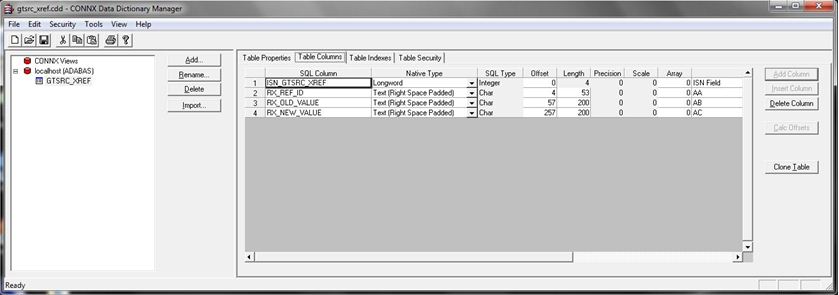
The FDT and DDM defining the cross-reference table in Adabas is given in Appendix A.
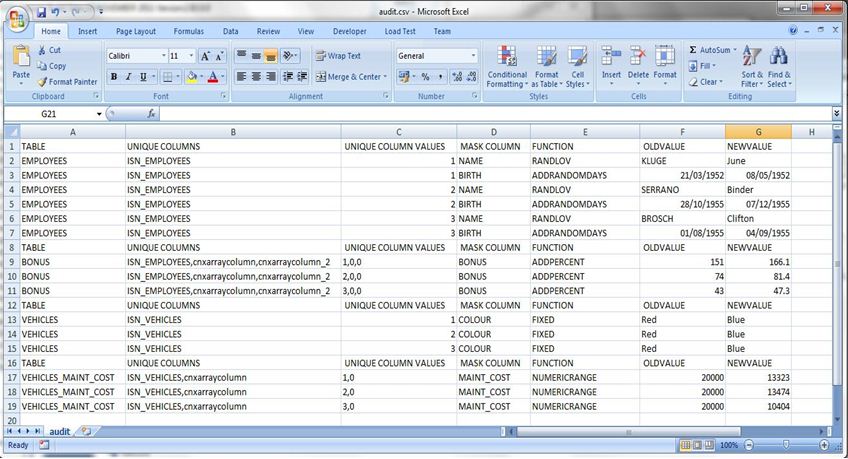
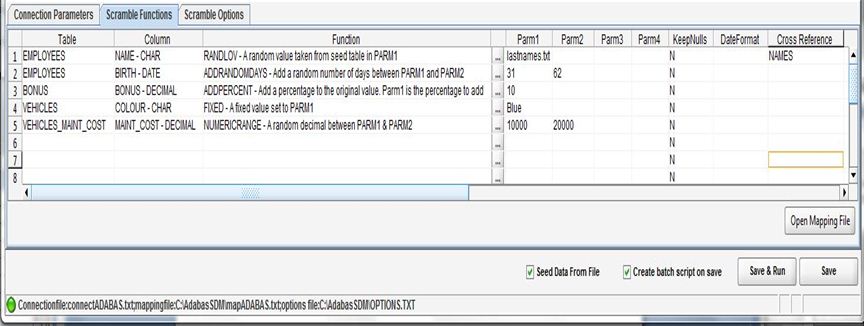
The following GTMAPPER™ screen shot shows a variety of masking functions being applied to fields in the Employees and Vehicle files:
When saved as a .csv file for input to GTSDM, this looks as follows:
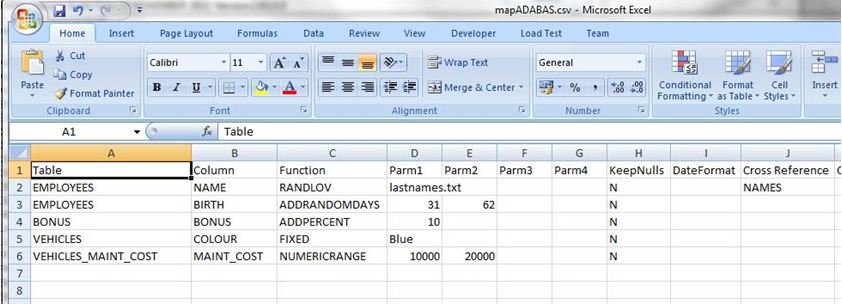
The mappings being applied here are as follows:
NAME
is masked with a value randomly selected from a seedlist called
lastnames.txt, this field is cross-referenced using a
cross-reference identifier of “NAMES”.
BIRTH
is masked by adding a random number of days between 32 and 62 to the
existing field value.
BONUS
is increased by 10%.
COLOUR
is set to “Blue”
MAINT_COST
is set to a random number between 10000 and 20000.
The following options settings are defined:
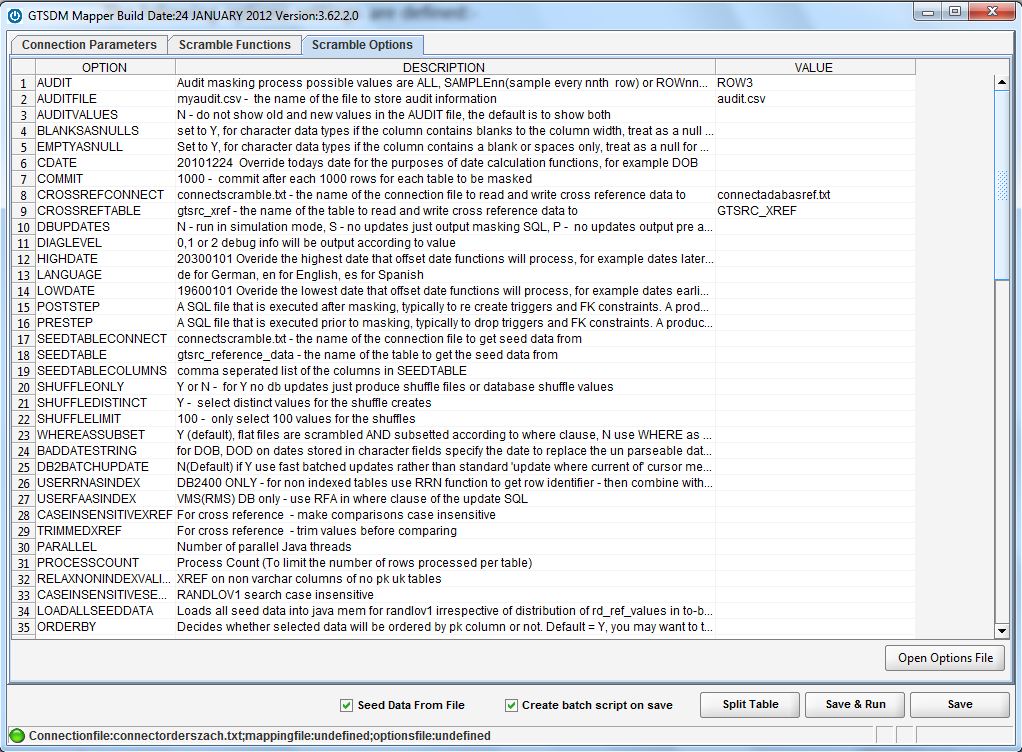
These settings mean that:
The first 3 rows masked will be recorded in an audit file called
audit.csv.
The connection file for the cross-reference table is called
connectadabas.txt.
The cross-reference table is called GTSRC_XREF.
The audit and log files resulting from this mapping are as follows: