
CONNX for VSAM/VSE provides an automated installation client application that transfers the CONNX server components to the target VSE host via TCP/IP FTP. To succeed, the automated FTP step requires a target VSE library defined in VSAM-managed space. The target library must be defined manually, either via the following CONNX-supplied template and FTP, or by using the VSE resource-definition panels. To use the CONNX installation template, follow the steps below:
The CONNX VSE installation template is copied to the CONNX VSE installation directory on the client machine; the default name is
C:\connx32\vsam\templates\ftp\vse\cnxlibv$.dat
Using your editor of choice, such as MS Notepad, Wordpad, Write, etc., open the cnxlibv$.dat file and make the following substitutions for the template variables defined in the following table:
CONNX for VSAM - VSE Installation Template Substitutable Variables
|
Variable |
Definition |
|---|---|
|
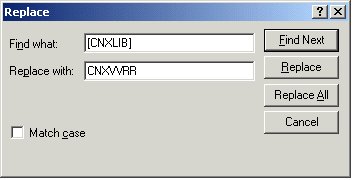
[CNXLIB] |
The 1-7 character CONNX VSAM library name defined in the [CNXLIBP] CONNX library VSAM cluster; the default is CNXVVRR. |
|
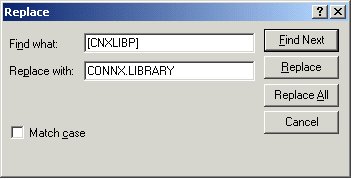
[CNXLIBP] |
The 1-44 character fully-qualified VSE VSAM cluster name which contains the CONNX V08R08 VSAM library; the default is CONNX..LIBRARY. |
|
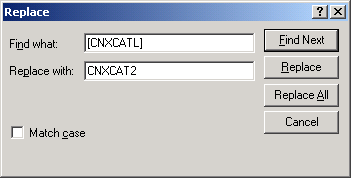
[CNXCATL] |
The 1-7 character VSE standard label which references the physical data set name of the VSAM user or system catalog ([CNXCATP] ). |
|
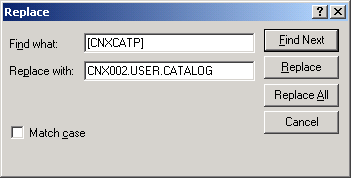
[CNXCATP] |
The 1-to-44 character physical data set name of the VSE VSAM user catalog into which the CONNX VSAM-managed library [CNXLIBP] is defined. If left blank, the CONNX library is defined in the default VSE system catalog. |
|
[SAMPLEVOLSER] |
The 1-6 character DASD volume serial number on which the CONNX VSE VSAM-managed library is installed: no default. |
A sample edit session appears below:


After making the substitutions
in the cnxlibv$.dat template, visually inspect the JCL and move each
line continuation character ( a rightmost capital X preceded by a
comma and one or more blanks ) to column 72; truncate all data beyond
column 72.
The control records for the standard label delete and add job steps
are column-sensitive; examples of unsubstituted and substituted control
records follow:
Column Rule Lines
Delete Step, template version:
Substituted example:

Add Step,
template version:

Substituted example:

Delete the column rule lines in the template and save the cnxlibv$.dat file as a new file; for example, cnxlibv0.jcl.
Via the Windows command prompt, start an ftp session to the target VSE host. Change directory to the VSE POWER Reader queue and submit the cnxlibv0.jcl job:
>ftp
>open 123.456.788.812
>user [USER]
>password [PASSWORD]
>cd POWER\RDR\A
>put cnxlibv0.jcl
This job should execute in less than a minute. Within the same ftp session, retrieve the output JCL from the POWER List Queue:
>cd "..\..\LST\A"
>dir
Given the default job name defined in the cnxlibv$.dat template, a job with the following naming convention is displayed:
CNXLIB.00037.00    04/17/03
  08:32   94  11  79  3 D SYSTCPIP
Retrieve the job output by issuing the following command:
>get CNXLIB.00037.00
The sample output below is from a run which deletes CONNX sub-libraries and libraries in VSAM-managed space before redefining new versions:
1// JOB  CNXLIB DEFINE CONNX FOR VSAM/VSE VSAM-MANAGED
 LIBRARY       DATE 04/17/2003, CLOCK 08/32/01
 // EXEC LIBR,PARM='MSHP'
1        DELETE SUBLIB=CNXVVRR.CNTL
0L252I NO LABEL INFORMATION FOUND FOR LIBRARY CNXVVRR
0L027I ABNORMAL END DURING DELETE COMMAND PROCESSING
0L113I RETURN CODE OF DELETE IS  8
0        DELETE SUBLIB=CNXVVRR.COPYBOOK
0L252I NO LABEL INFORMATION FOUND FOR LIBRARY CNXVVRR
0L027I ABNORMAL END DURING DELETE COMMAND PROCESSING
0L113I RETURN CODE OF DELETE IS  8
0        DELETE SUBLIB=CNXVVRR.OBJLIB
0L252I NO LABEL INFORMATION FOUND FOR LIBRARY CNXVVRR
0L027I ABNORMAL END DURING DELETE COMMAND PROCESSING
0L113I RETURN CODE OF DELETE IS  8
0        DELETE SUBLIB=CNXVVRR.RUNLIB
0L252I NO LABEL INFORMATION FOUND FOR LIBRARY CNXVVRR
0L027I ABNORMAL END DURING DELETE COMMAND PROCESSING
0L113I RETURN CODE OF DELETE IS  8
0        DELETE SUBLIB=CNXVVRR.SOURCE
0L252I NO LABEL INFORMATION FOUND FOR LIBRARY CNXVVRR
0L027I ABNORMAL END DURING DELETE COMMAND PROCESSING
0L113I RETURN CODE OF DELETE IS  8
11S55I  LAST RETURN CODE WAS 0008
 // EXEC IDCAMS,SIZE=AUTO
1IDCAMS  SYSTEM SERVICES                      TIME:
 08:32:02        04/17/2003   PAGE
   1
0
    DELETE CONNX..LIBRARY                -
           CLUSTER
 PURGE            -
           CATALOG
 (CNX002.USER.CATALOG)
0IDC3012I ENTRY CONNX.LIBRARY NOT FOUND
 IDC3009I ** VSAM CATALOG RETURN CODE IS 8 - REASON
 CODE IS IGG0CLCG-6
 IDC0551I **ENTRY CONNX.LIBRARY NOT DELETED
0IDC0001I FUNCTION COMPLETED, HIGHEST CONDITION CODE WAS
 8
0
0IDC0002I IDCAMS PROCESSING COMPLETE. MAXIMUM CONDITION
 CODE WAS 8
11S55I  LAST RETURN CODE WAS 0008
 // OPTION STDLABEL=DELETE
                   CNXVVRR
 1L63I  LABEL CNXVVRR NOT FOUND
 // EXEC IESVCLUP,SIZE=AUTO
1// EXEC IDCAMS,SIZE=AUTO
1IDCAMS  SYSTEM SERVICES                       TIME:
 08:32:05        04/17/2003   PAGE
   1
0
  DEFINE CLUSTER ( -
         NAME
 ( CONNX..LIBRARY )                 -
         TRACKS
 (300 30 )                               -
         SHAREOPTIONS
 (3)                              -
         RECORDFORMAT
 (NOCIFORMAT)                     -
         VOLUMES
 (CNX002)                              -
         NOREUSE
                                       -
         NONINDEXED
                                    -
         TO
 (99366))                                   -
         DATA
 (NAME ( CONNX..LIBRARY.@D@ ) )     -
         CATALOG
 (CNX002.USER.CATALOG)
0IDC0001I FUNCTION COMPLETED, HIGHEST CONDITION CODE WAS
 0
0
   IF LASTCC NE 0 THEN CANCEL JOB
0IDC0204I PRECEDING COMMAND BYPASSED DUE TO CONDITION CODES
0
0IDC0002I IDCAMS PROCESSING COMPLETE. MAXIMUM CONDITION
 CODE WAS 0
11S55I  LAST RETURN CODE WAS 0000
 // OPTION STDLABEL=ADD
 // DLBL CNXVVRR,'CONNX..LIBRARY',,VSAM,CAT=CNXCAT2,DISP=(OLD,KEEP)
 // EXEC IESVCLUP,SIZE=AUTO
1// EXEC LIBR,PARM='MSHP'
1        DEFINE LIB=CNXVVRR
             REPLACE=YES
0L113I RETURN CODE OF DEFINE IS  0
0        DEFINE SUBLIB=CNXVVRR.CNTL
     REPLACE=YES
0L113I RETURN CODE OF DEFINE IS  0
0        DEFINE SUBLIB=CNXVVRR.COPYBOOK
 REPLACE=YES
0L113I RETURN CODE OF DEFINE IS  0
0        DEFINE SUBLIB=CNXVVRR.OBJLIB
   REPLACE=YES
0L113I RETURN CODE OF DEFINE IS  0
0        DEFINE SUBLIB=CNXVVRR.RUNLIB
   REPLACE=YES
0L113I RETURN CODE OF DEFINE IS  0
0        DEFINE SUBLIB=CNXVVRR.SOURCE
   REPLACE=YES
0L113I RETURN CODE OF DEFINE IS  0
11S55I  LAST RETURN CODE WAS 0000
 EOJ CNXLIB    MAX.RETURN CODE=0008
                     DATE
 04/17/2003, CLOCK 08/32/13,        DURATION
   00/00/12
Notes:
For a first-time run, the return codes from the first step:
// EXEC LIBR,PARM='MSHP'
will be 8, which is expected.
For a first-time run, the return code from the IDCAMS statement:
DELETE CONNX.VXXRXX.LIBRARY -
CLUSTER PURGE -
CATALOG (CNX001.USER.CATALOG)
will be 8, which is expected. All subsequent return codes should be 0 or 4.
The VSE volume and VSAM user catalog physical data set and data label names in the above example are CNX002, CNX002.USER.CATALOG, and CNXCAT1. These values are substituted into template variables [SAMPLEVOLSER], [CNXCATP], and [CNXCATL].
Make the CONNX for VSAM - VSE library available for FTP access.
Depending on the TCP/IP security rules of the target VSE system, the newly allocated CONNX library may not be immediately available for ftp read/write access. The CONNX VSAM library can be manually defined to the VSE TCP/IP partition via VSE console commands as follows:
msg f7
AR 0015 1I40I READY
F7-0100 IPN300I Enter TCP/IP Command
102 def file,pub=CNXVVRR,dlbl=CNXVVRR,type=lib,READONLY=NO
F7 0098 IPN264I File defined, Dataset: CNXVVRR
The CONNX for VSE-VSAM library can be permanently defined to the TCP/IP partition via the batch JCL provided in member IPINIT00 of the TCP/IP for VSE installation library. The control record syntax is identical to the console command:
DEFINE FILE,PUBLIC='CNXVVRR',DLBL=CNXV8R8,TYPE=LIBRARY,READONLY=NO
To verify that the new CNXVVRR library is defined and available for ftp, start a Command Prompt window, and then an ftp session to the target host. Once logged on, you can navigate to the CNXVVRR directory and list the subdirectories:
230 User logged in, proceed.
ftp> cd cnxv8r9
250 Requested file action okay, completed.
ftp> dir
200 Command okay.
150 File status okay; about to open data connection
CNTL <Sub Library> 0 1 04/17/03 08:32
COPYBOOK <Sub Library> 0 1 04/17/03 08:32
OBJLIB <Sub Library> 0 1 04/17/03 08:32
RUNLIB <Sub Library> 0 1 04/17/03 08:32
SOURCE <Sub Library> 0 1 04/17/03 08:32
You are ready to begin the CONNX for VSAM/VSE automated installation. Click Start, point to All Programs, point to CONNX Driver and then click CONNX Server Setup. Follow the steps described in the next section, "Part 2: Installing the CONNX VSAM Components on a VSE Server".