
Click the Import button in the CONNX Data Dictionary Manager window.
The Import CDD dialog box appears. Select Enterprise OLE DB/ODBC Adapter from the Import Type list box in the Import CDD dialog box.
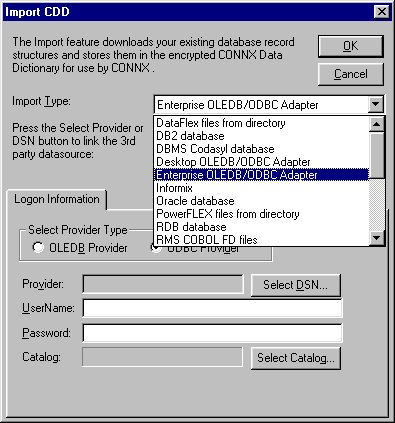
Select OLE DB Provider under Select Provider Type, and then click the Select Provider button in the Logon Information pane.
Select an OLE DB Provider from the list shown in the Data Link Properties dialog box. Click the Next button or the Connection tab.

Enter a data source name in Item 1 on the Connection tab in the Data Link Properties dialog box.

Enter a user name and password in section 2.
Select an object from the list box in Item 3. Click the Test Connection button to verify that it is available. Click the OK button.
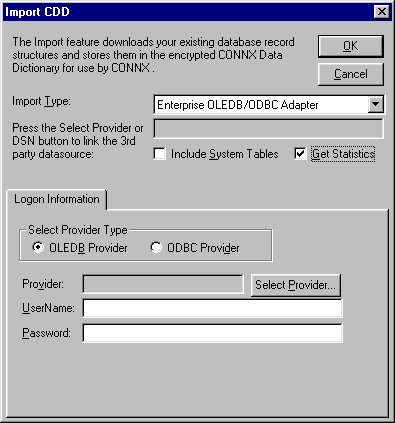
The Import CDD dialog box appears. Reenter the user name and password, if required.
Normally, only user-defined tables can be selected for import. Select the Include System Tables check box to enable the import of non-user-defined tables.
Select the Get Statistics check box to identify the table sizes. This is used by CONNX query optimization. Click the OK button.
The CONNX Import Table Selection dialog box appears. Click the Add or Add All button to move the database objects to the Select Tables for Import pane.

Click the OK button to import the selected objects into CONNX. The imported catalogs appear in the list of accessible objects in the CONNX Data Dictionary Manager window.