
Click the Start
button, and then point to All Programs.
Point to CONNX Driver then
click DSNRegistry. The Data
Source Name Registry window appears.
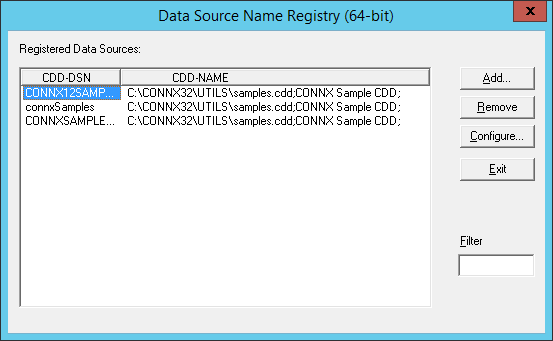
Click the Add
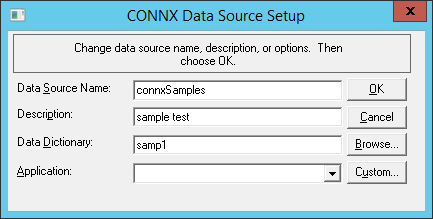
button. The CDD Data Source Setup
dialog box appears.
Note: The Samples CDD DSN for ODBC is created automatically when the CONNX JDBC component is installed.
Type a 4- to 32-character logical name for the CDD in the CDD DSN text box.
Type an optional description of the contents of the CDD in the Description text box.
Type the absolute path to the location of the CDD files in the CDD Name text box.
Enter the name of the application used in the CDD, for example, RMS, Oracle, or DBMS, from the Application list box.
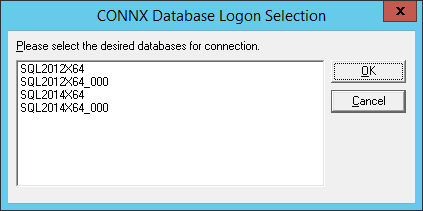
The custom button becomes active when the (Connect to selected databases) is selected from the Application combo box. When you press the Custom button, a list of the databases in the CDD appears, allowing you to select one or all of the databases for connection.
Click the OK button to return to the Data Source Name Registry dialog box.
Click the Exit button.