
Click the Import button in the CONNX Data Dictionary Manager window.
The Import CDD dialog box appears. Select RMS Text Specification File in the Import Type list box.
Type the full RMS path for the text file you created, for example, DKA600:[MYDIR]MYIMPORT.TXT
Note: If CONNX detects more than one record layout when importing, multiple data dictionary entries are created.
Note: Multiple files can be specified in the text box by separating each file name with a comma. The allowable limit is 255 characters.
You can also use the Browse button below the text box to locate files to import. If you do not need to use the Browse button, proceed to Step 6.
Click the Browse button. If you are not connected to a VMS server, the CONNX Database Login dialog box appears.
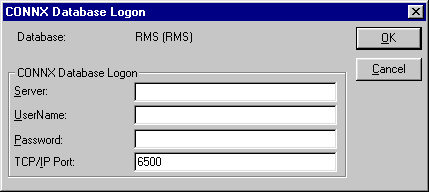
Type the server name or IP address, a user name, and password in the corresponding text boxes.
Port 6500 is listed in the TCPIP Port text box by default.
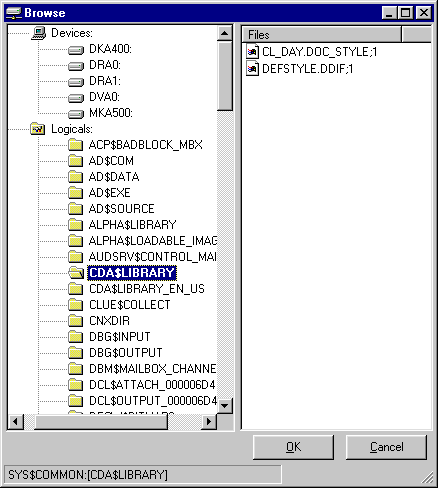
Click the OK button. The Browse dialog box appears.
Select the file(s) in the Browse dialog box, and then click the OK button to return to the Import CDD dialog box.
Enter the following information in the Import CDD dialog box:
Type the server name or IP address, a user name, and password in the corresponding text boxes on the Logon Information tab.
Port 6500 is listed in the TCP/IP Port text box by default.
Select the destination database from the Destination Database list box. See Adding a database connection for more information.
Click the OK button.
![]() RMS Text File Import Specification
RMS Text File Import Specification
![]() CONNX Data Types
CONNX Data Types