
Prior to installing DataSync, please read Installing SSL Certificate for use with REST server. If you intend to use your own SSL certificate, it should be bound to port 9500 prior to running the DataSync installation procedure. If the DataSync installer does not find an SSL certificate bound to port 9500, it will create a self-signed certificate and bind it to port 9500 automatically.
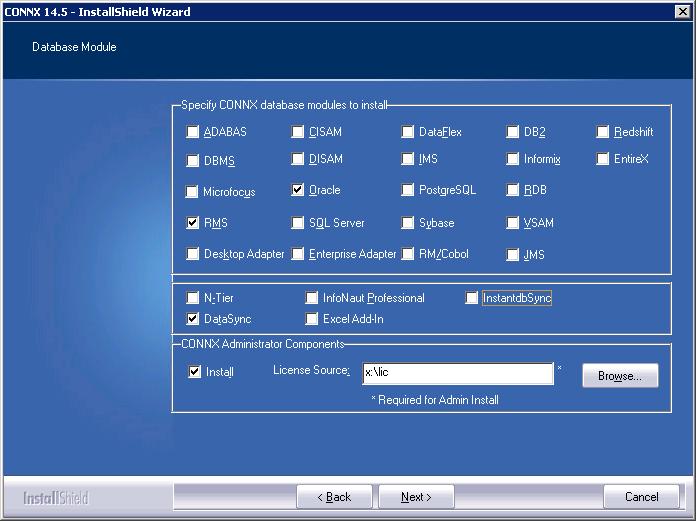
DataSync is installed during a CONNX installation. When the Database Module screen is shown, DataSync should be checked. It is necessary to have the appropriate DataSync license. See the CONNX Installation Guide for more information.
Install CONNX. The DataSync
module must be licensed and selected before continuing with installation.
Click the Next button.
Important:
If you already have one or more
CONNX licenses, you must select the check box for each database for
which you are licensed. Failure to do so will cause the license for
that database to uninstall.
Once CONNX and DataSync are installed, you may need to restart your computer. Please do so if prompted.
Confirm that the CONNXStore Database Server Service, the CONNXDataSync REST Service and the CONNX DataSync Schedule Service are running by going to the Start menu. Point to Settings, and then click Control Panel. Click Administrative Tools, and then click Services. The Status column for both services should read Started. Close Control Panel.