Select CDD
The Select CDD step provides functionality to upload a new CDD to the
DataSync Server, Download a CDD from the DataSync Server to the local
machine where the client is running in a browser or chose a CDD that already
exists on the DataSync Server for activation.
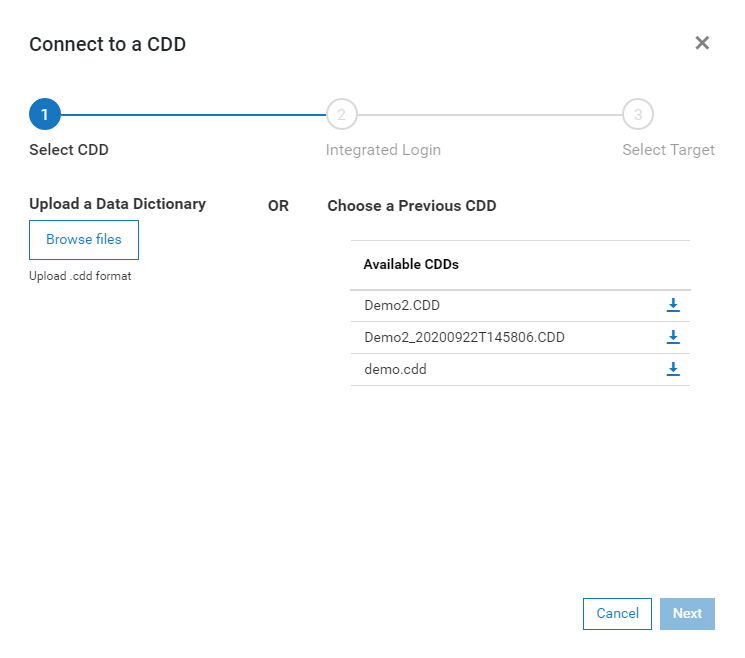
- Upload a Data Dictionary
Before a CDD can be activated, it must be on the DataSync Server. A
CDD can be created and edited on a local machine and then uploaded
to the server when it is ready for use. To upload a CDD, click
the Browse files button and then select the CDD from the File Open
dialog. Once the CDD has been successfully uploaded, it will
appear in the Available CDDs list.
- Choose a Previous CDD
The Available CDDs list is a list of CDDs that reside in the connx32\datasync\cdd
directory on DataSync server. Any time a CDD is uploaded, it
will be added to this list. If a CDD is uploaded and there is
a name conflict, the previous CDD of the same name will be renamed
with and underscore followed by a timestamp. In the above example,
the CDD Demo2.CDD was uploaded when there was already a CDD with that
name. In this case, the original Demo2.CDD was renamed to Demo2_20200922T145806.CDD.
- Download a CDD
When multiple users are editing CDDs, it is recommended that a CDD
be downloaded from the server before making edits to it. This
keeps the primary copy of the CDD on the server. If edits need
to be made, the CDD should be downloaded, edited and then uploaded
again. In this case, the previous version will be renamed with
a timestamp. If you wish to revert to a previous version of
the CDD, that CDD can be activated.
Once a CDD has been selected from the Available CDDs list, press Next
to proceed to Step 2:
Integrated Login
