After confirming the RDBName, determine the host TCP/IP address and port number.
When DB2 UDB 5.x or 6.x is installed, it auto-detects the TCP/IP stack and updates its configuration and the TCP/IP services
file. You can verify the TCP/IP settings via the DB2 Control Center or the DB2 Command Line Processor.
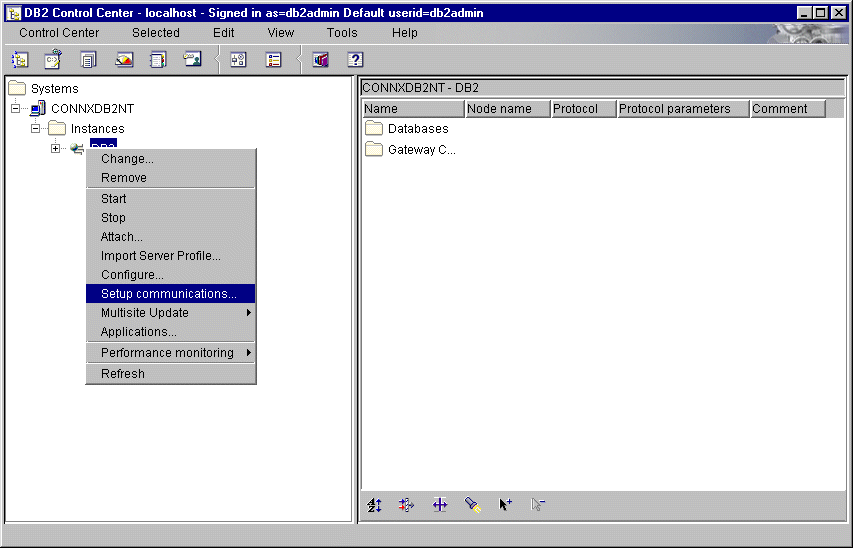
Start the DB2 Control Center.

Click on a DB2 instance in the left pane. Right-click, and select Setup Communications.
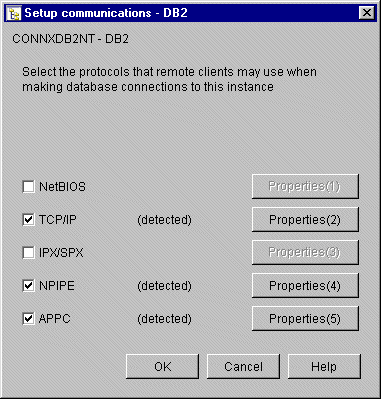
The Setup Communications – DB2 dialog box appears.

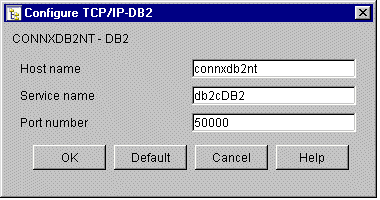
If TCP/IP is preconfigured, the TCP/IP check box is checked. Click the Properties button to the right of the TCP/IP check box in the Setup Communications dialog box to display the symbolic host name, service name, and port number.

To resolve the symbolic host name into a dotted TCP/IP address, open the hosts file on your local machine, or open a command prompt window and enter the following command:
ping hostname
A successful ping returns one or more lines as follows:
Pinging the hostname [123.456.789.012] with 32 bytes of data.
Reply from 123.456.789.012: bytes=32 time<10ms TTL=64
You can connect to the target host using either the symbolic host name or the dotted TCP/IP address. This value is entered in the TCP/IP address text box in the CONNX CDD Import dialog box.