This document describes the administrative tasks that you can perform with the Adabas System Coordinator for Open Systems graphical user interface.
Adabas System Coordinator for Open Systems is maintained and monitored using Software AG's cross-product and cross-platform product management framework System Management Hub (SMH). If you are not familiar with using SMH, please refer to the SMH documentation for further information.
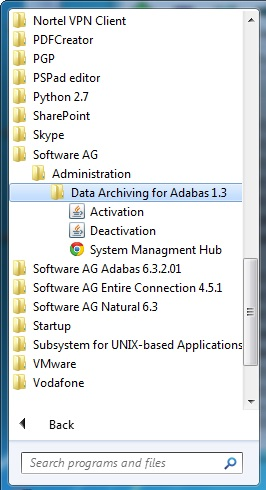
If System Management Hub is available on your local machine, the install process creates a Start Menu entry; an example screen shot follows:
If no Start Menu entry is available, go to your browser and use http://localhost:10010/smh (assuming defaults have been used for the System Management Hub install) or use your normal entry to the System Management Hub.
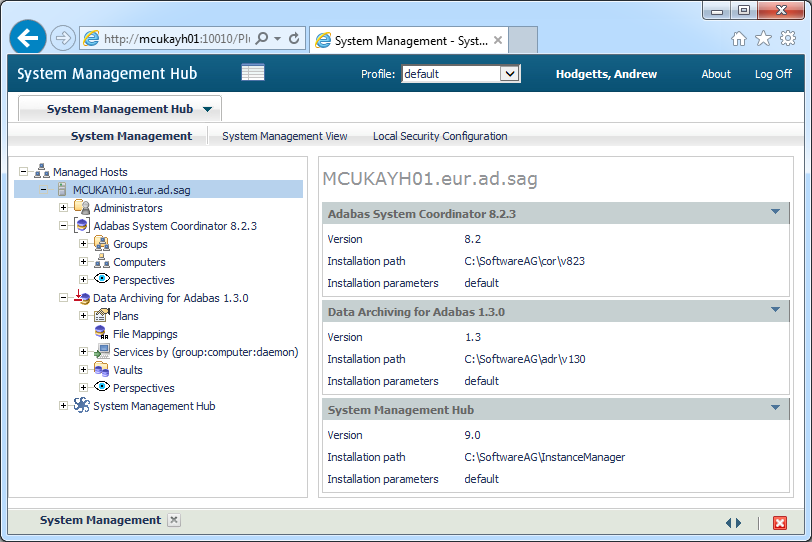
The SMH screen is divided into two frames: the navigation frame on the left; and the content frame on the right. You can navigate within the navigation tree using expand (+) and minimize (-), selecting an object and then left clicking or right clicking on the object depending on the type of operation you wish to perform.
The following is a typical SMH screen:
Each computer where Adabas System Coordinator for Open Systems is to be installed and run must be defined. This is usually performed automatically during the installation so take great care if you are altering these definitions manually. Without a full definition of a computer, other Adabas System Coordinator components will not run (on that computer).
 To define a new Computer:
Select and right click the Computers node within the Adabas System Coordinator navigation tree, then select Add Computer. The Add Computer window will appear.
Enter the following information for the new Computer:
| Field | Description |
|---|---|
| Node (Short) Name |
1-32 characters to be used as the name for the Computer. This is the name that will appear under the Computers node within the Adabas System Coordinator navigation tree and in selectable drop-down boxes where appropriate. Names are case-sensitive, the first character must be alphabetic, all other characters can be either alphabetic or numeric. The only special character permitted is underscore. |
| Fully Qualified Hostname |
The fully qualified hostname of the computer being defined. |
| Description |
A free-form text description. |
Click the Add Computer button to add the new Computer.
A Group represents a logical network where related Adabas System Coordinator components are to run. The extent of the network is chosen by you according to where related Adabas System Coordinator components (and the sibling products that dock into them) are to run. An Adabas System Coordinator group can run within a single computer or across as many computers as you wish.
To add a new Group:
Select and right click the Groups node within the Adabas System Coordinator navigation tree, then select Add Group. The Add Group window will appear.
Enter the following information for the new Group:
| Field | Description |
|---|---|
| Short Name |
1-32 characters to be used as the name for the Group. This is the name that will appear under the Groups node within the Adabas System Coordinator navigation tree and in selectable drop-down boxes where appropriate. Names are case-sensitive, the first character must be alphabetic, all other characters can be either alphabetic or numeric. The only special character permitted is underscore. |
| Description |
A free-form text description. |
Click the Add Group button to add the new Group.
You must define the list of computers that represent the scope of the Group. This may be a subset of the Computers defined earlier, from one computer up to as many as are defined.
Multiple Groups may be defined that run on partly the same, wholly the same or completely different lists of computers – it is your choice where each group is to run.
To add a new Computer where the Group is to run:
Select and right click on a Group that already exists, then select Add Computer. The following window will appear:
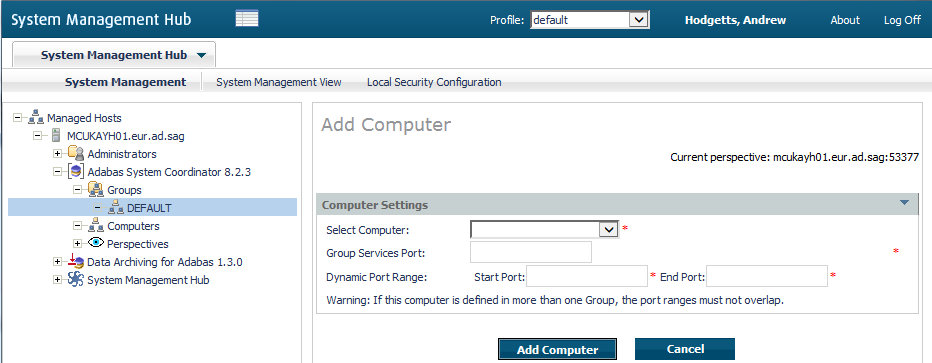
Enter the following information:
| Field | Description |
|---|---|
| Select Computer (drop-down list) | A drop-down list of all the Computers not yet defined for this Group will appear. Select the one you wish the Group to run on. |
| Group services port | This port is used for Group communications within and across Computers. The default is 53376. |
| Dynamic port range | These ports are used between components within and across Computers. The default range is 53377 to 53399. |
Click the Add Computer button to add the Computer to the Group.
A Daemon is the runtime component of Adabas System Coordinator which enables products to run as Services. By defining a daemon to run on a particular computer you are enabling sibling product services to also run on that computer. One or more daemons may be defined to run on a computer allowing different products to run separately or together in the same daemon.
To add a new Daemon to run on a Computer within a Group:
Select and right click on a Computer that already exists within a Group, then select Add Daemon. The following window will appear:
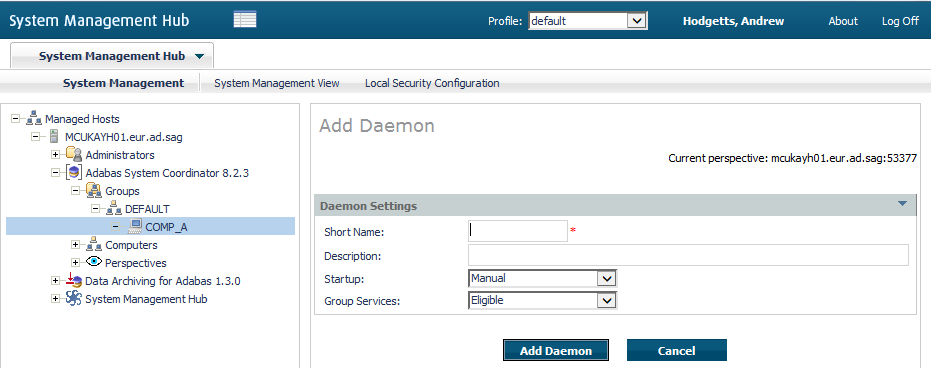
Enter the following information:
| Field | Description |
|---|---|
| Short name |
1-32 characters to be used as the name for the Daemon. This is the name that will appear under the selected Computer name within the selected Group. Names are case-sensitive, the first character must be alphabetic, all other characters can be either alphabetic or numeric. The only special character permitted is underscore. |
| Description |
A free-form text description. |
| Startup |
Manual: The Daemon will not start until you tell it to do
so. |
| Group services |
Eligible: The Daemon will be eligible to act as the leader
of the Group, handling group communications (etc). At least one Daemon must be
able to act in this way within a Computer. The first eligible Daemon to start
up will become the leader. Other eligible Daemons will automatically become the
leader if the existing leader is terminated or fails. |
Click the Add Daemon button to add the Daemon.
Various product services run within a Daemon. You can choose to run multiple services within one Daemon or you can chose to define multiple Daemons and run one service within each.
To add a new Service to a Daemon in a Computer within a Group:
Select and right click on a Daemon that already exists, then select Add service. The following window will appear:
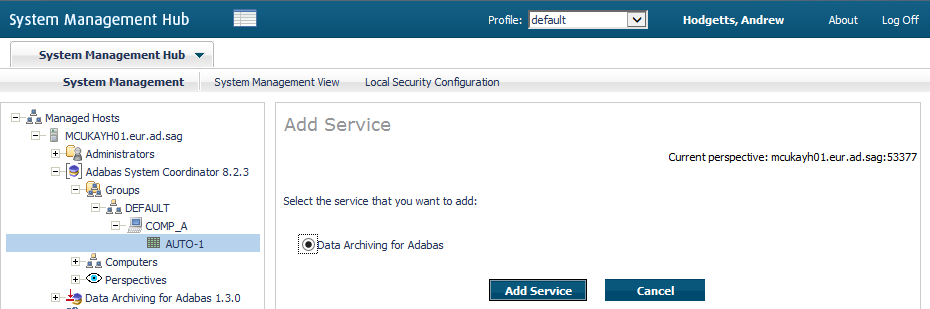
Enter the following information:
| Field | Description |
|---|---|
| Data Archiving for Adabas (button) | Select that Data Archiving for Adabas is to run in this Daemon. |
Click the Add Service button to add the Service.
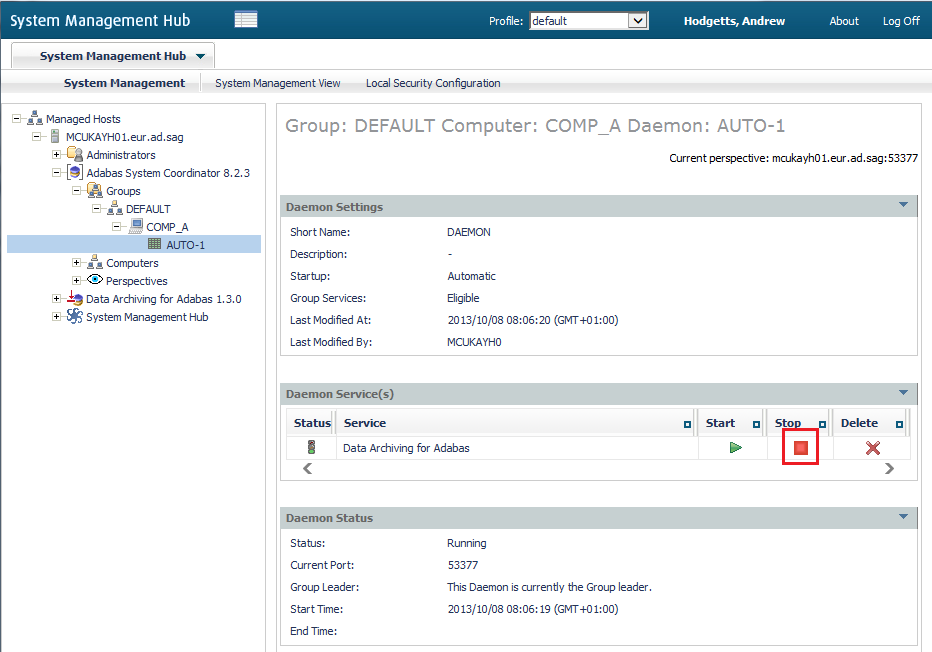
To display daemon (and service) status:
Select a Daemon that already exists, the following window will appear:
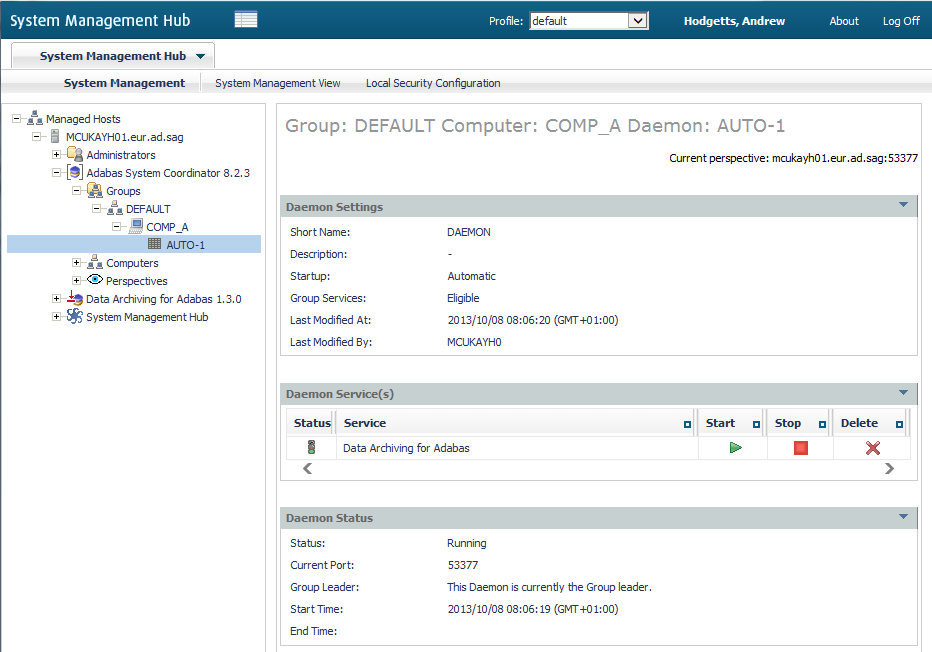
You will see:
| Field | Description |
|---|---|
| Daemon Settings | The configuration is displayed. |
| Daemon Services | The list of services is displayed with a traffic light to indicate status. |
| Daemon Status | Indicates whether the daemon is running or not, which dynamic port is currently being used and whether this daemon is currently acting as group leader. |
Note:
Services normally start and stop automatically
To start a Service that is not active:
Click the start button on the appropriate service:

To stop a Service that is active:
Click the stop button on the appropriate service: