Scenario: I have a mainframe Adabas database and want to notify a user when a record is updated.
Solution: Use the Event Replicator for Adabas to send a message to the webMethods Integration Server via EntireX Broker, and use Integration Server logic to send an email to the target user.
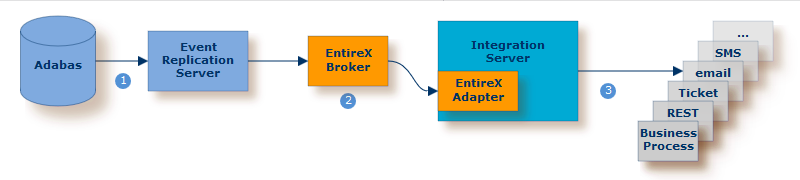
| Event Replicator for Adabas listens for specific actions on the database. | |
| Event Replicator for Adabas sends an XML message to Integration Server via EntireX Broker | |
| The EntireX Adapter listens to the respective message queue and triggers an IS service to send the email. |
This scenario requires the following Software AG products:
Mainframe Adabas
Event Replicator for Adabas
webMethods Integration Server
EntireX Broker
EntireX Adapter
This scenario consists of the following steps:
This section covers the following topics:
Before you begin, ensure that the EntireX Adapter package is available on the webMethods Integration Server.
 To ensure that the EntireX Adapter package is available on the webMethods Integration Server
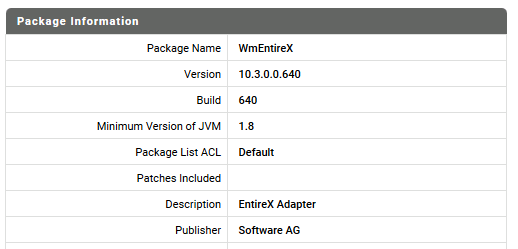
In the webMethods Integration Server Administration interface, go to Packages > Management.
Click on WmEntireX for details. A screen similar to this should be displayed (extract):
To create an Adabas Replication Listener Connection
In the EntireX Adapter menu go to Connections. Click on Adabas Replication Listener Connection to display the following screen:
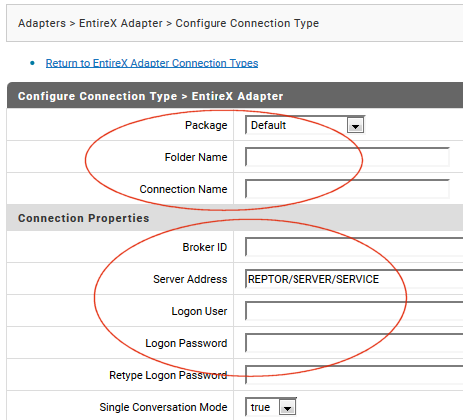
Add the name of the package where the connection is stored.
Add the name of the folder where the connection is stored.
Add the name of the connection.
Add the ID of the broker you are using for this task.
Add the server address in the format
<class>/<server>/<service>.
Add the user ID and password (if applicable).
Note:
All other parameters are optional. Normally you can use the
default values for these. All parameters are described
here.
Click on .
In the next step, create a listener for this connection, using the Adabas Replication Wizard.
To generate a listener and all required objects for an existing
connection
In the webMethods Integration Server, choose Adapters > EntireX Adapter > Connections and make sure the connection you created in the previous step is enabled.
In the Integration Server, choose EntireX Adapter > Adabas Replication Wizard.

Select the connection you created previously.
Enter the name of the new listener.
Choose Create.
The listener will be stored in the same location as the connection.
Note:
Document types can be optionally created to restrict the scope
of the listening operation. See Create
Document Type from Adabas File.
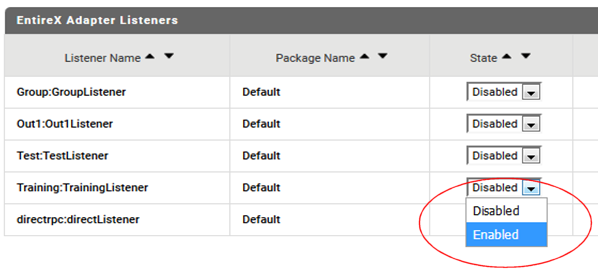
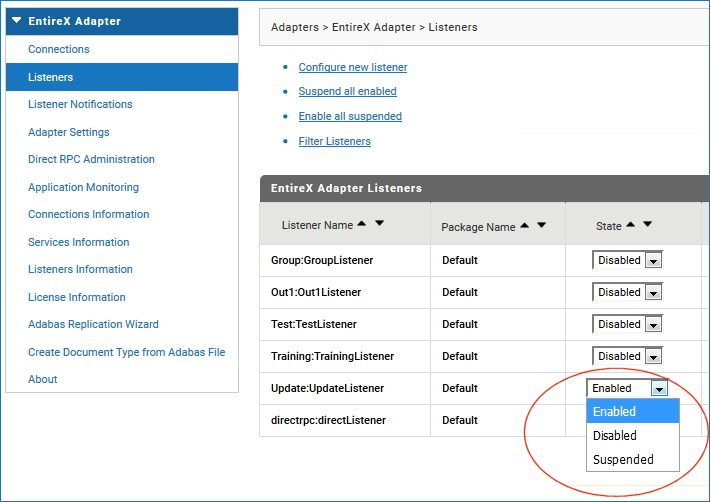
Make sure the listner you created is enabled. Choose Enabled from the drop-down menu.
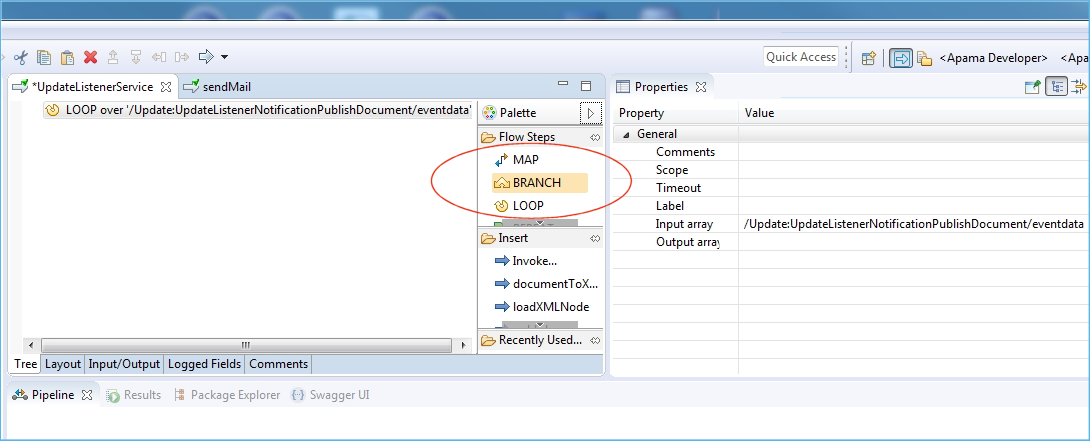
In the previous step you created the required listener objects with the Adabas Replication Wizard. Now you can add your own logic to perform the actions you require. In the example below we are sending an email with the updated data in XML format.
To customize the newly created flow service
Open the flow service created in the previous step to add your custom logic.

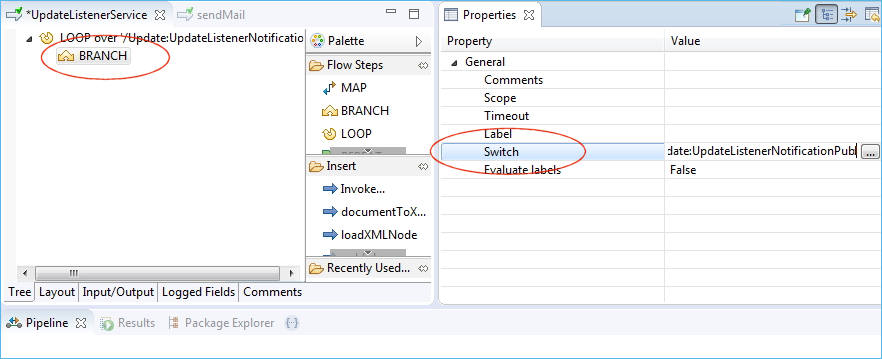
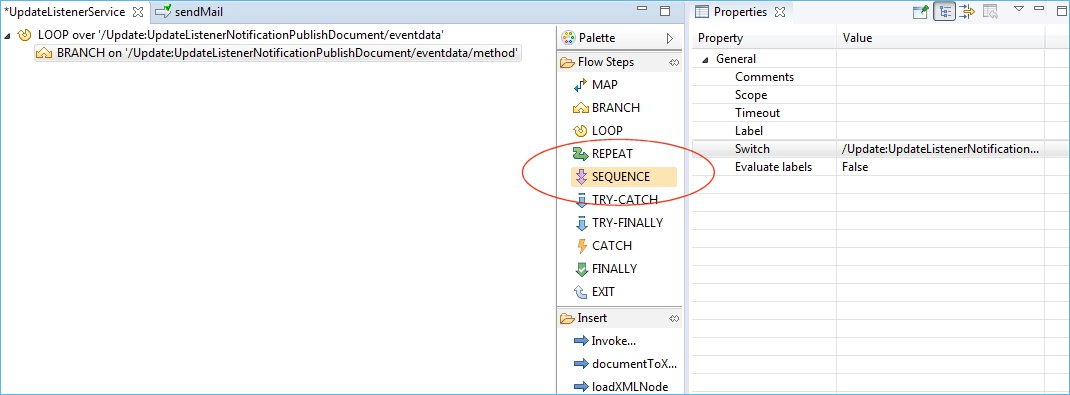
Add a flow step BRANCH within the LOOP. This enables you to decide on a specific action for a particular field.
In the Switch property, set the path to an
attribute of the event data. In this case it is the
method attribute of the event data.
Under flow step SEQUENCE, specify what happens when the method has a particular value.
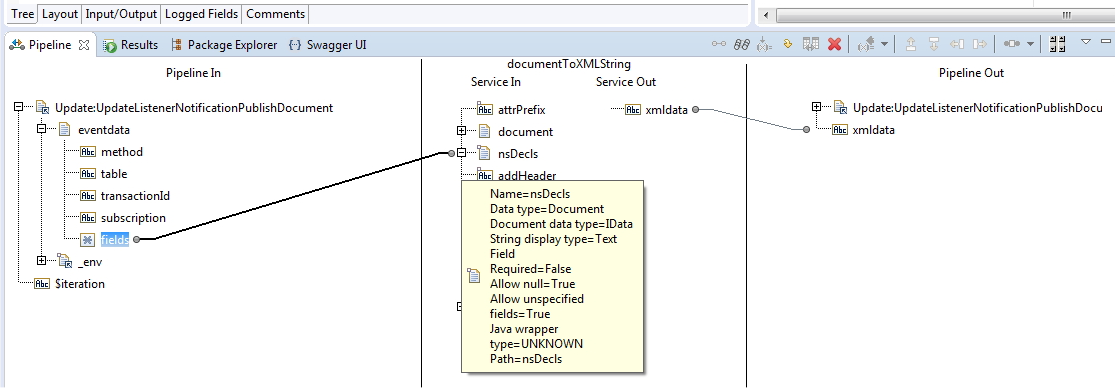
Set Label to Update and map document (the input format) to XML string.
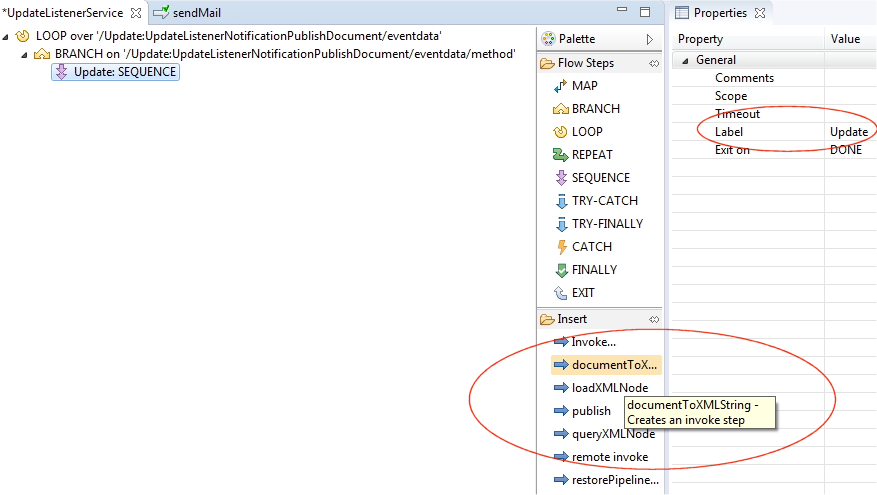
Use the pub.sml:documentToXMLString
service from the WmPublic package to create, from a
document, an XML string that can be sent via email.
Specify the mail protocol, in our example
"smtp". To send the mail you can use the public flow
service pub.client:smtp from the
WmPublic package.

Set the SMPT parameters.
Some fields are coded manually, for example
to.
These fields are marked with the icon

Other fields are filled dynamically with values from the
flow service, for example subject.
These fields
are marked with the icon

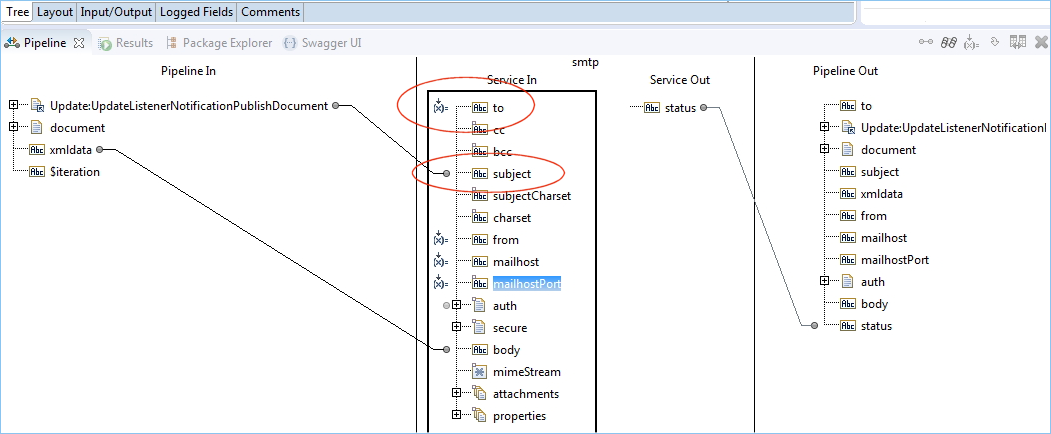
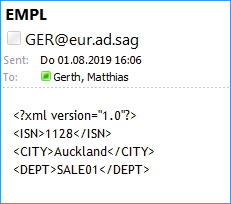
The result of these steps is an email where
the subject is dynamically filled with the value from the flow service
the addresse is coded manually in a mapping operation
the body is converted to XML and contains the fields that have been updated