
This document covers the following topics:
This section covers the following topics:
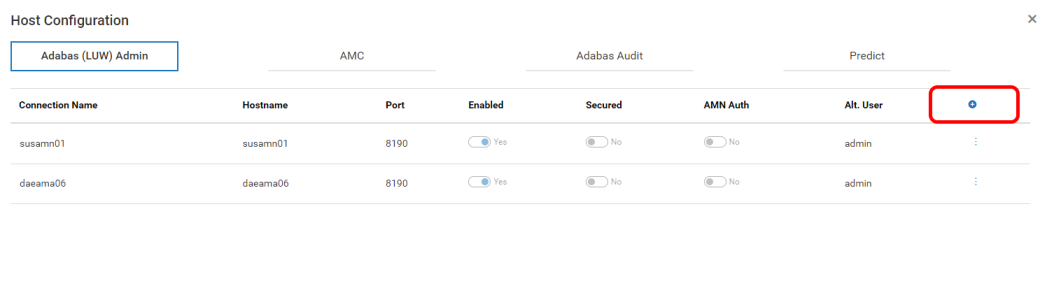
Click on the host configuration icon
 on the top right corner of the
Adabas Manager screen.
on the top right corner of the
Adabas Manager screen.
Click on the button .
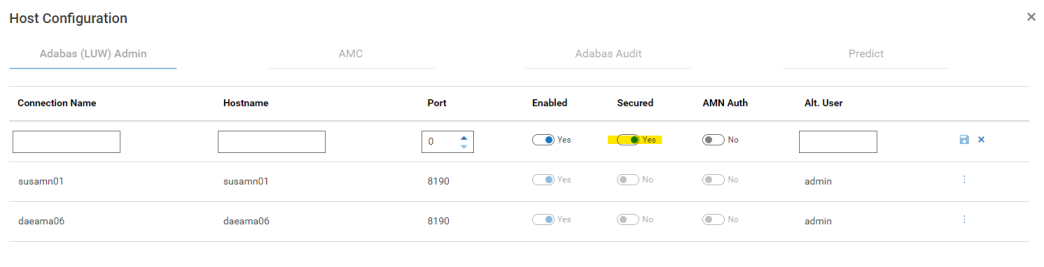
Click the "+" icon on the far right, to add a new Adabas REST Administration HOST
Enter the values according to your connections.
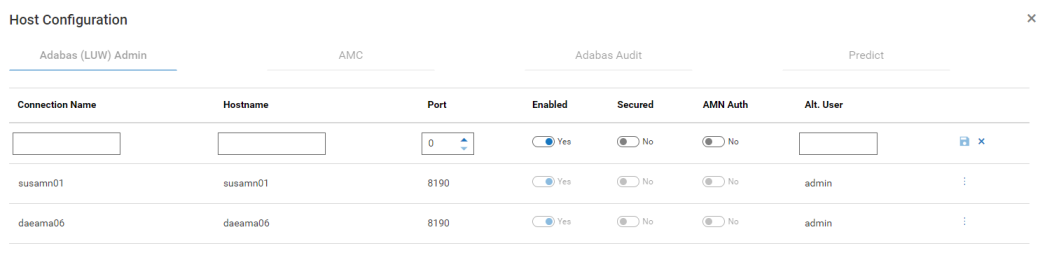
You can add as many host connections to the Adabas REST Server as you want, and enable only those you want to administer by setting the connection to ‘Enabled’ (default setting).
This section covers the following topics:
Default Configuration of the Adabas REST Server After Installation
Default Authentication Mode of the Adabas REST Server After Installation
Port Number for Adabas Manager Host Connection to the Adabas REST Server
Authentication Configuration for Adabas Manager Host Connection to the Adabas REST Server
Configuring the REST Server to use Adabas Manager Login Credentials
Configuring the Adabas REST Server to use Different Login Credentials
Adabas Manager accepts log-ins from the following:
Operating system (e.g. Windows) local user
LDAP domain user
If the username of local user and LDAP user are identical, then the local user credentials take precedence.
For further information about Adabas REST Server connection authentication using its default authentication mode, refer to Adabas Rest Administration, Installation and First Steps for the Adabas REST Server default login credentials.
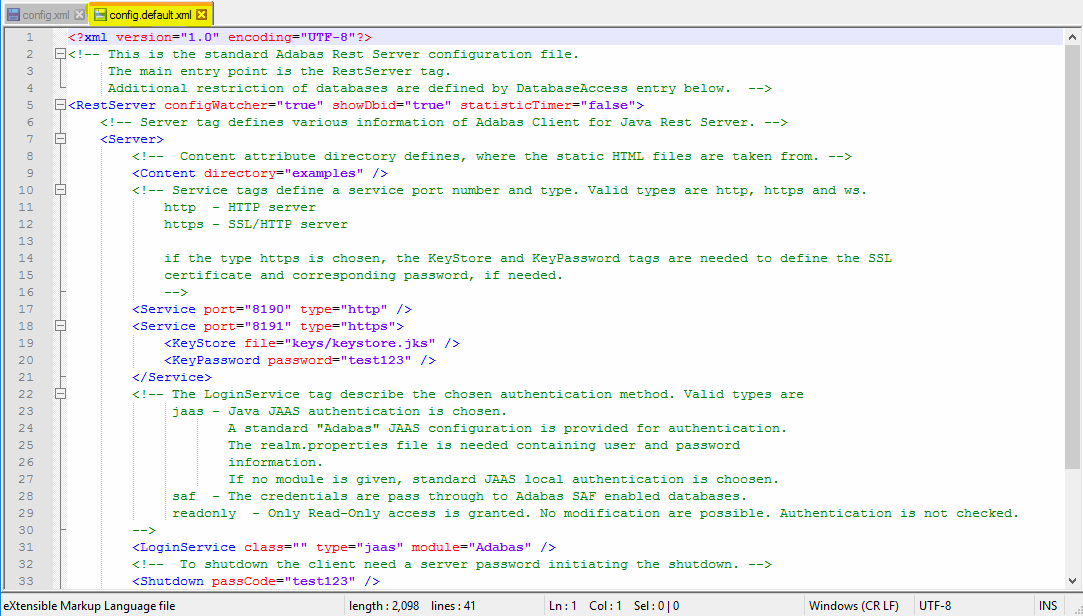
The default configuration of the REST server can be found in config.default.xml file.
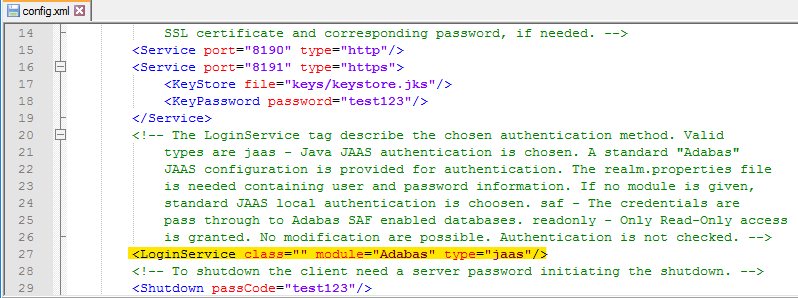
Adabas REST Server uses Java JAAS with the standard "Adabas"
configuration as its default authentication mode (see the XML tag
<LoginService...> in the
config.xml file located in the Adabas REST Server
installation configuration directory). By default it is
<LoginService class="" module="Adabas"
                     										type="jaas"/>
. It authenticates the Adabas REST Server login
credentials (including the Adabas REST Server post-installation default login
credentials) contained in the realm.properties file
located in the same Adabas REST Server installation configuration directory.
The authentication mode can be changed by adapting the server module of the
<LoginService...> in the
config.xml file. Refer to Adabas Rest
Administration, Authentication for further
information.
Use the Adabas REST Server default port (assigned during Adabas REST Server installation), which is port 8190 for connection via HTTP, or port 8191 for a secured connection via HTTPS. The port is evaluated in the config.xml file located in the Adabas REST Server installation configuration directory.
Select the Secured Connection (via HTTPS) check box if you want to use a secured connection via HTTPS to the Adabas REST Server.
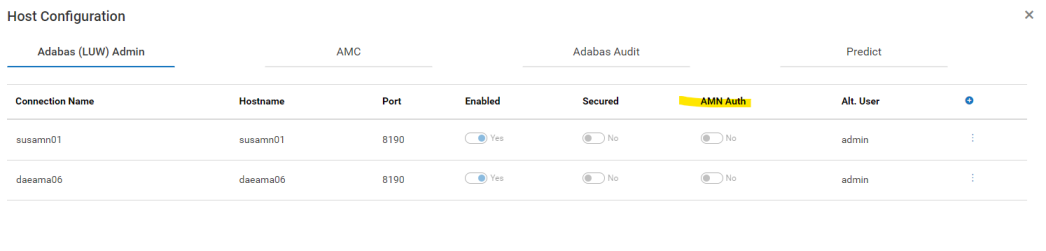
To connect to the REST Server using Adabas Manager credentials turn the switch "AMN Auth" to "Yes".
To connect to the REST Server using Adabas REST Server credentials and its default authentication mode turn the "AMN Auth" switch to "No" and specify the Adabas REST Server user name in the field "Alt. User".
Prerequisite: Adabas REST Server authentication and credentials configuration.
 To configure the REST server to use Adabas Manager login
credentials:
To configure the REST server to use Adabas Manager login
credentials:
Follow the steps below if you select Use Adabas Manager login credentials and use LDAP domain user credentials:
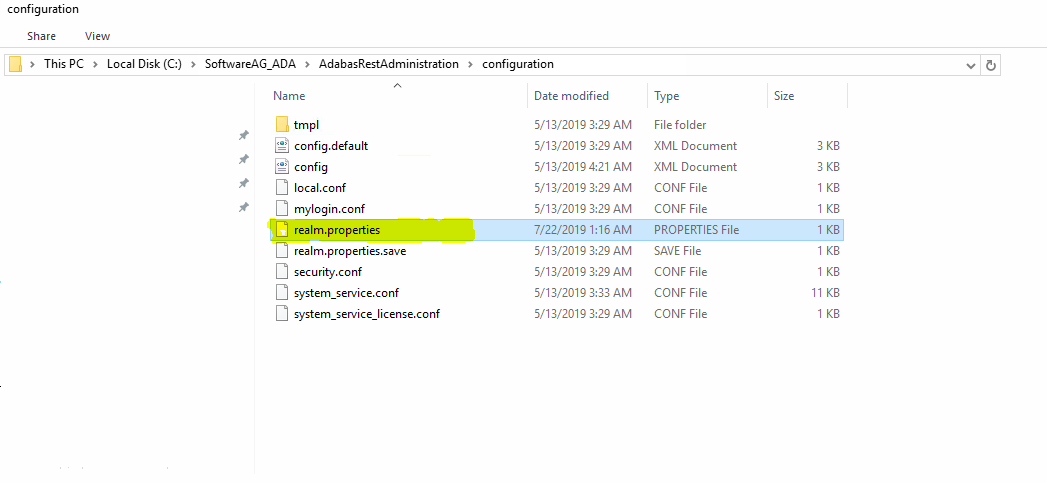
Go to the Adabas REST Server installation directory <installation directory>\AdabasRestAdministration\configuration.
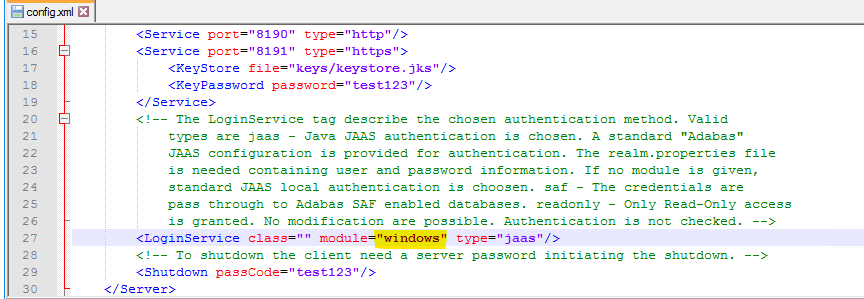
Open the file config.xml and search
for the XML tag <LoginService...>.
Edit the value of module to
module="windows" (for Windows).
Note:
The module name is case sensitive and must match the
module name defined in the security.conf file located in
the same directory
Save the edited version of config.xml.
If you select Use Adabas Manager login credentials and use OS local user credentials, see Configuring the Adabas REST Server to use Different Login Credentials
If local and domain user names are identical, the local user name authentication takes precedence.
To configure the Adabas REST server to use different login
credentials (other than its default login credentials and LDAP domain
user)
Go to the Adabas REST Server installation directory (<installation directory>\AdabasRestAdministration\configuration) and rename the file realm.properties to an arbitrary name.
Note:
You can ignore this step if you want to keep the default
post-installation user name and password. The new user name and password will
be added as a new entry to the existing one.
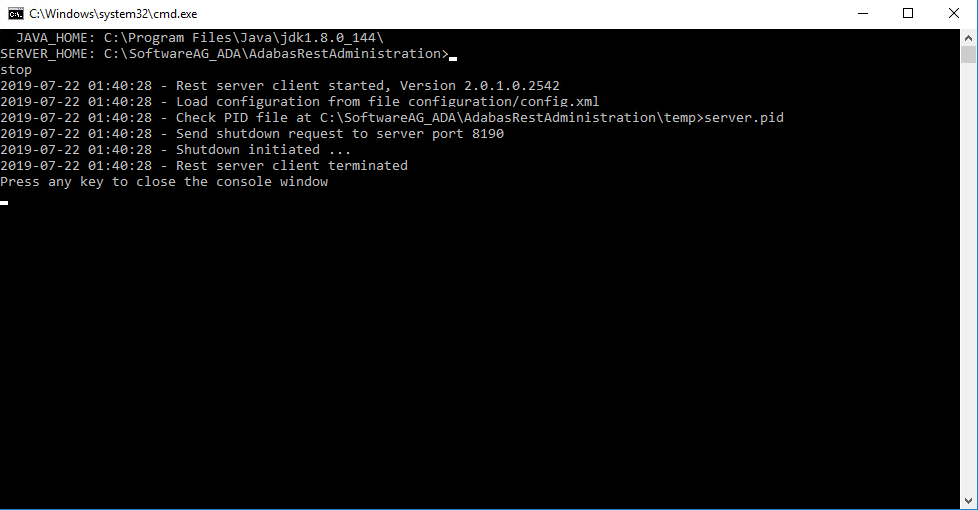
Stop the Adabas REST Server if it is running.
From the Adabas command prompt, go to the Adabas REST Server installation directory (<installation directory>\AdabasRestAdministration\bin) and run the command service.bat init. You will be prompted to Enter Administration user: enter the user name and password for that user.
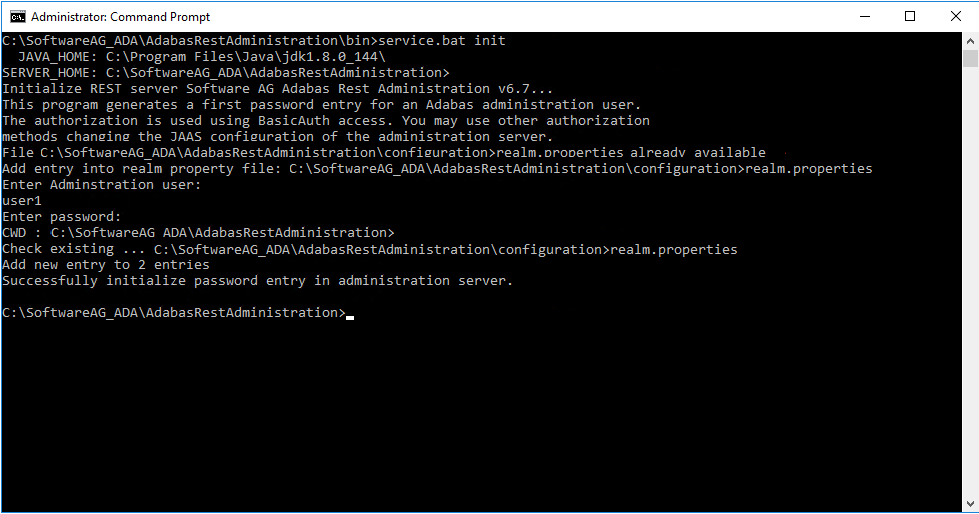
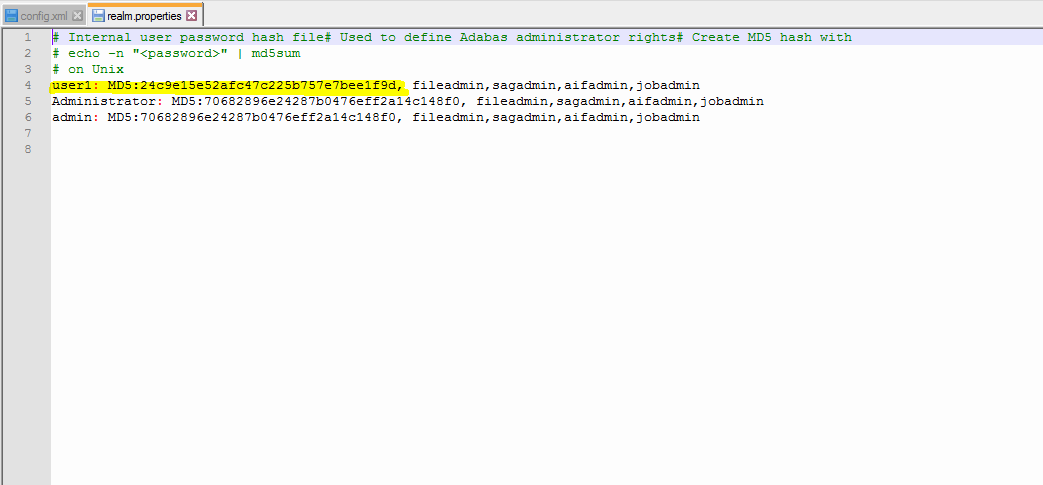
The user name and password are now set. Go back to the Adabas REST Server installation directory and check for a new realm.properties file. Your new user name should appear in the file.
Run the command service.bat run to restart the Adabas REST Server.
This section covers the following topics:
In the Adabas REST Server configuration file, the Adabas installation location (ADAPROGDIR) is set by default to the Adabas REST Server installation directory.
To enable administration of a different Adabas version:
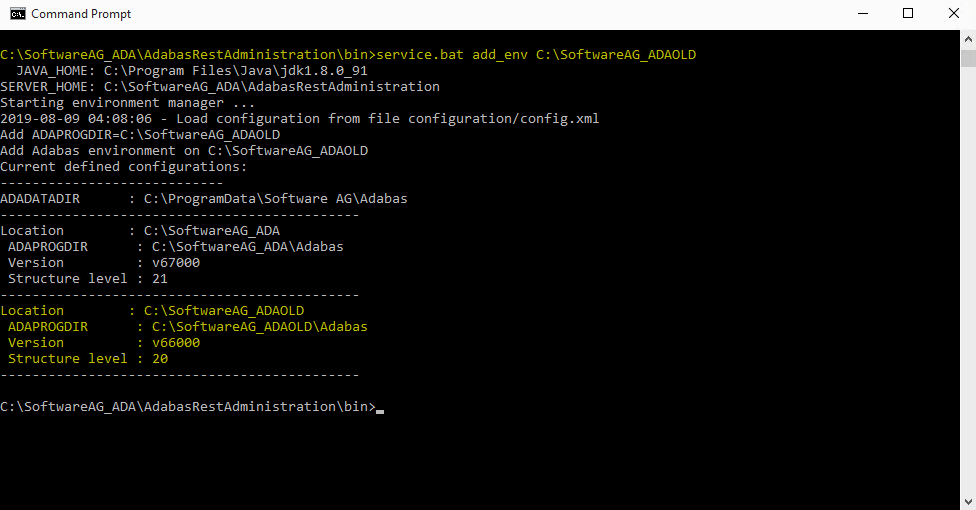
From an Adabas command prompt, set the Adabas environment by executing the command service.bat add_env <Adabas installation location>.
To set the Adabas environment for lower Adabas version, use the latest Adabas REST Server installed for the current Adabas version.
Note:
If the specified installation location does not have Adabas
installed, the error message EAIF00013:Adabas environment path
error will be displayed, e.g. ‘Error evaluating
environment on C:\SoftwareAG_ADA:EAIF00013:Adabas environment path error for
C:\SoftwareAG_ADA\Adabas’
By default, the browsing directory is set to {ADADATADIR}.
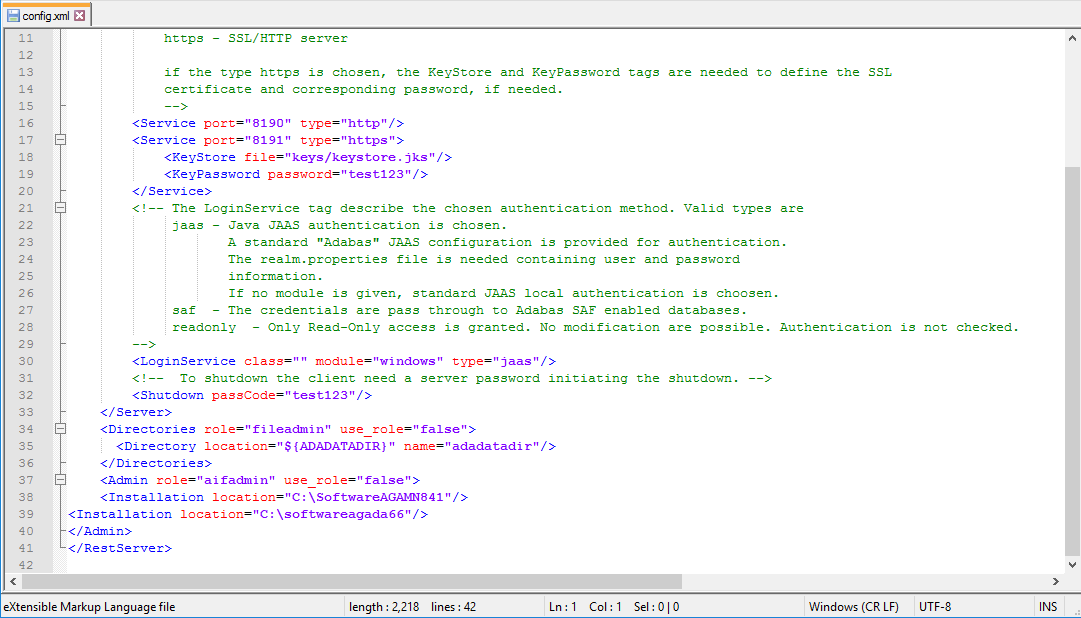
If you want to browse files on another location, e.g. local drive or network drive, add its directory location to the Adabas REST Server config.xml file.
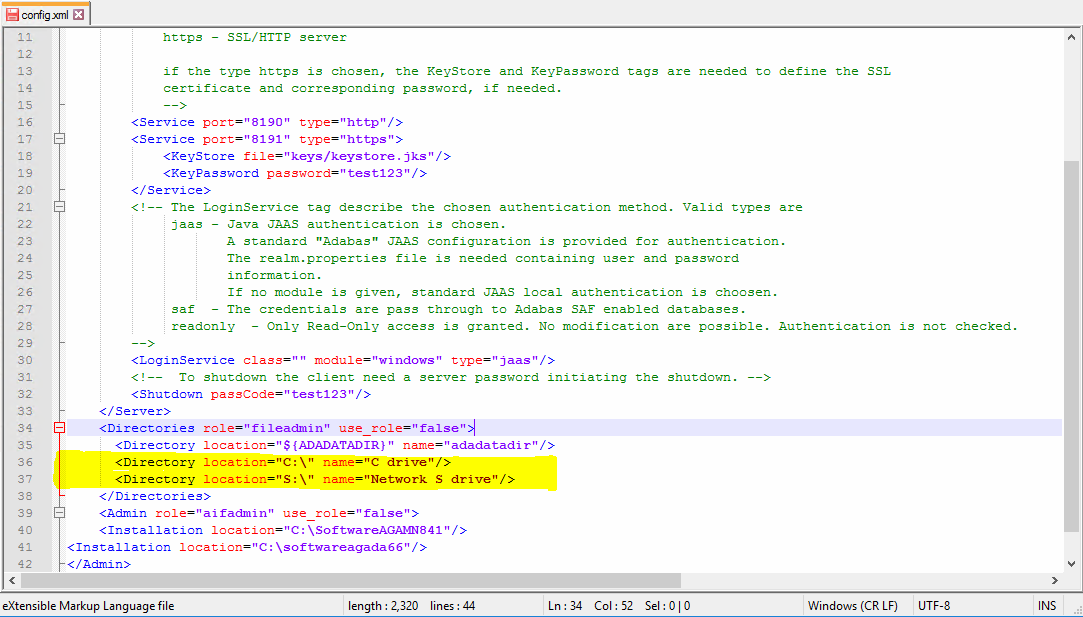
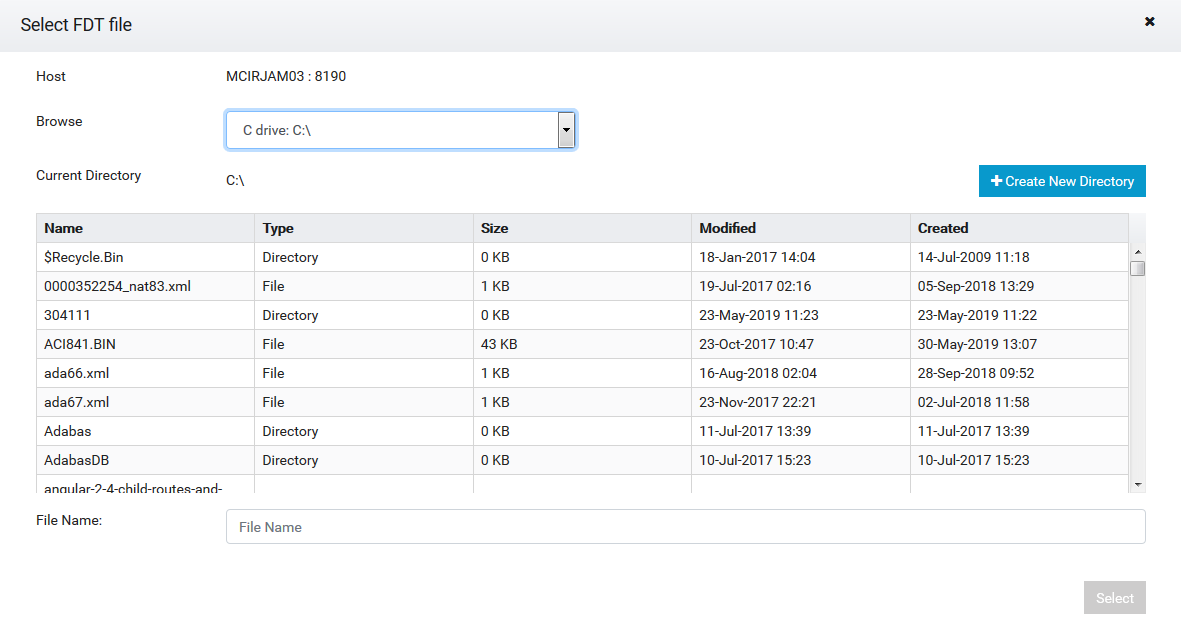
Browsing local drive:
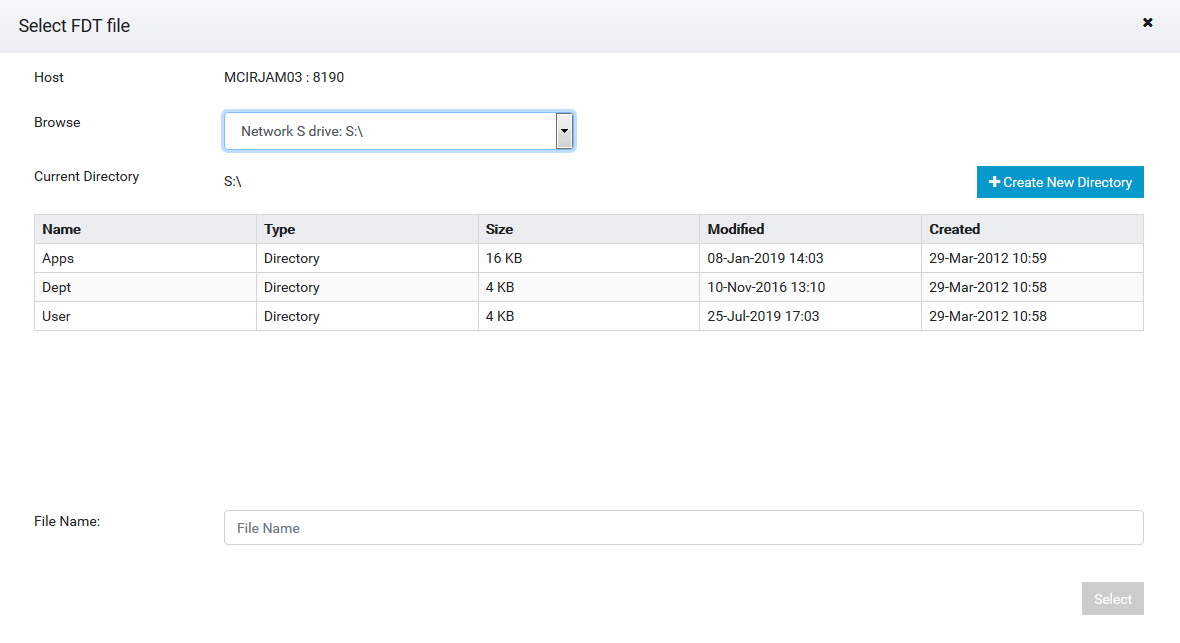
Browsing mapped network drive:
This section covers the following topics:
Adabas Manager Communicator disables CORS by default. CORS must be enabled in order for Adabas Manager to connect to and administer Entire Net-Work. Open the file <Software AG Installation Folder>\AdabasManagerCommunicator\config\amc.properties and change the following line from:
ENABLE_CORS=NO
to
ENABLE_CORS=YES
To allow all connections to Adabas Manager Communicator:
ALLOW_ORIGIN=*
To allow a specific Adabas Manager to connect:
ALLOW_ORIGIN=http://<host>:<port> (for example http://amn.com:8083)
Restart the Adabas Manager Communicator service after configuring the amc.properties file in order for the changes to take effect.
Besides logging into Adabas Manager using LDAP authentication, it is possible to create local user IDs and store them into a text file. This is useful for users of Adabas Manager who only want to test out Adabas Manager locally without connecting to the company network (LDAP).
To add internal users to the InternalRepository file for local
authentication:
To add internal users (e.g. user1) to the authentication text file (auth.config), issue the following command at the bash shell prompt:
sh /<install-dir>/AdabasManager/bin/text_user.sh add
Or:
In a Windows environment, issue the following command at the
Windows command prompt to add internal users (e.g.
user1) to the authentication text file
(auth.config):
<install-dir>\AdabasManager\bin\text_user.bat add
To list internal users in the InternalRepository file for local
authentication:
To list internal users in the authentication text file, issue the following command at the bash shell prompt:
sh /<install-dir>/AdabasManager/bin/text_user.sh list
Or:
In a Windows environment, issue the following command at the
Windows command prompt to list internal users in the authentication text file
(auth.config):
<install-dir>\AdabasManager\bin\text_user.bat list
To delete internal users from the InternalRepository file for local
authentication:
To delete internal users (e.g. user1) from the authentication text file (auth.config), issue the following command at the bash shell prompt:
sh /<install-dir>/AdabasManager/bin/text_user.sh delete
Or:
In a Windows environment, issue the following command at the
Windows command prompt to delete internal users (e.g.
user1) from the authentication text file
(auth.config):
<install-dir>\AdabasManager\bin\text_user.bat delete