
Data Archiving for Adabas contains a getting started demo to help you quickly see how to use the product. This demo is real; it runs against test files that are created as part of the demo itself. The following sections explain how to use the demo.
The default demo execution uses databases 1 and 2. It is much easier to achieve a quick “getting started” if you can arrange to use these database numbers for the demo; you can use different database numbers if you wish.
Also, we assume it is easier for you to create and use completely new databases for the demo - to stay away from your day-to-day data while you are getting started. But you do not have to create new databases either, you can use existing ones.
Assuming your environment is new for the purposes of getting started we suggest you create two new databases with the numbers 1 and 2 (if possible).
Depending on your environment, you can use the Adabas Manager, Adabas Online Services, DBA Workbench or even utilities to create these databases. Or you may have two test databases with space available for creating some (small) test files in them. Note the database numbers, you will need them later.
Note:
These test files do not need to be part of a database that is secured
with PLOG, and they do not need to be backed up everyday, because the demo has
a reload capability that you can use at any time to recreate the files in
full.
The demo is not automatically loaded during the installation, you choose whether you want to load (or reload) it.
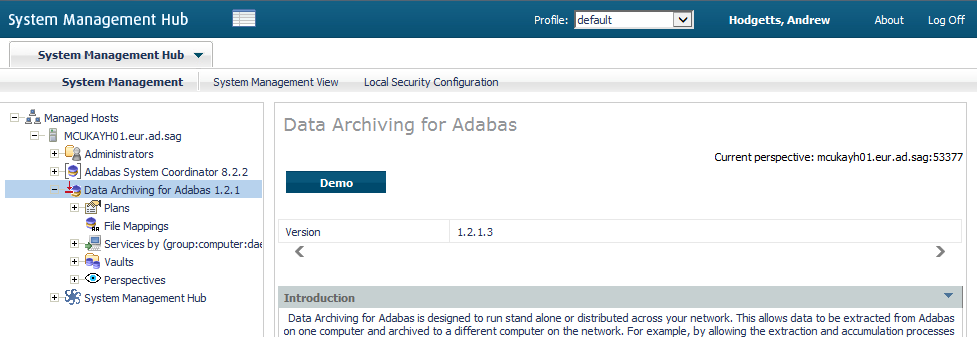
You must first login into System Management Hub and select the main tree.
![]() To load or reload the demo
To load or reload the demo
Select the main node.
The following screen appears:
Click the button.
The Demo Load/Reload screen appears:
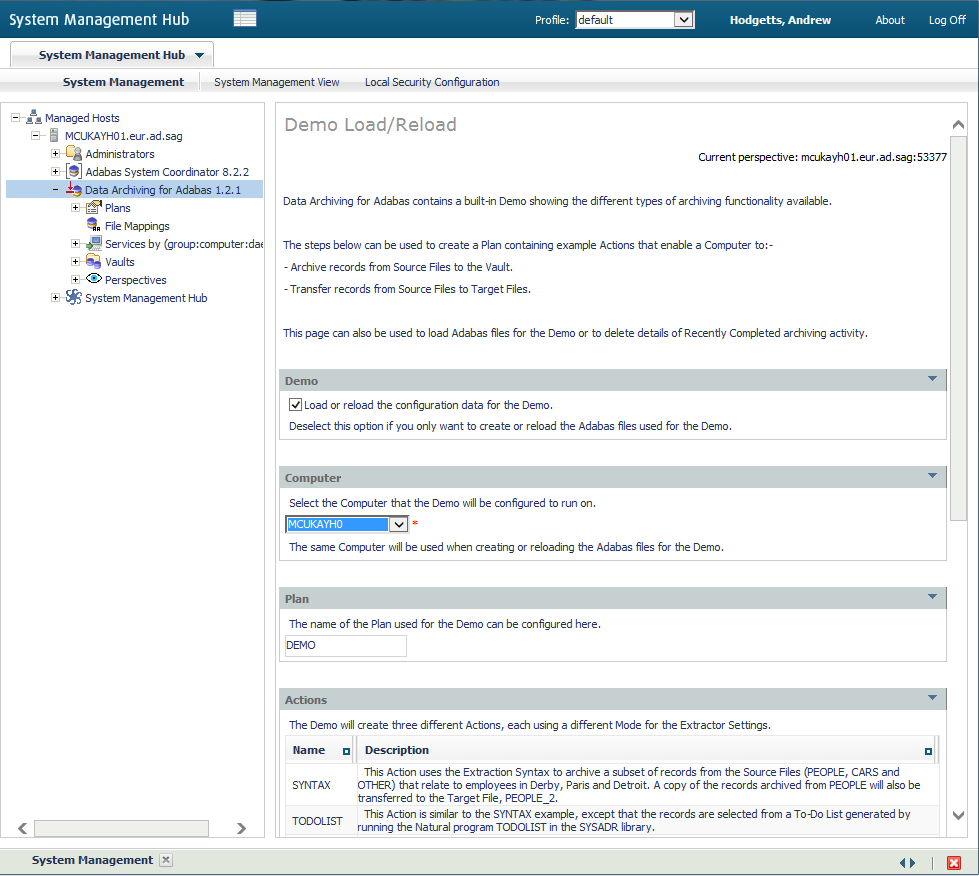
Scrolling down the screen:
The demo load/reload allows you to:
Choose if the configuration data is to be loaded/reloaded.
Choose the computer on which the load/reload processing is to take place.
Define the name of the Plan under which the configuration objects will be loaded (default is DEMO).
Define the demo Source Files and optionally indicate if they are to be created/reloaded.
Define the demo Target File.
Reset the list of recent completed activities, before doing anything else.
Each time the configuration objects are loaded (or reloaded) into the defined Plan name, they are dynamically adjusted to reflect a configuration for running on the computer that you have selected.
Note:
This means a multiple computer implementation (where the
Repository is shared) may be re-loading the configuration so that the computer
running the demo changes from one reload to the next. You can negate this
effect by defining a different Plan name for each different computer that you
want to run the demo on.
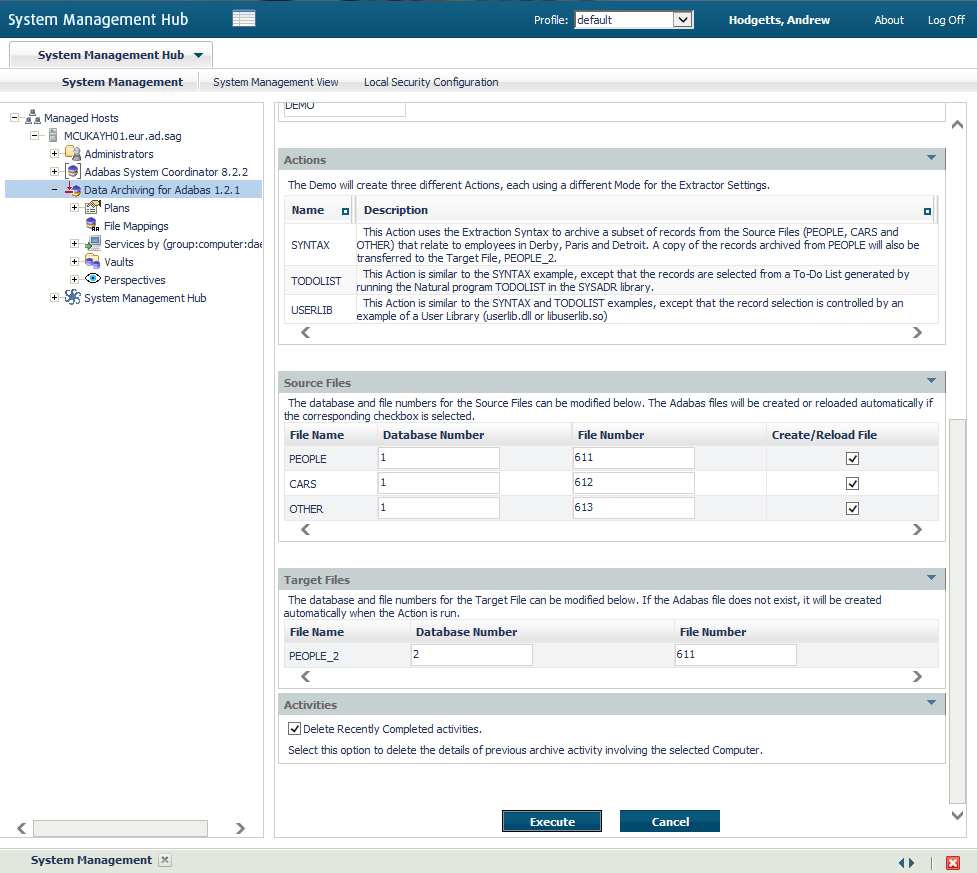
Enter the following information (or accept the defaults):
| Section | Description |
|---|---|
| Demo |
Identifies if the configuration data is to be loaded/reloaded. Note: |
| Computer |
The computer the demo will be configured to run on. |
| Plan |
The Plan name under which the configuration data will be loaded/reloaded. |
| Source Files |
The Source Files to be used by the demo. The checkbox on the right hand side specifies whether these files are to be reloaded (or created if they do not already exist). Note: |
| Target Files |
The Target File to be used by the demo. This file will be created automatically if it doesn’t already exist. |
| Activities |
Delete previous activity reports involving the specified Computer. |
Click the Execute button to start the demo load/reload.
Check the status of the demo load/reload.
The Source Files are loaded by performing a recall from an archived copy of the demo test files kept within the product itself. This means you can actually watch the recall activities running while the load/reload takes place. To watch this happen, do the following:
Select the Services by… node under Data Archiving for Adabas.
Within that, select the DEFAULT:<computername>:DAEMON node.
Within that, select the Pending Activities, Activities or Recently Completed nodes to follow the progress of the recall activities.
When the Demo Load/Reload is complete, within Recently Completed you will see each of the completed recall activities as shown below:
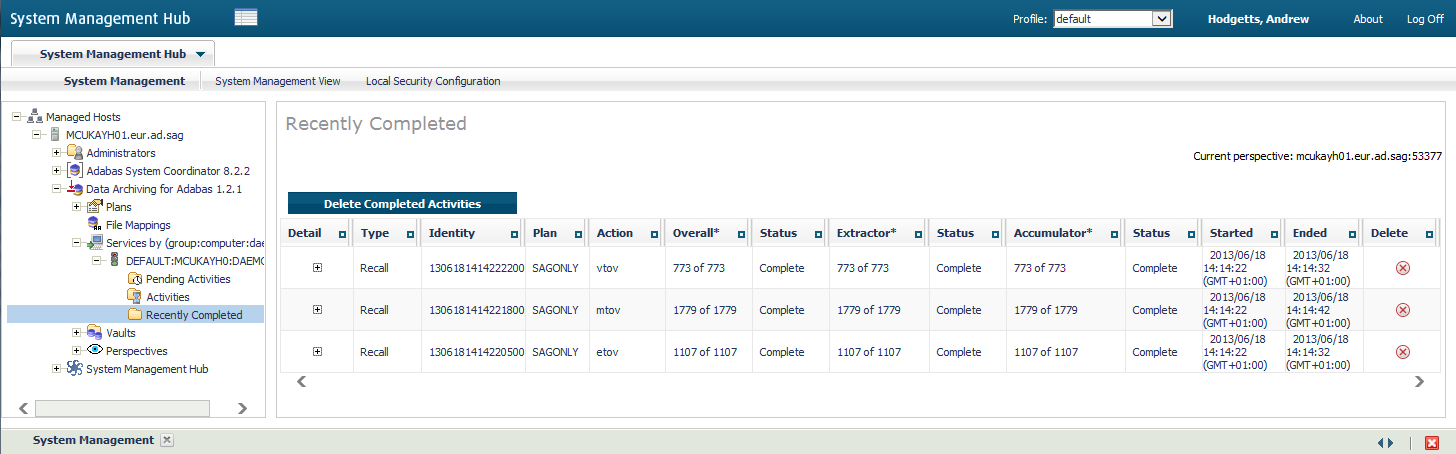
Click the Delete Completed Activities button if you want to clear the recent history.
The demo is loaded (or re-loaded) and ready to use.
The demo contains three sample Actions SYNTAX, TODOLIST and USERLIB that demonstrate the three Data Selection Modes (see Data Selection Mode).
Action TODOLIST: Uses the API for Natural to generate an archive/transfer list
Action USERLIB: Uses a record selection plug-in (User Lib/DLL)
This action uses Extraction Syntax to select records for archive or transfer.
Select the Extraction Syntax node in the UI to view the Extraction Syntax that will be run.
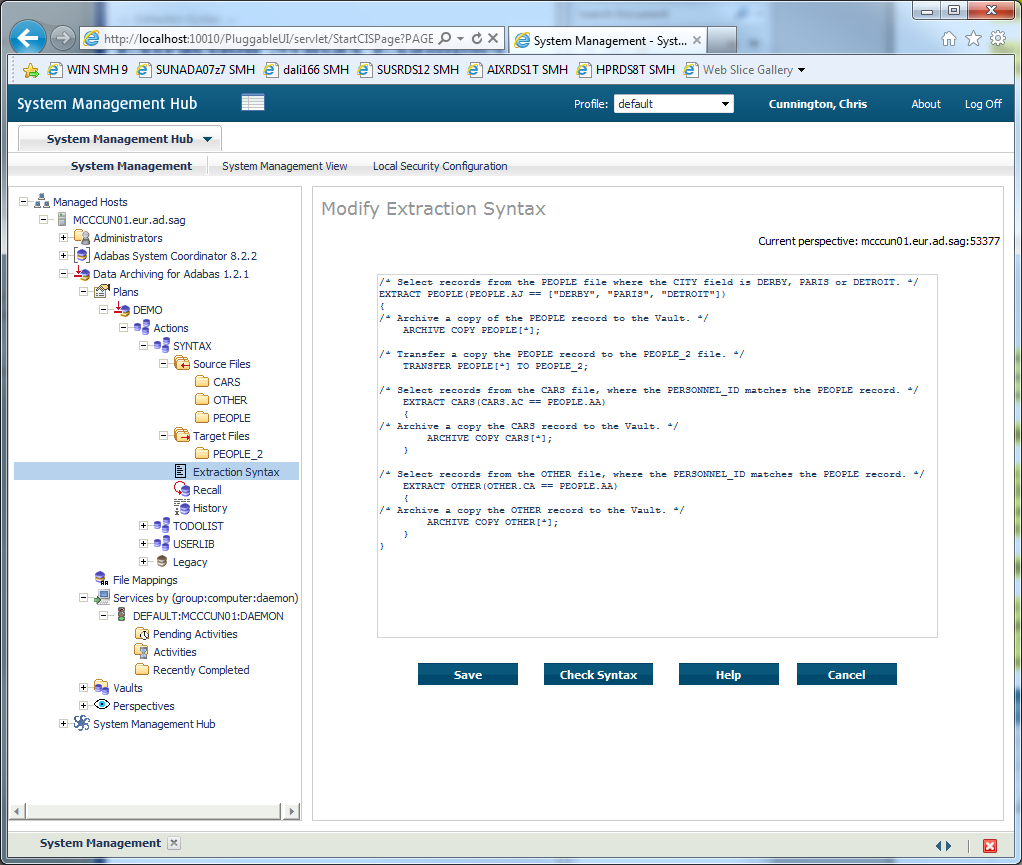
The Extraction Syntax selects records from the PEOPLE file where the CITY field is DERBY, PARIS or DETROIT and archives a copy of the PEOPLE record to the Vault. It then transfers a copy the PEOPLE record to the PEOPLE_2 file. Next it selects records from the CARS file, where the PERSONNEL_ID matches the PEOPLE record and archives a copy the CARS record to the Vault. Finally it selects records from the OTHER file, where the PERSONNEL_ID matches the PEOPLE record and archives a copy of the OTHER record to the Vault.
To run the action, right-click on the Action name SYNTAX, and then select Run Action SYNTAX Now.
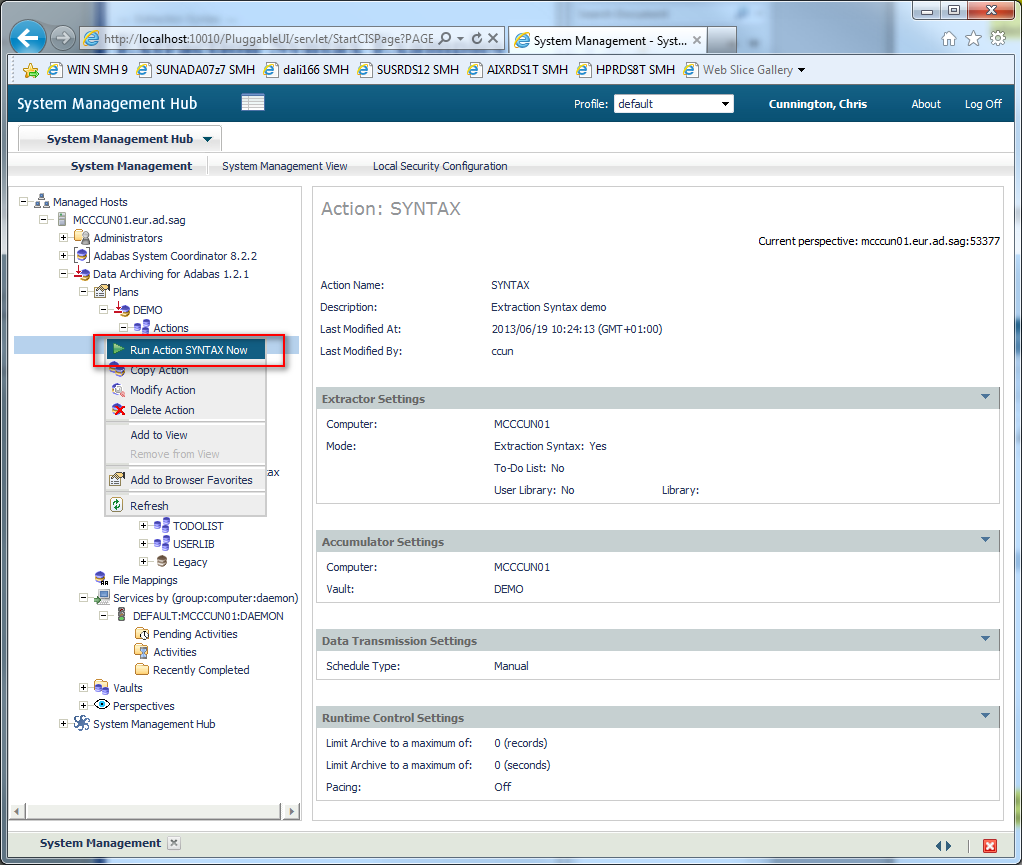
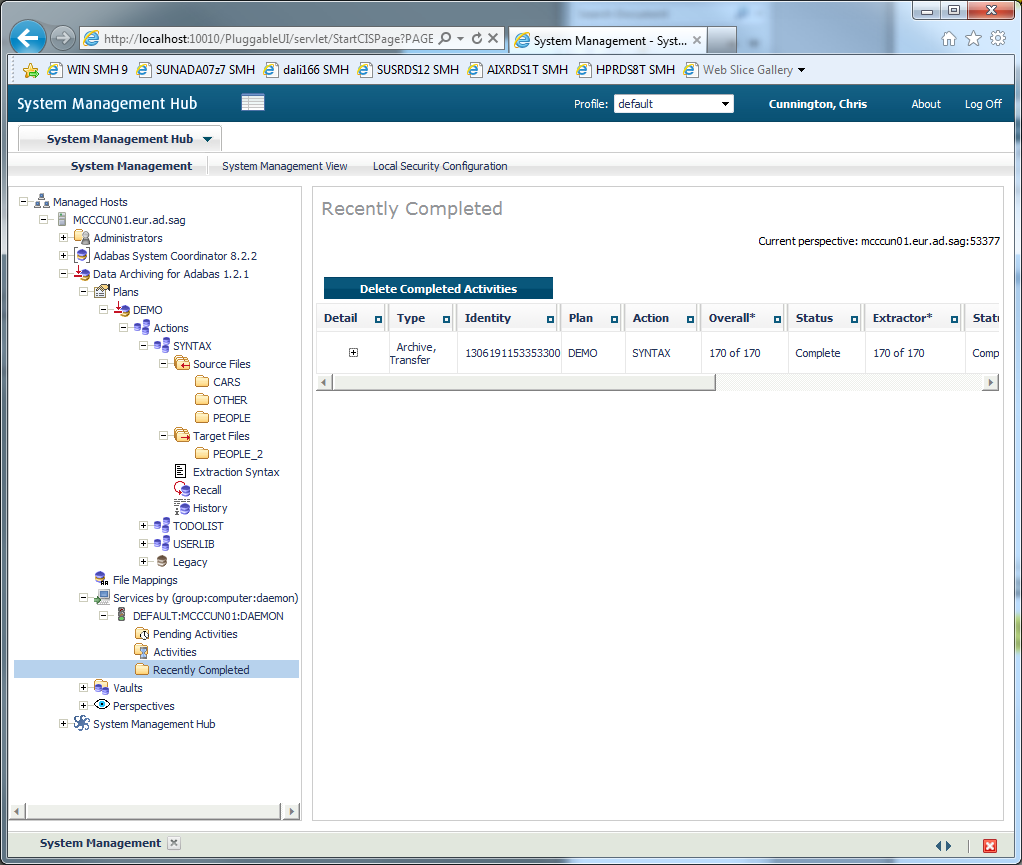
The progress of the archive Action can be monitored from the Services by – Activities screen, and when complete the Action will be visible on the Recently Completed screen.
To recall the archived data select the Recall node of the SYNTAX Action and select the Recall button for the archive you want to restore back into Adabas.
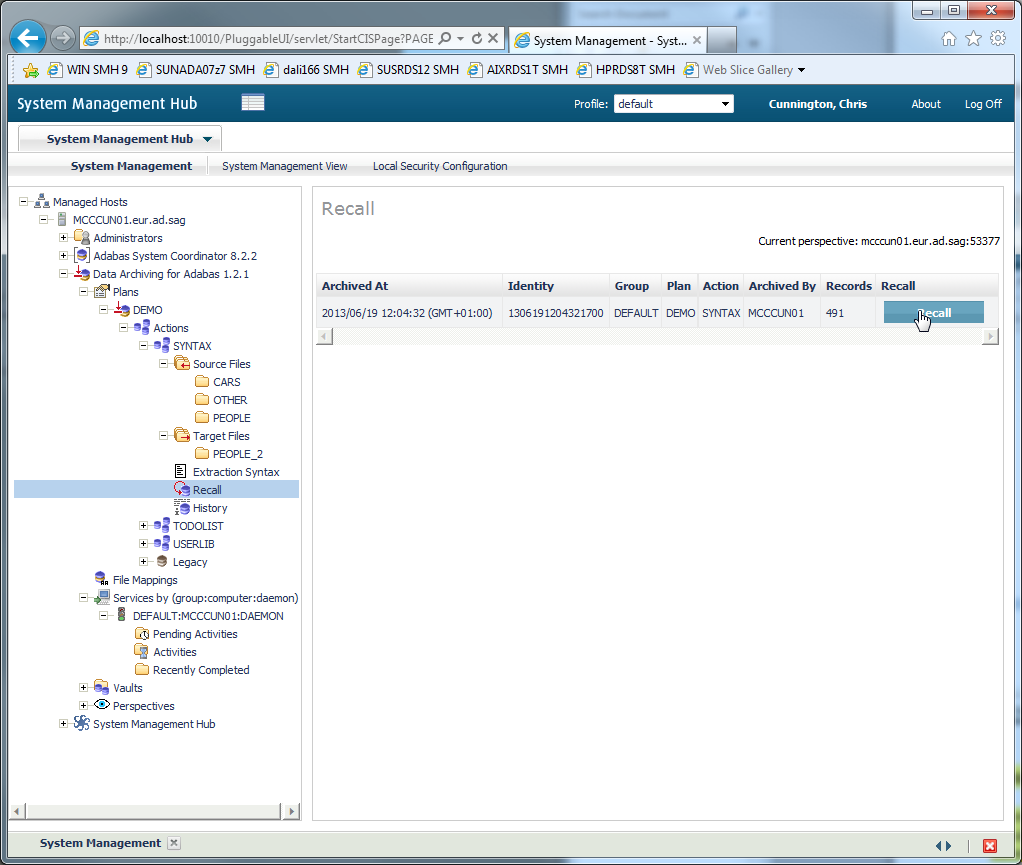
Because the SYNTAX Action archives data from three different files (PEOPLE, CARS and OTHER) there is the possibility to recall the archived data for any or all these files. Select all three files and specify the destination database and file numbers the recalled data will be placed in. Select Next.
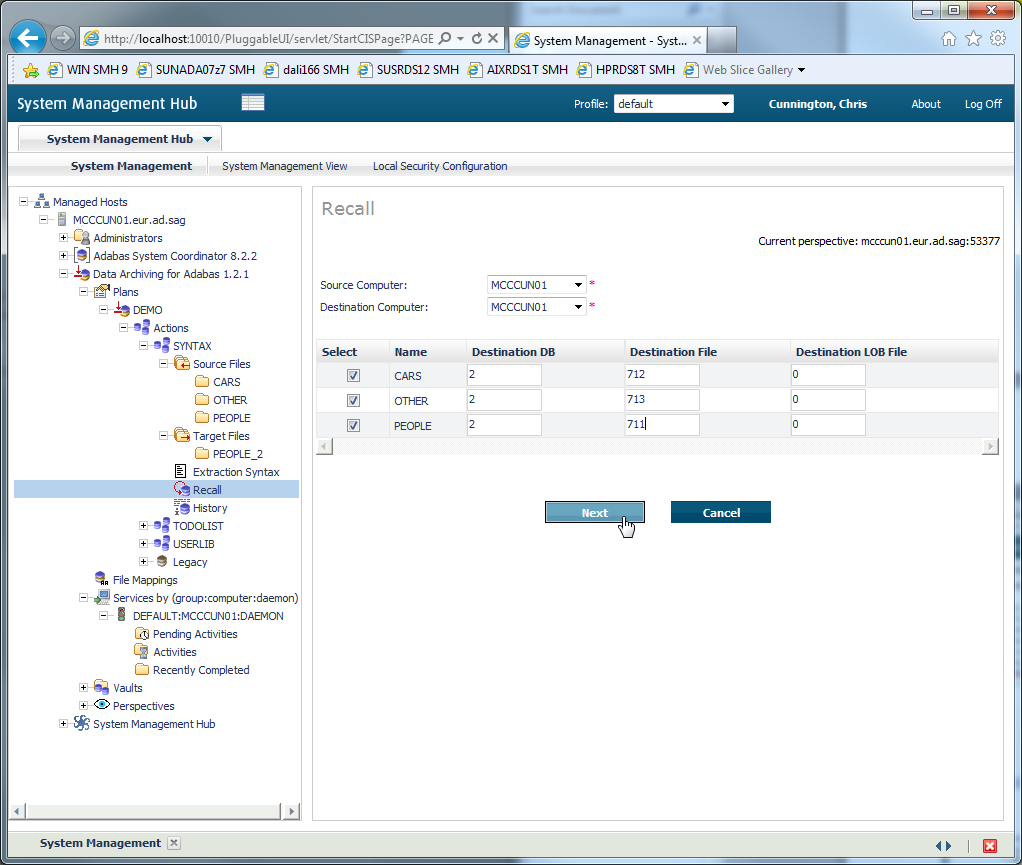
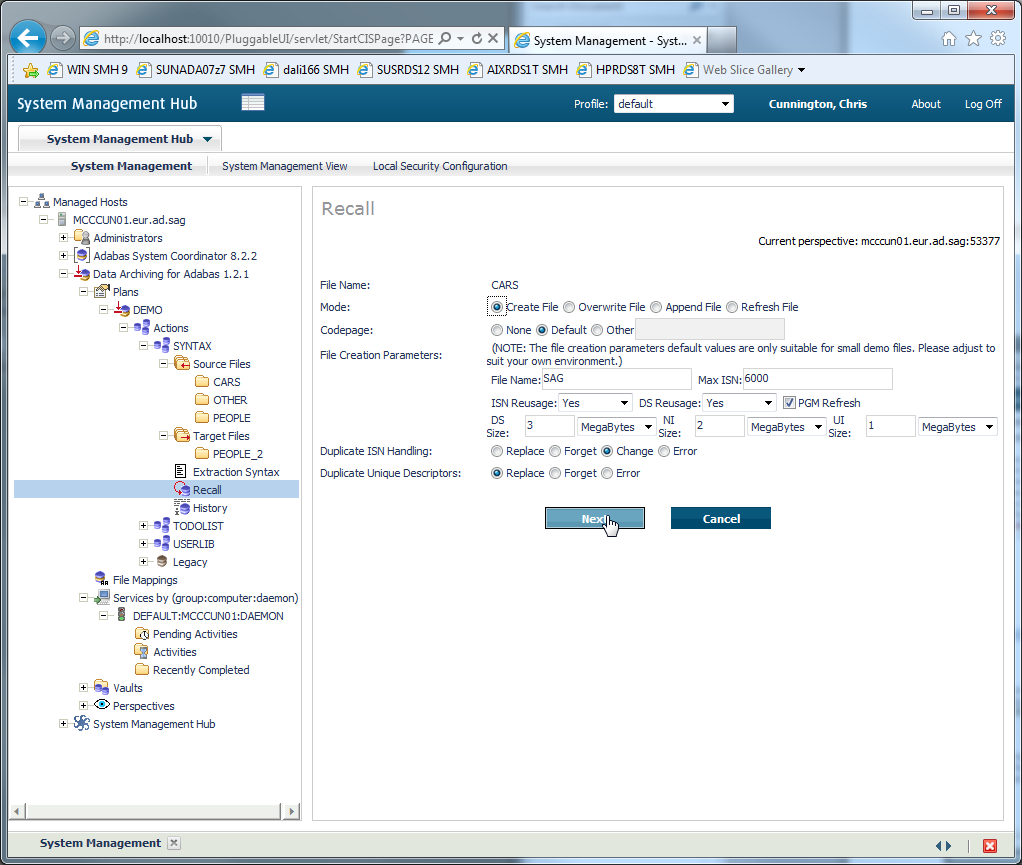
For each recall file a file setting screen will now be displayed. Select a suitable mode option (Create File or Overwrite) for each file, then select Recall to start the recall operation.
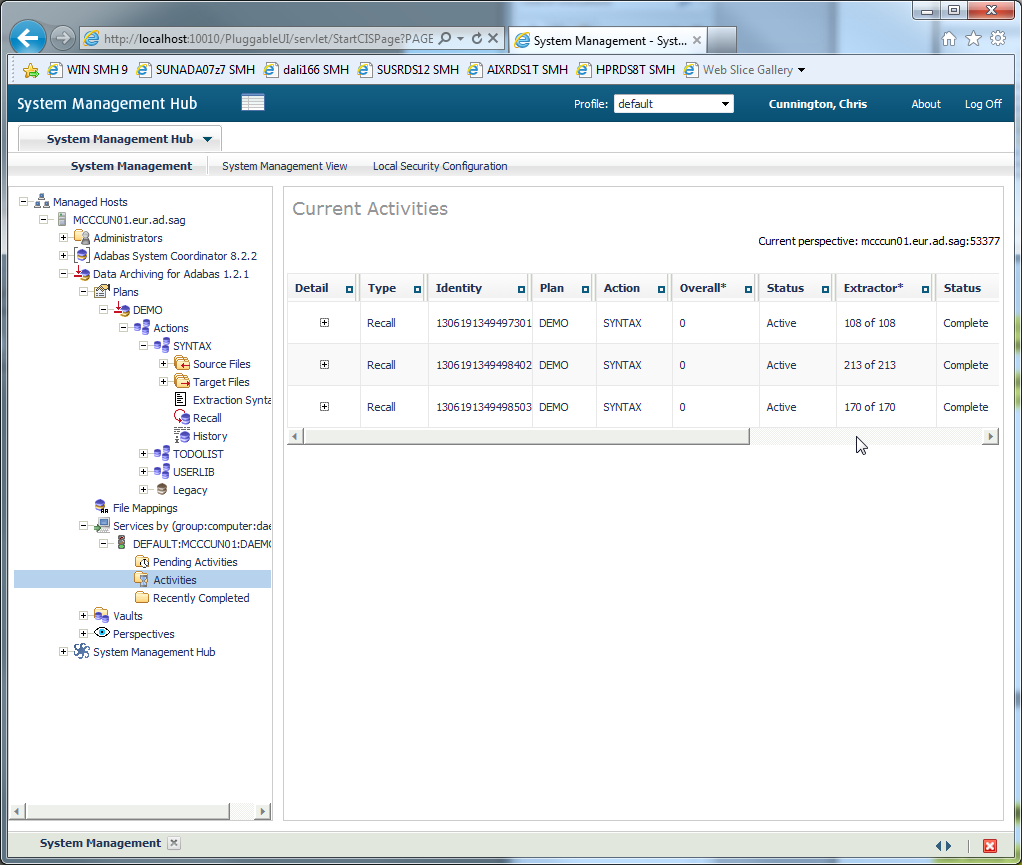
The progress of the recall can be monitored from the Services by – Activities screen, and when complete the Action will be visible on the Recently Completed screen. Because three archives are being recalled there will be three separate recall activities, one per file.
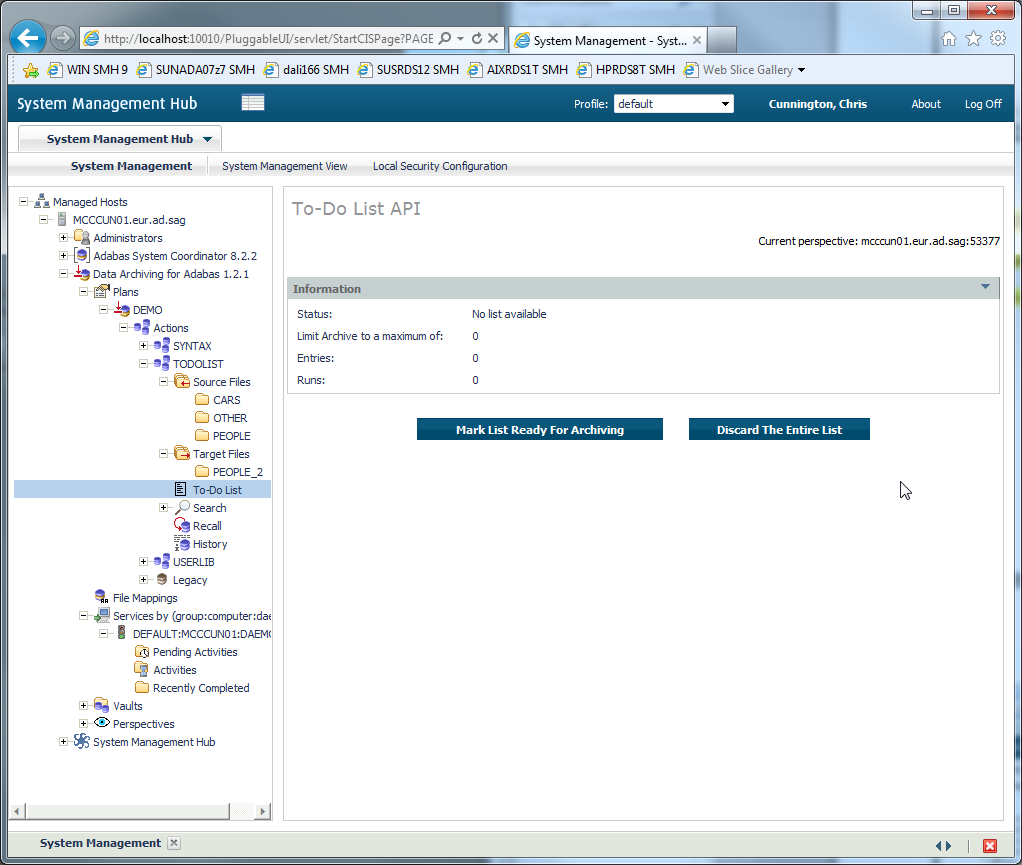
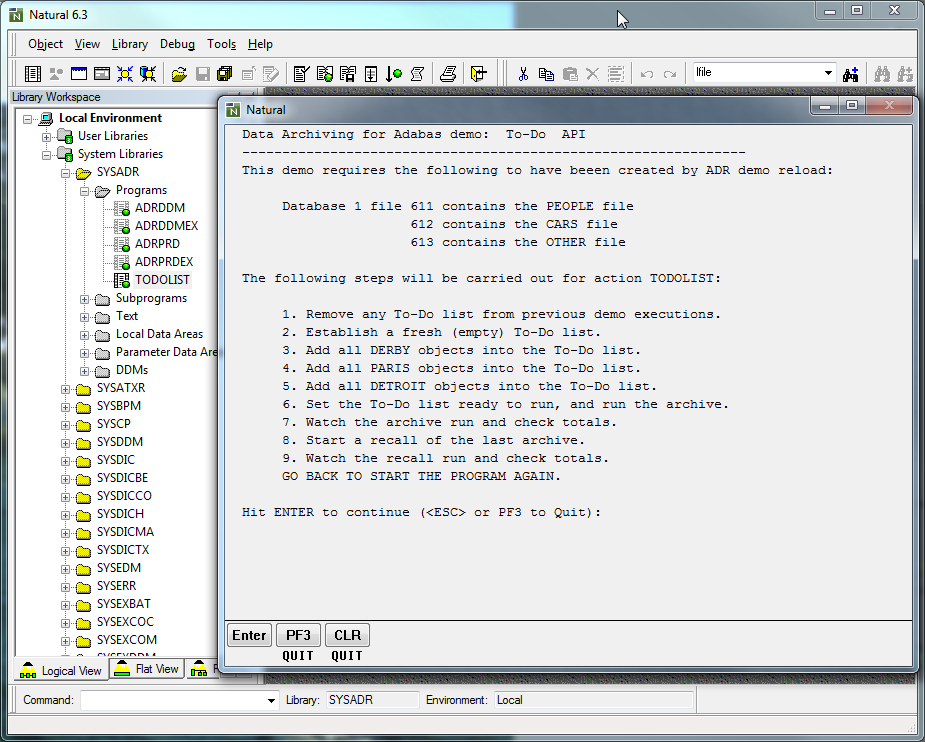
This action selects records for archive or transfer from a To-Do List generated by a Natural application that utilises the Data Archiving for Adabas Application Programming Interface.
Use of this action requires an INPL of the Natural library SYSADR. Refer to Application Programming Interface for more information on installing and using this interface.
Select the To-Do List node in the UI to view the current status of the To-Do list.
Now from Natural run the SYSADR/TODOLIST program. Unlike the previous SYNTAX demo where the action is run manually from the browser interface the TODOLIST demo is driven entirely from the Natural application using the Data Archiving for Adabas Application Programming Interface.
The TODOLIST program selects all the records from the PEOPLE file where the CITY field is DERBY, PARIS or DETROIT and archives a copy of the PEOPLE record to the Vault. It then transfers a copy the PEOPLE record to the PEOPLE_2 file. Next it selects records from the CARS file, where the PERSONNEL_ID matches the PEOPLE record and archives a copy the CARS record to the Vault. Finally it selects records from the OTHER file, where the PERSONNEL_ID matches the PEOPLE record and archives a copy of the OTHER record to the Vault.
Follow the on screen prompts of the program and it will guide you through the creation, build-up of a To-Do List, automatically trigger the archive process and finally recall the archives back to Adabas files.
Note:
The TODOLIST program recalls the archives back to database 2 files
611,612 & 613. If you wish to change the recall destination then locate the
section /* Set up the Recall files and edit the values appropriately
before running.
For this action, record selection for archive or transfer is performed by a plug-in user Lib/DLL. The Lib/DLL has been created using the API for the C Programming Language.
For further details on creating your own User Library refer to the supplied Data Archiving for Adabas Application Programming Interface, API for the C Programming Language and the section titled User-Lib Interface.
Select the Real-Time API Parameters node in the UI to view the name of the User Lib that the action will call (userlib.dll/libuserlib.so) and the parameters that will be passed to it. In the case of this action, the string DERBY will be passed.
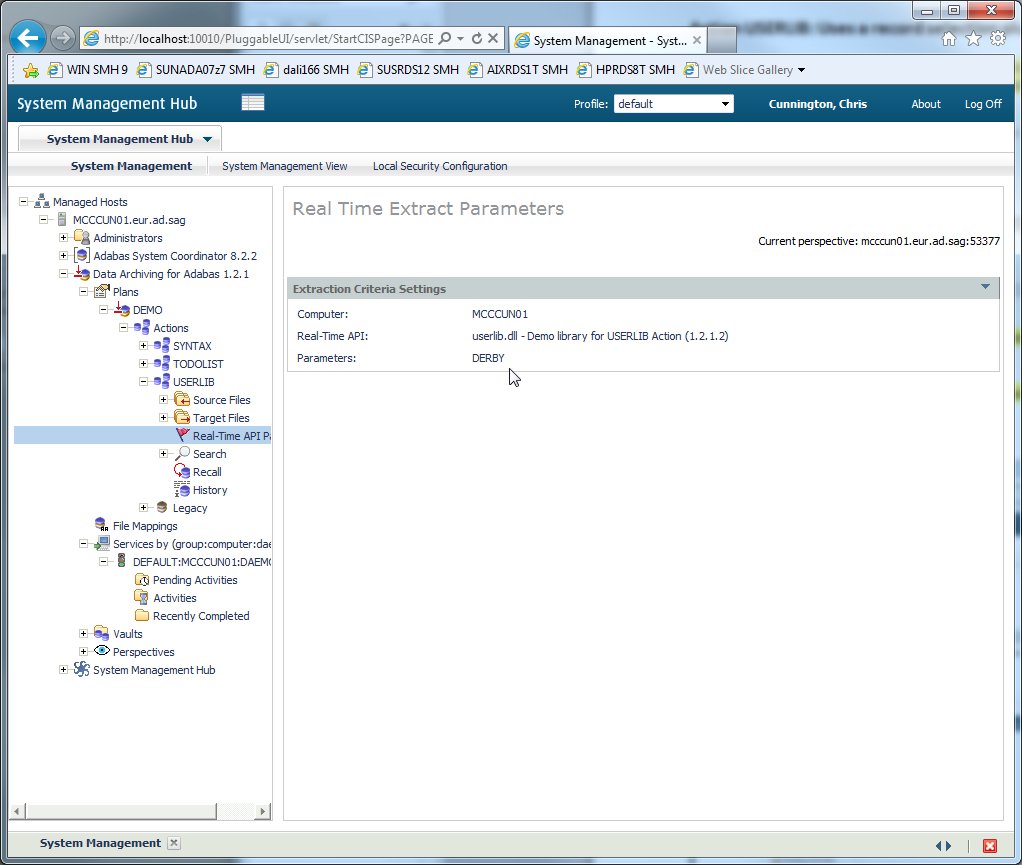
The User Lib userlib.dll/libuserlib.so selects all the records from the PEOPLE file where the CITY field is DERBY (the parameter passed to the user library) and archives a copy of the PEOPLE record to the Vault. It then transfers a copy the PEOPLE record to the PEOPLE_2 file. Next it selects records from the CARS file, where the PERSONNEL_ID matches the PEOPLE record and archives a copy the CARS record to the Vault. Finally it selects records from the OTHER file, where the PERSONNEL_ID matches the PEOPLE record and archives a copy of the OTHER record to the Vault.
Follow the same process as the SYNTAX demo above to run and recall this action.