The product contains a getting started demo to help you quickly see how to use the product. This demo is real; it runs against test files that are created as part of the demo itself. The following sections explain how to use it…
The default demo execution uses databases 1 and 2. It is much easier to achieve a quick “getting started” if you can arrange to use these database numbers for the demo; but you can use different database numbers if you wish.
Also, we assume it is much better for you to use (and create) completely new databases for the demo – to stay away from your day to day data while you are getting started. But you do not have to create new databases either, you can use existing ones. You choose.
Assuming your environment is new for the purposes of getting started we suggest you create two new databases, numbers 1 and 2 if possible.
Depending on the environment you may use Adabas Manager, Adabas Online Services, DBA Workbench or even utilities to create these databases. Or, you may have two test databases with space available for creating some (small) test files on it. Make your decisions, and note the database numbers, you will need them later.
Note:
These test files do not need to be part of a database that is secured
with PLOG, or need to be backed up everyday. The demo has a reload capability
that you can use anytime to recreate the files in full.
The demo is not automatically loaded during the installation, you choose whether you wish to load (or re-load) it.
First, login into SMH and select the main tree.
![]() to load or re-load the demo
to load or re-load the demo
Select the main node.
On the right-side panel you will see…
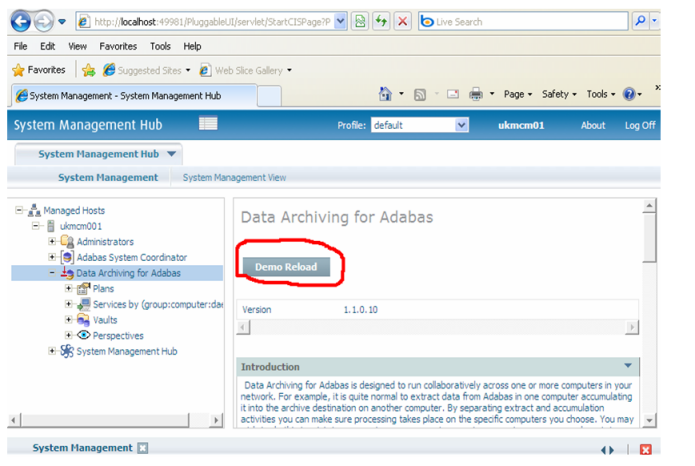
Click the button shown above.
This shows the following screen…
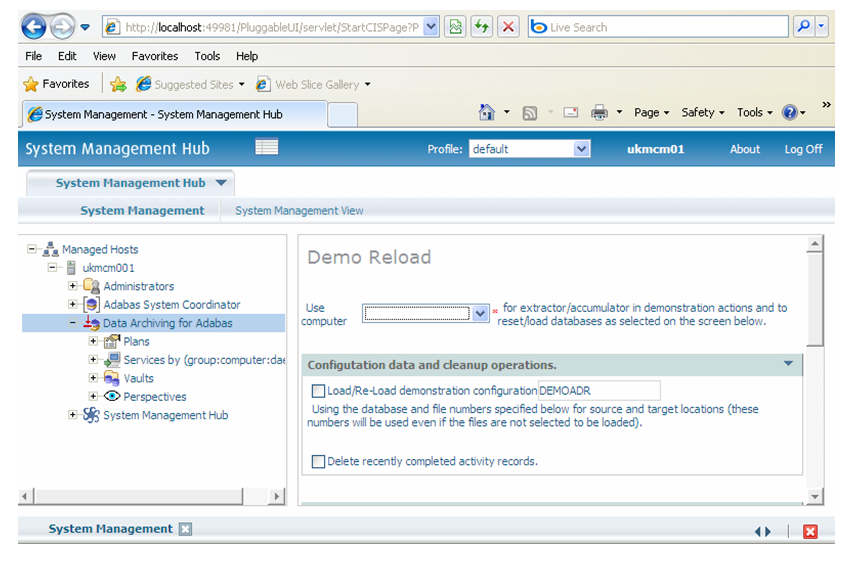
The demo load/re-load allows you to:
Choose which computer the load/re-load processing is to take place on (out of all those computers known so far to the configuration file).
Reset the list of recent completed activities, before doing anything else.
Load/re-load configuration objects called DEMOADR (by default).
Load/re-load test applications files so that achiving operations can be seen running (the real demo).
Each time the DEMOADR configuration objects are loaded (or re-loaded), they are dynamically adjusted so they reflect a configuration for running on the computer that you indicate.
Note:
This means a multiple computer implementation (with shared
configuration file) may be re-loading the DEMOADR configuration so that the
computer doing the demo changes from one reload to the next. You can negate
this effect by giving a different name to the objects for each different
computer that you wish to demo on.
To run the demo load/re-load do the following…
Choose the computer where the load/re-load will run from the drop-down selection.
If you wish to load/re-load the configuration objects (Note: You must do this the first time!) check the “load/re-load demonstration configuration” box and choose the name of the objects (usually DEMOADR).
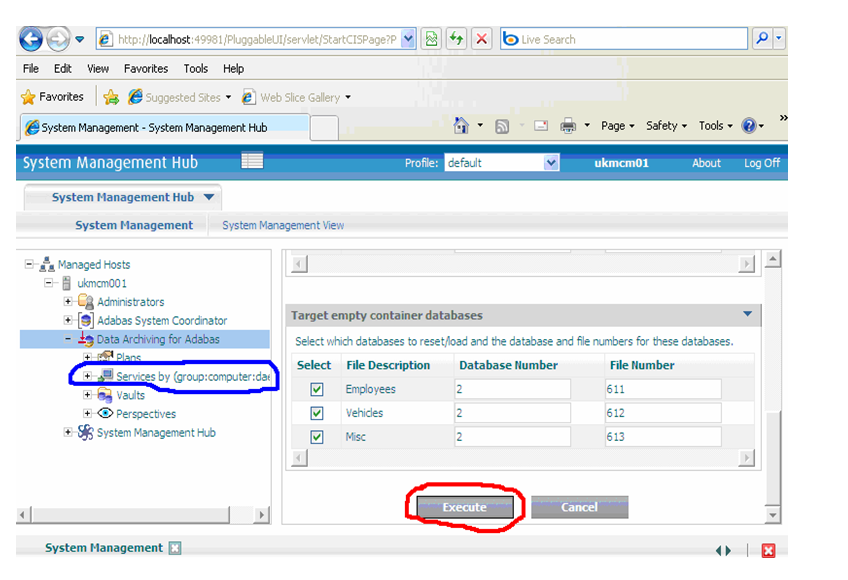
Lower down this panel you will see 6 check boxes for files in database 1 and database 2. The Demo Reload will create (or re-create) these files. If you have decided to use different database numbers (and want to use different file numbers) then make your alterations here. Check all the 6 boxes for the 6 test files together.
Note:
The files are affected in the computer selected above, which may
be different to the current computer being used.
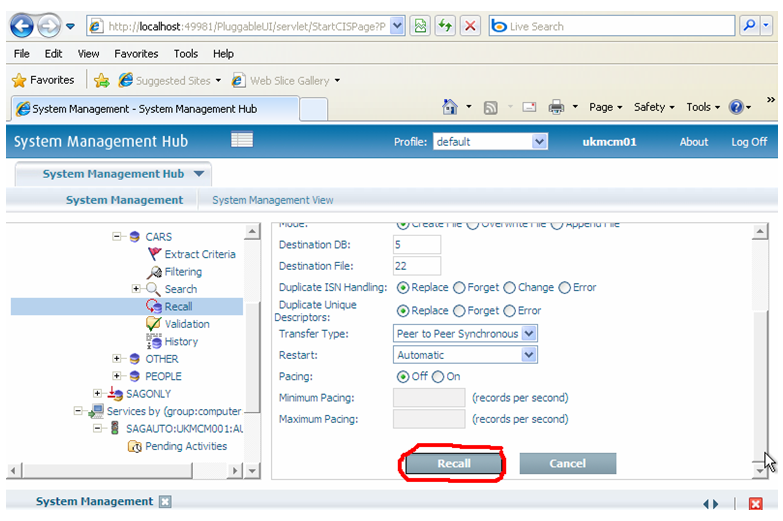
Slide to the bottom of the panel and click the button that you can see here (highlighted in red)…
The demo load/re-load takes an archived copy of the demo test data (kept within the product install) and recalls it into the Adabas files you will use to demo the product for yourself! This means you can actually watch real recall activities running while the re-load takes place. As follows…
Select the node (highlighted in blue above).
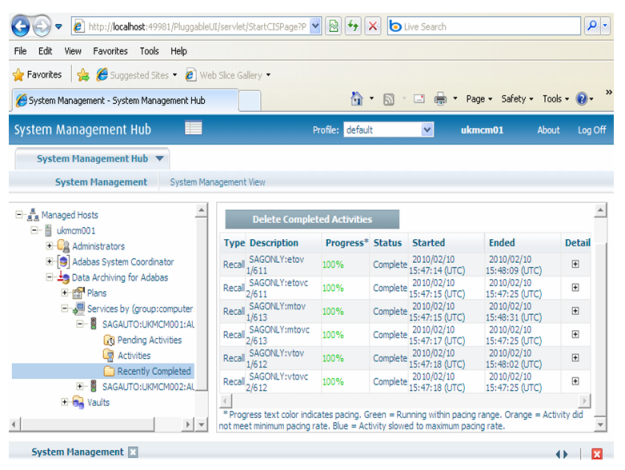
Within that select the node.
Within that select the pending, active, recent completions nodes to follow the progress of the recalls.
At the end you will see 6 successful completions as follows (below). Click the button to clear the recent history.
The demo is loaded (or re-loaded) and ready to use.
The demo contains the archive plan DEMOADR for which the actions CARS, OTHER and PEOPLE are defined. This section describes what these actions do and how to execute them.
This action will archive the contents of Adabas file 612 (cars) which is located in database 1 to the archive vault. The file contents are archived and then deleted from the source file. You can run this action by positioning to > , right-clicking on CARS, and then selecting .
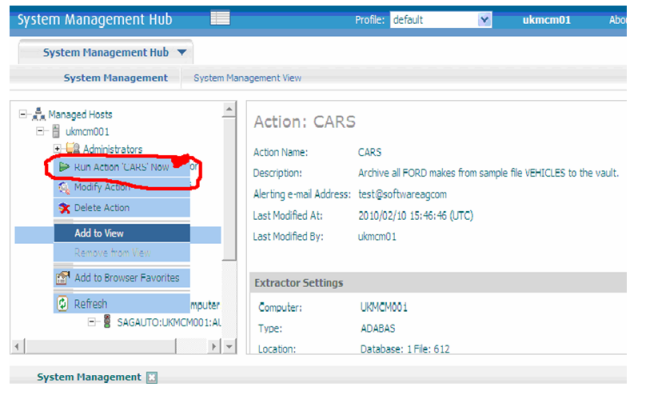
You can then monitor the activity for CARS in the Services node watching it go from pending to active to completed. Here is the display for the completed activity for demo CARS:
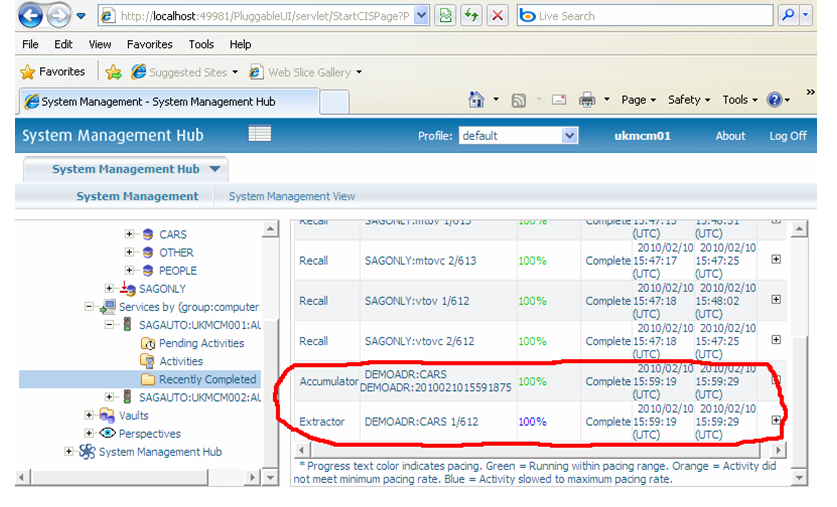
This action copies the contents of Adabas file 613 (Miscellaneous) in database 1 to Adabas file 613 in database 2.
This action deletes file 611 (Employees) from database 1. No archiving is performed.
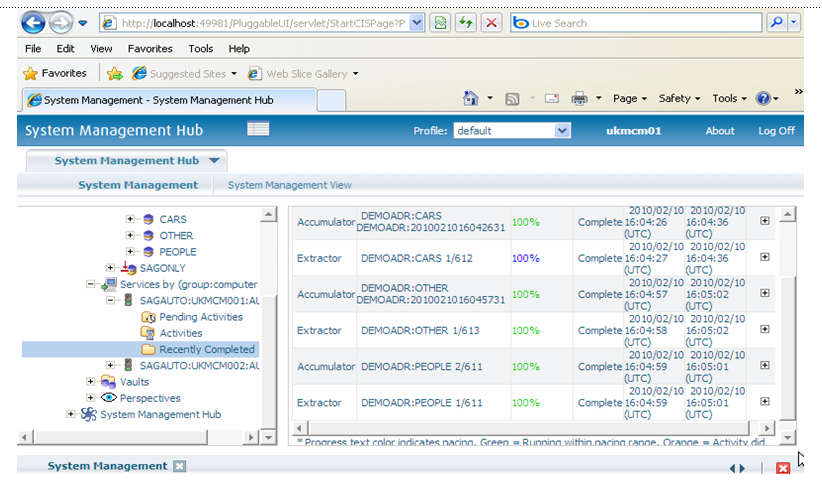
After you have run all of the above action plans, you can see the results by positioning to > SAGAUTO > and then right-clicking on .
You call recall archived data by positioning to > DEMOADR > > CARS > and then selecting , and then selecting the previous archive activity you wish to get back into Adabas (there is one selected in the screen below):
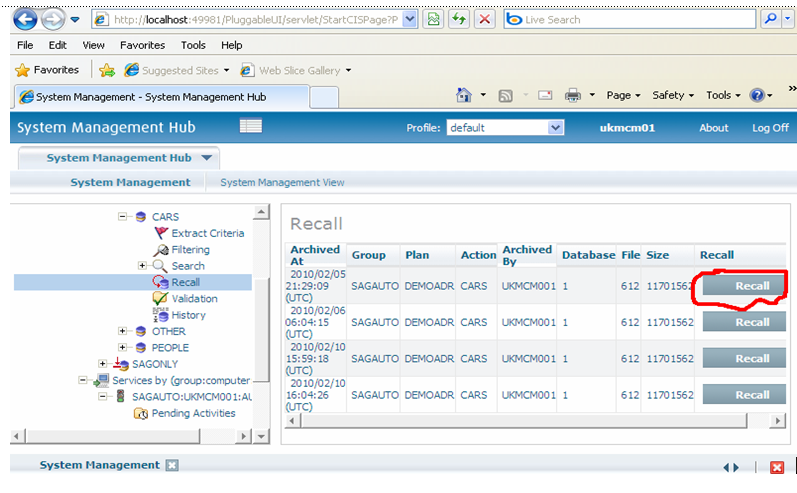
You then use the Recall menu to provide the parameters to be used for the recall: and then select at the bottom of the menu to start the recall operation.
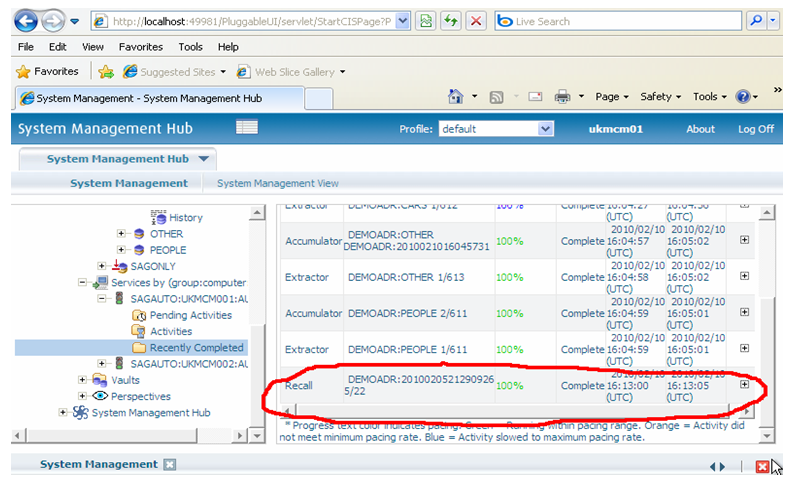
You can see the results by positioning to > SAGAUTO > and then right-clicking on .
This is no different to the first load apart from you can choose to not reload the configuration for DEMOADR if you wish, etc.