This document describes how to install Adabas Manager on Windows systems. Prior to attempting the installation, verify that you have met all of the requirements described in Platform Coverage and Prerequisites.
The section contains the following topics:
![]() To install Adabas Manager in a Windows
environment:
To install Adabas Manager in a Windows
environment:
Install Entire Net-Work Client if it has not already been installed at your site. For complete information on Entire Net-Work Client, including its installation and prerequisites, read Entire Net-Work Client Administration.
Insert the Adabas Manager installation CD into your CD-ROM drive. The CD should not be removed from the CD-ROM drive until the installation is completed.
If the Windows Autorun mode is active (this is the default), the installation will start automatically. If it does not, locate and run the setup.exe file found in the root directory of the CD or in the dir subdirectory on the CD-ROM.
If the installation is successful, the InstallShield Wizard Complete panel appears.
If for any reason the installation is not successful, you will receive one of several possible error messages. Contact your local distributor for information about customer support services.
Note:
If the installation fails, it is likely that some parts of the
product will have been installed. Therefore, before you attempt to install
Adabas Manager again, run the installation program
to remove it.
Important:
If you have Event Replicator for
Adabas installed and are using the Predict
Generate/Mapping Tool for the Global Format Buffers, the
Predict Access Component must be installed manually.
For details see section Installing
Predict Access Component and the
Event Replicator
Administration documentation.
If you have Event Replicator for Adabas 2.6.1 installed and are using the Predict Generate/Mapping Tool for the Global Format Buffers, the Predict Access Component must be installed manually.
![]() To install the Predict Access
Component:
To install the Predict Access
Component:
If Natural or Natural Runtime is not installed on your PC, you can install Natural Runtime from the delivery medium. For details on the installation and operation of Natural Runtime, please see section Installing Natural or Natural Runtime on a PC in the Natural documentation.
Copy an existing FNAT to a new location.
Note:
Although it is possible load the required
Natural program in an existing
Natural system file (FNAT), it is recommended to
create a new FNAT to hold these programs.
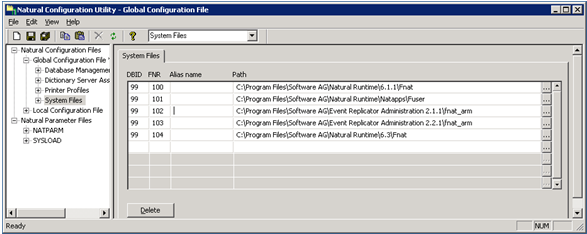
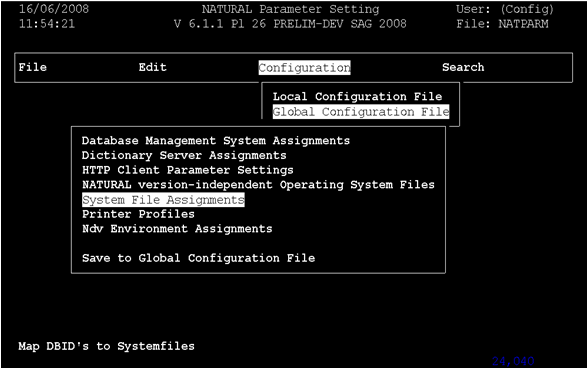
Start the and navigate to . Assign a new Database/File number to the FNAT:
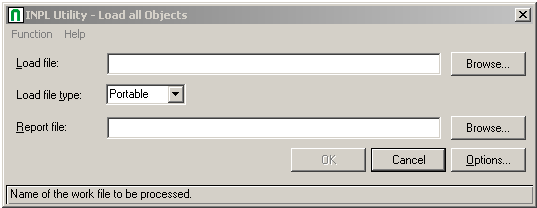
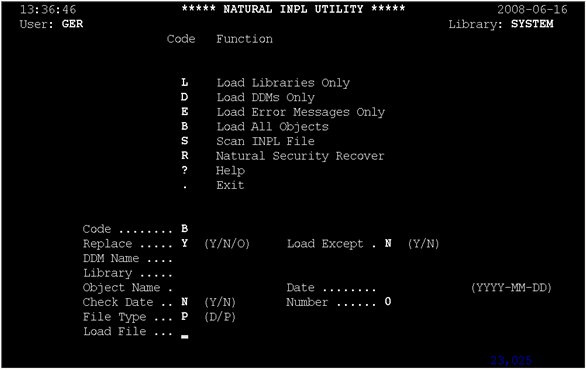
Start Natural with the new FNAT and use the INPL Utility to load the provided file (portable work file):
![]() To update the registry:
To update the registry:
Use the Adabas Manager Configuration agent to:
enter the ID of the database containing the Predict repository (DBID) and the file number of the FDIC file;
enter the Natural Runtime parameters (DBID and file number of the FNAT containing the Predict Access Component);
enter the Natural Bin Directory.
Select in tree-view and right-click on it.
Select in the menu.
The Adabas Manager Configuration panel is displayed in detail-view:
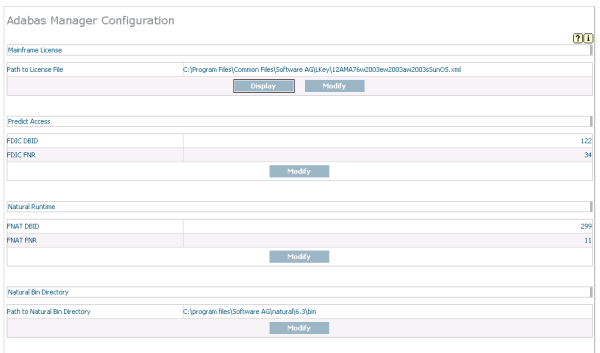
Press the buttons and enter the required values.
For details on special format buffer conversions with Event Replicator Administration, see the Event Replicator Administration documentation.
This section describes how to uninstall Adabas Manager in a Windows environment.
Notes:
![]() To uninstall Adabas Manager on
Windows:
To uninstall Adabas Manager on
Windows:
Go to Start/Settings/Control Panel.
Select Add/Remove Programs.
Select Software AG Adabas Manager 7.6.3 and click on the button.
The InstallShield Wizard is invoked.
Select Remove on the Welcome panel and click . Click for any verification messages.
The Setup Status panel appears on which you can watch the progress of the uninstallation.
When the uninstallation has completed, the Finish panel appears. Click to end the uninstallation.
Alternatively, when you try to install this version of the product, the InstallShield automatically detects whether another version is already installed and prompts you to remove it.