
This document covers the following topics:
This installation documentation provides just a brief description on how to install Adabas directly on the target machine using the Software AG Installer GUI. For detailed information on the Software AG Installer, see Using the Software AG Installer.
 To install Adabas
Start the Software AG Installer GUI as described in Using the Software AG Installer.
When the first page of the Software AG Installer GUI (the so-called Welcome panel) is shown, press the button repeatedly (and specify all required information on the shown panels as described in Using the Software AG Installer) until the panel containing the installation directory appears.
Note:
The section
Side-by-Side
Installations provides details on the restrictions, which
apply to the installation directory when multiple instances of the Adabas are
to be installed side-by-side.
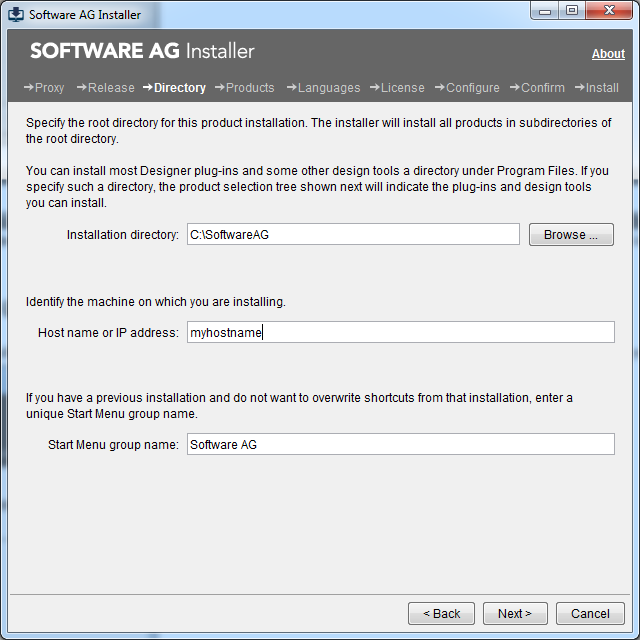
Specify the installation directory, host name or IP address (optional) and the Start Menu group name.
Note:
If you opt to install several versions of Adabas in
parallel directories, you should not use the proposed installation directory
C:\SoftwareAG but a
subdirectory, for exampleC:\sSoftwareAG\ada67, and to
change the Start Menu group name, for example to Software AG Adabas 6.7, to
install the release version of Adabas 6.7. The installation wizard does not
allow you to install two Adabas versions into the same directory.
Press the button.
Note:
The panel shown below is an example of a possible product
selection.
The panel containing the product selection tree appears. This tree lists the products for which you have valid credentials and which can be installed on the operating system of the machine on which you are installing.

Note:
Products or product versions which are already installed in
the selected installation directory are shown as disabled.
If you want to install Adabas and pre-selected product components, select the Adabas Products node.
Notes:
Or:
If you want to customize the list of selected product
components, expand the Adabas Products node, deselect
Adabas Products and select the product components that you want to install.
If you select a single Adabas product component, the installer automatically selects any additional components which are also required (for further information see Components Installed with Adabas).
If you want to install Adabas Client, select Adabas Client in the product selection tree. The Adabas Client is always installed together with Adabas, but can also be installed separately.
Press the button.
Read the license agreement, select the check box to agree to the terms of the license agreement, and press the button.
On the last panel, review the list of products and items you have selected for installation. If the list is correct, press the button to start the installation process.
When the Software AG Installer has completed the first-time installation, additional configuration steps are required. See Completing the Installation for further details.