This document provides you with the information necessary to install and to configure Adabas on UNIX platforms.
The following main topics are described:
This section describes the prerequisites for installing Adabas and how to perform the Adabas installation on UNIX.
This section contains the following topics:
Before you start installing Adabas, make sure that you meet the prerequisites for your environment as described below.
Note:
The RAM size given in the hardware prerequisites for each platform
only applies if you do not intend to use LOBs. For LOB processing, you need at
least four times the size of the LOB data concurrently accessed. However, it
may happen also with this memory size that large LOBs cannot be processed
because of memory fragmentation.
For the installation of Adabas, the following hardware requirements apply:
| Hardware Prerequisites for HP-UX | |
|---|---|
| Processor: | PA_RISC |
| RAM: | 1GB |
| Disk space: |
Installing the optimized version of Adabas requires approximately 85MB. An additional 180MB are required if you install the trace version of Adabas. These figures do not include disk space requirements for other databases that you will create. |
| CD-ROM drive: | A CD-ROM drive to install the software. |
For the installation of Adabas, the following software requirements apply:
| Software Prerequisites for HP-UX | |
|---|---|
| Operating System: |
HP-UX 11i Version 3 |
We suggest that you install all of the manufacturer's recommended patches before you start the installation.
For the installation of Adabas, the following hardware requirements apply:
| Hardware Prerequisites for HP-UX | |
|---|---|
| Processor: | Itanium |
| RAM: | 1GB |
| Disk space: |
Installing the optimized version of Adabas requires approximately 85MB. An additional 180MB are required if you install the trace version of Adabas. These figures do not include disk space requirements for other databases that you will create. |
| CD-ROM drive: | A CD-ROM drive to install the software. |
For the installation of Adabas, the following software requirements apply:
| Software Prerequisites for HP-UX | |
|---|---|
| Operating System: |
HP-UX 11i Version 3. |
We suggest that you install all of the manufacturer's recommended patches before you start the installation.
For the installation of Adabas, the following hardware requirements apply:
| Hardware Prerequisites for IBM AIX | |
|---|---|
| Architecture: | IBM e-Server pSeries |
| RAM: | 1GB |
| Disk space: |
Installing the optimized version of Adabas requires approximately 45MB. An additional 60MB are required if you install the trace version of Adabas. These figures do not include disk space requirements for other databases that you will create. |
| CD-ROM drive: | A CD-ROM drive to install the software. |
For the installation of Adabas, the following software requirements apply:
| Software Prerequisites for IBM AIX | |
|---|---|
| Operating System: |
IBM AIX Version 6.1 (64 bit) with at least system technology level 6100-04-01 IBM AIX Version 7.1 |
We suggest that you install all of the manufacturer's recommended patches before you start the installation.
For the installation of Adabas, the following hardware requirements apply:
| Hardware Prerequisites for Solaris | |
|---|---|
| Processor: | UltraSPARC |
| RAM: | 1GB |
| Disk space: |
Installing the optimized version of Adabas requires approximately 45MB. An additional 60MB are required if you install the trace version of Adabas. These figures do not include disk space requirements for other databases that you will create. |
| CD-ROM drive: | A CD-ROM drive to install the software. |
For the installation of Adabas, the following software requirements apply:
| Software Prerequisites for Solaris | |
|---|---|
| Operating System: |
SUN Solaris Version 10 (64 bit) If you use the ufs file system, you must install the Solaris 10 patch 139483-03. Problems with starting the workbench may be caused if the following Solaris 10 patch is missing: 119059-45. |
We suggest that you install all of the manufacturer's recommended patches before you start the installation.
For the installation of Adabas, the following hardware requirements apply:
| Hardware Prerequisites for Linux | |
|---|---|
| Processor: | x86 or x86-64 |
| RAM: | 1GB |
| Disk space: |
Installing the optimized version of Adabas requires approximately 45MB. An additional 60MB are required if you install the trace version of Adabas. These figures do not include disk space requirements for other databases that you will create. |
| CD-ROM drive: | A CD-ROM drive to install the software. |
For the installation of Adabas, the following software requirements apply:
| Software Prerequisites for Linux | |
|---|---|
| Operating System: |
SUSE Linux Enterprise Server 11 (x86, x86-64). |
|
Red Hat Enterprise Linux 5 AS (x86, x86-64). Red Hat Enterprise Linux 6 AS (x86-64).
|
|
Notes:
For the installation of Adabas, the following hardware requirements apply:
| Hardware Prerequisites for IBM zLinux | |
|---|---|
| Architecture: | IBM System z, z9 and z10 (but not z890, z900, z990) |
| RAM: | 1GB |
| Disk space: |
Installing the optimized version of Adabas requires approximately 45MB. An additional 60MB are required if you install the trace version of Adabas. These figures do not include disk space requirements for other databases that you will create. |
| CD-ROM drive: | A CD-ROM drive to install the software. |
For the installation of Adabas, the following software requirements apply:
| Software Prerequisites for IBM zLinux | |
|---|---|
| Operating System: |
SUSE Linux Enterprise Server 11. |
|
Red Hat Enterprise Linux 5 AS. Red Hat Enterprise Linux 6 AS.
|
|
Notes:
Adabas requires increased System V resources. You can check your
current settings by using the command showipc -s. In the
following, the resources required for Adabas are described. Note that there are
also other processes running on your system that require IPC resources.
Therefore, you must add the IPC resources required by the other processes to
parameters that describe a systemwide maximum number or size of resources. For
parameters that describe the maximum size of a resource, the value must, of
course, be large enough for the other processes.
Note:
Instead of specifying kernel parameters, on Solaris 10 it is
possible to change these parameters dynamically, for example for a non-global
Solaris 10 zone. Please refer to the Solaris 10 documentation for futher
details.
Check, and if necessary, change the values of the following parameters:
The maximum number of outstanding I/O operations. A minimum of 5000 is recommended.
The maximum number of AIO ops that can be specified in a lio_listio call. In earlier versions of Adabas (before V3.3), PIO is used. The value for this parameter should be set to 256 or 128. This parameter applies to HP-UX only.
Note:
The value of the parameter max_thread_proc should be set to
aio_listio_max plus a minimum of 128 plus the value specified for the keyword
total from the ADANUC parameter
READ_PARALLEL_LIMITS.
The maximum size (in bytes) of a shared memory segment. The size of SHMMAX limits the size of the Adabas buffer pool (Adabas LBP nucleus parameter) and the number of attached buffers (Adabas LAB nucleus parameter). The required size is the maximum value of (750 KB + LAB + LBP) of all databases.
The maximum number of shared memory segments, systemwide. Each Adabas database uses 4 shared memory segments.
The maximum number of shared memory segments per process. Adabas requires 4 segments.
Notes:
The maximum size (in bytes) of a given queue (i.e. the sum of all messages in that queue). The value should be 32 * the maximum value of NCL of all databases. A value of 65535 bytes is recommended if you use NET-WORK.
The size (in bytes) of the largest message that can be sent. A value of 32 is required. A value of 65535 bytes is recommended if you use NET-WORK.
Note:
This parameter has become obsolete for Solaris
10.
The maximum number of message queues, systemwide. Each Adabas client requires one message queue per accessed database ID. The required value is given by the sum of (2 + NCL + max. (2,NT/3)) for all databases.
The maximum size of all messages, systemwide. This parameter limits the combined number of concurrent clients of all database. The value should be the sum of (32 * NCL) for all databases. A value of 65535 bytes is recommended if you use NET-WORK.
Note:
On some platforms, this parameter is called MSGMNM, or it may not
be available.
The maximum number of semaphore sets, systemwide. Each Adabas database requires 2 semaphore sets.
The maximum number of semaphores per semaphore set. This parameter limits the number of users per database (NCL parameter). This parameter should be at least as large as the largest NCL value of all databases + 1.
The maximum number of semaphores, systemwide. This parameter limits the combined number of concurrent clients of all databases. Each database requires 2 + NCL.
Note:
This parameter has become obsolete for Solaris
10.
The maximum value of any semaphore. A value of 32767 is recommended.
Note:
This parameter has become obsolete for Solaris
10.
The maximum number of undo structures, systemwide. The value is given by the sum of (NCL +2) for all databases.
Note:
This parameter has become obsolete for Solaris
10.
Adabas uses the AIX asynchronous I/O facility, which by default is not enabled in the AIX kernel. Perform the following steps as superuser to enable asynchronous I/O:
![]() To enable asynchronous I/O (5.3)
To enable asynchronous I/O (5.3)
Start the AIX system administration command
smit.
Go to Devices -> Asynchronous I/O -> Change/Show Characteristics of Asynchronous I/O. Accept the values provided.
Go to Devices -> Asynchronous I/O -> Configure Defined Asynchronous I/O and execute it. If this command executes successfully, the following should be displayed:
aio0 available
![]() To enable asynchronous I/O (6.1)
To enable asynchronous I/O (6.1)
The I/O facility is enabled by default. Make sure it is available by
running the command ioo -a | grep active. If the
command runs successfully, the system returns this message:
aio_active = 1 posix_aio_active = 1
The performance of Adabas can be improved by making some changes to the thread scheduling model. By default, AIX uses 8:1 as the ratio of user threads to kernel threads. There are two ways in which you can change this ratio:
By setting the environment variable AIXTHREAD_MNRATIO. You can choose any ratio.
AIXTHREAD_MNRATIO=1:1
export AIXTHREAD_MNRATIO
By setting the environment variable AIXTHREAD_SCOPE.
AIXTHREAD_SCOPE=S
export AIXTHREAD_SCOPE
This gives you a 1:1 ratio.
AIXTHREAD_SCOPE=P
export AIXTHREAD_SCOPE
This gives you an M:N ratio.
AIXTHREAD_SCOPE=S is the recommended setting.
In this section the following is assumed:
The user account for the administrator of Software AG products is called "sag".
The group to which the administrator and all users of Software AG products are assigned is called "sag".
The home directory for the user "sag" is /opt/softwareag.
The root directory for Software AG products is /opt/softwareag.
Caution:
If you use a different administrator user and/or group name,
showipc, which is also used by the Adabas nucleus, only works after some
environment variables have been set. For further information, please refer to
ADANUC in
Utilities and showipc in
Administration.
![]() To perform these steps, use an appropriate system administration tool
(e.g. smit).
To perform these steps, use an appropriate system administration tool
(e.g. smit).
Create one administrator's account and one group for all Software AG products when you install your first Software AG product.
Define an administrator account to which all of the Software AG products installed at your site belong. Since all environment definition files for the products are written for the Bourne shell, this shell is required as the login shell for the administrator account.
Define a group to which the administrator and all users of Software AG products belong.
Create a login directory for the user "sag".
It is assumed that user and group accounts are defined in the respective files in /etc.
The following is a possible entry in the system file /etc/group:
sag:*:21:sag
The following is a possible entry in the system file /etc/passwd:
sag::100:21:SAG - Product Administrator:/opt/softwareag:/bin/sh
SAG environment
variable
The environment variable "SAG" defines the default location under which the directory trees of installed Software AG products are located. In the Bourne shell you can define it like this:
SAG=/opt/softwareag ; export SAG
The Adabas software will be installed in, and under the subdirectory ada of the location specified by $SAG.
Once you have set up your installation environment as described above, you can proceed with the installation itself, which will only take a few minutes.
The Adabas installation offers the three installations "Typical", "Minimal", and "Customized". "Typical" performs a complete installation (including the examples and the DBA Workbench). If you select "Minimal", Adabas will be installed with just the nucleus, the utilities and the Adabas client package (ACL). The "Customized" installation allows you to select the components you wish to install. Customized scenarios include just the nucleus and the Adabas client package (ACL) only (the absolute minimum configuration), the nucleus, the Adabas client package (ACL) and the DBA Workbench, or just the nucleus alone (when installing a new patch level). If you choose not to install one or more units during the installation procedure, you can add them at a later stage by re-running the Adabas installation procedure. Note that the installation procedure does not check which units are already installed.
Note:
The Adabas client package (ACL) is a subproduct that is also
installed with Entire Net-Work client. It contains the Adabas interface modules
that are required to access Adabas from applications. ACL has its own
versioning, because new versions may be delivered by Adabas and by Entire
Net-Work, and therefore using the versioning of Adabas or Entire Net-Work is
not appropriate. For further information about the Adabas interface modules,
see Linking Application
Programs in Command Reference.
The installation procedure examines the environment variable
DISPLAY to determine whether to run in graphical
or interactive text-oriented mode. If the environment variable
DISPLAY points to an active X-Server, the
graphical installation mode starts, otherwise the interactive text-oriented
installation mode starts. There is also a batch mode available (see
Batch Installation for further
information).
Note:
If you run the installation procedure in character mode, at each
command prompt, you must type in the exact wording (for example:
"accept" for "accept", not just
"y" or the ENTER key).
![]() To set the
To set the DISPLAY environment
variable
Enter the following shell commands (this example is for Bourne shell):
DISPLAY="<machine_name>:0"
export DISPLAY
replace "<machine_name>"by the name of your terminal device.
Note that the graphical mode can only start if there is an X-Server currently active.
![]() To install the Adabas product
To install the Adabas product
To perform this step, you must be the user "sag" with "su" or "sudo" privileges.
You need to have superuser permissions for some parts of the installation procedure. You can choose between entering the password of the root user and entering your own password if the third party tool "sudo" is installed and configured.
Mount the installation CD (in the following it is assumed that the mountpoint is "/cdrom").
Start the installation procedure from a writable working directory.
Enter the command:
/bin/sh /cdrom/setup.ux
The setup program is started and guides you through the installation.
If you want to install the trace version of the product, you have to use a parameterized call of setup.ux. In this case, enter the command:
/bin/sh /cdrom/setup.ux ada version
where version is the Adabas trace version number, e.g. t63003 (t stands for trace, and 63003 is the version and service pack number).
Note:
The Adabas client package installation is a subinstallation of
Adabas. In the case of a batch installation, a prerequisite for a trace
installation is that all trace subinstallations have to be installed before the
main product can be installed.
Installing ACL trace version: /bin/sh/cdrom/setup.ux acl tversion
Installing ADA trace version: /bin/sh/cdrom/setup.ux ada tversion
The file sagenv.new is created at the end of the installation. This file contains the settings for all required environment variables. Insert these settings into your profile (for example, ".profile"). Software AG strongly recommends that you save an old sagenv.new file before you start the installation or that you select another name for the file.
The following screen shots show an installation made on a Solaris machine in the graphical mode - please note that the exact number of the service pack may differ from the actual service pack that you are installing
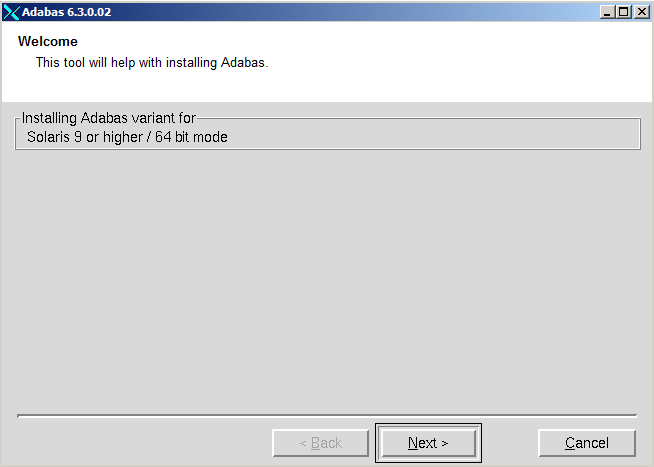
Choose to continue.
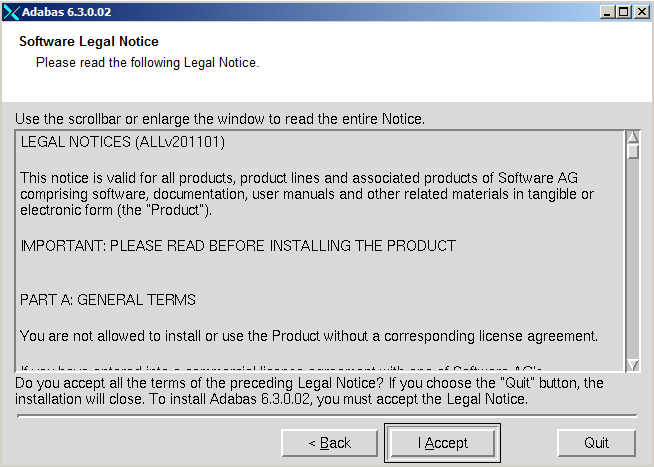
The license agreement is displayed. Choose to continue with the installation.
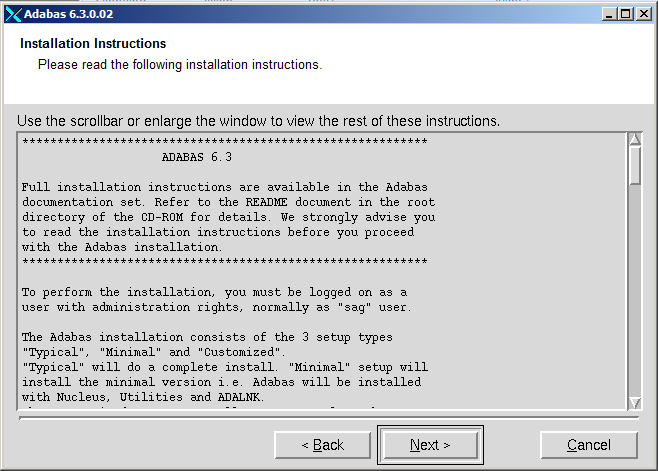
The installation instructions are displayed. Once you have read them, choose to continue.
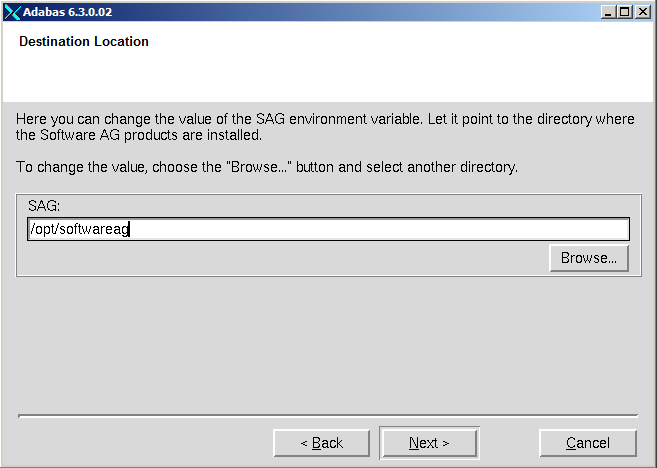
The dialog box is displayed. Enter the value of the directory of the $SAG environment variable, or browse to a SAG directory if you already have one. If the destination you specify does not exist, you will be asked if you want to create it. Choose to continue.
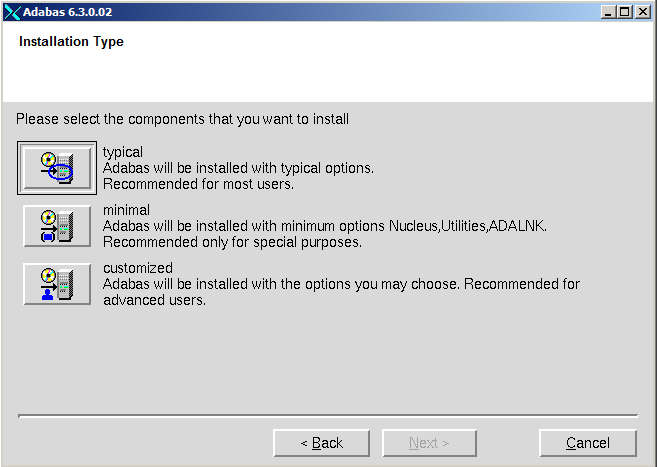
Choose the type of installation that you want to make.
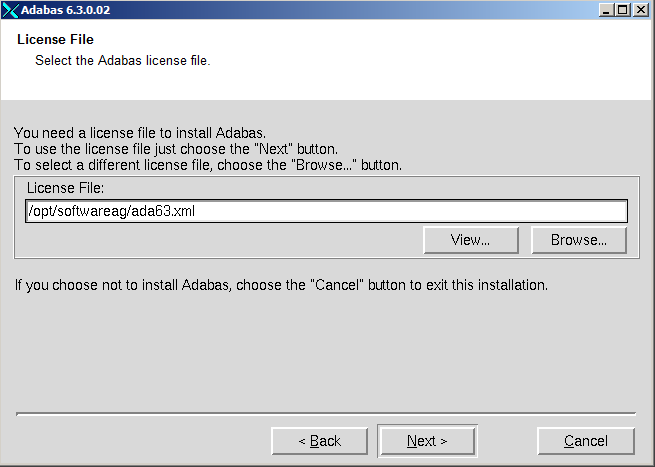
Enter the path where your license file can be found, then choose to continue.
Notes:
If you choose customized, the following installation options are available:
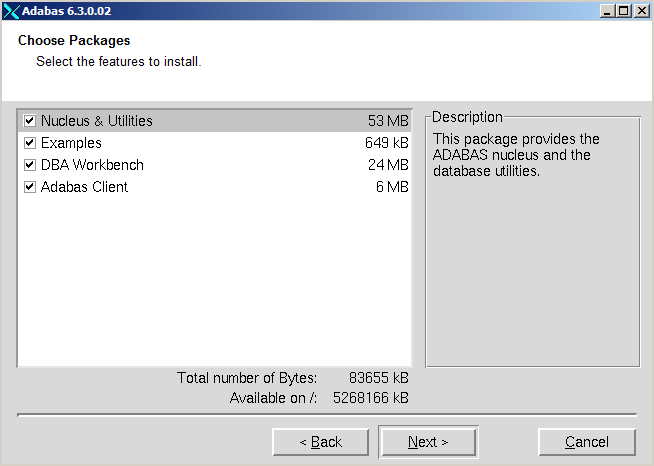
| Option | Meaning |
|---|---|
| Adabas Client | Installs everything that is required in order to
build an application, including shared libraries and header files. If only
Adabas Client is selected, you can only access remote databases if you have
Entire Net-Work installed.
Note: |
| Nucleus & Utilities | Implies the Adabas Client option, in addition all utilities (except the Workbench) and the nucleus can be executed after installation. Local Adabas calls are possible. |
| DBA Workbench | Implies both the Adabas Client and the Nucleus & Utilities option, in addition the Workbench is installed. |
| Examples | Only installs all example programs and the files required to load the demo data. |
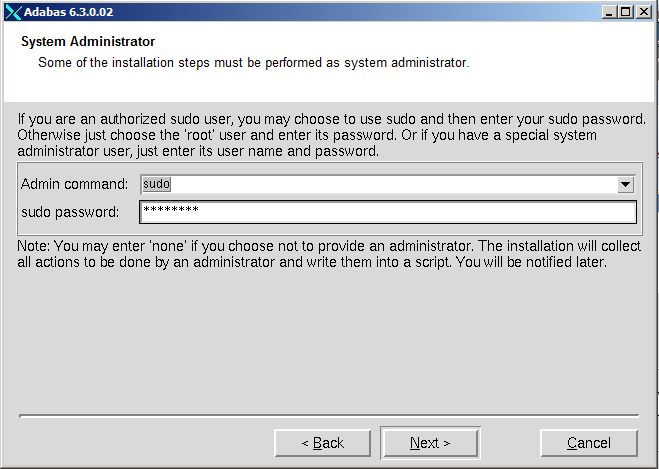
Note:
This screen is not displayed if you are making the installation as
'root'.
From the drop-down list box select one of the options shown in the following table.
| Option | Meaning |
|---|---|
| none | Password entry is disabled, requested privileged actions that are otherwise performed during the installation are written to a script instpriv.bsh, that can be executed later with sudo or root authentication. |
| sudo | Sudo password must be entered. |
| root | Root password must be entered. |
Select the root command or the sudo command to perform privileged actions, then enter either the root password or your own sudo password, where appropriate. Choose to continue.
Note:
Root permission is required for the following reasons: for changing
the owner to root and setting the s-bit for showipc/showkrn, and for performing
the installation in the recommended default directory
"/opt/softwareag" (if you are not the owner of this
directory).
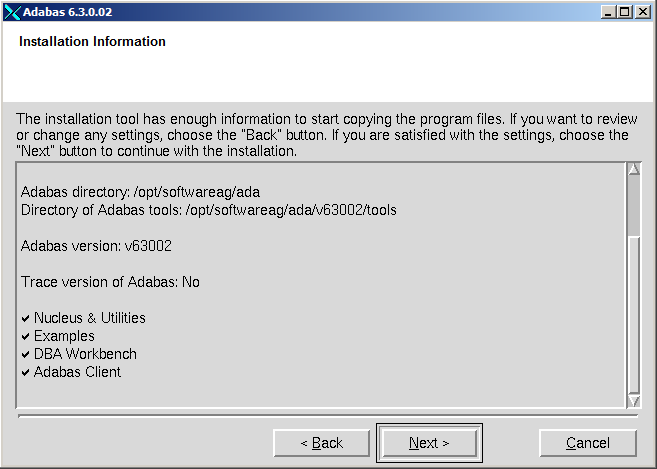
The settings you have selected are now displayed. Choose to change the settings, or choose to start extracting the files.
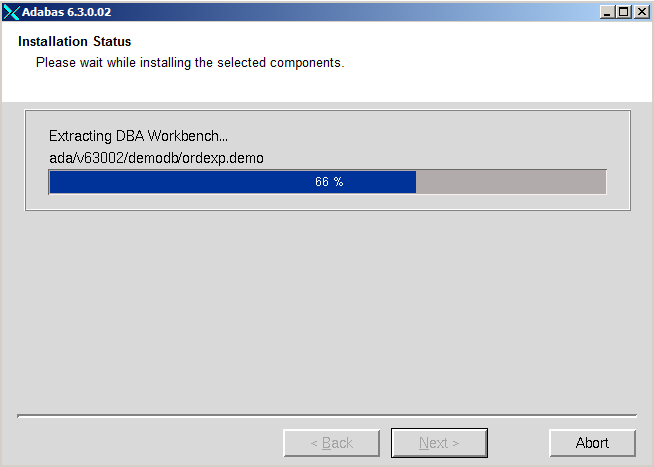
Once the files have been extracted, choose to start copying them.
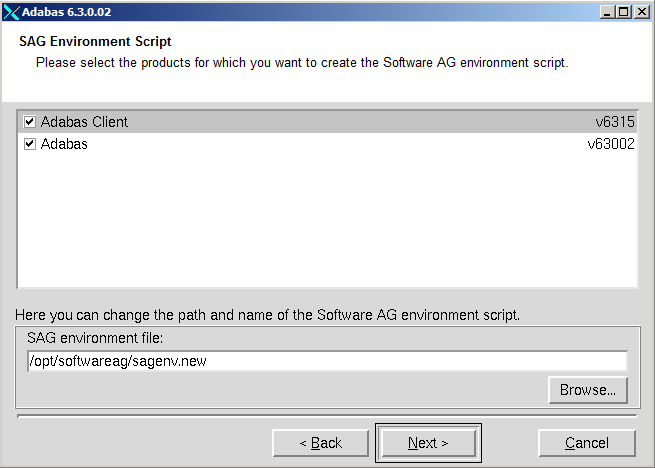
Select the products for which you want to create the environment file sagenv.new.
Choose to continue.
Note:
If you need local Adabas calls, both products must be
selected.
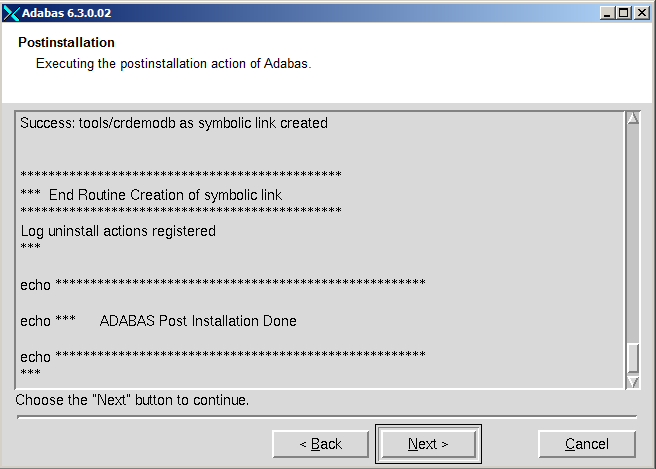
The postinstallation actions are displayed. Once they have finished, choose to continue.
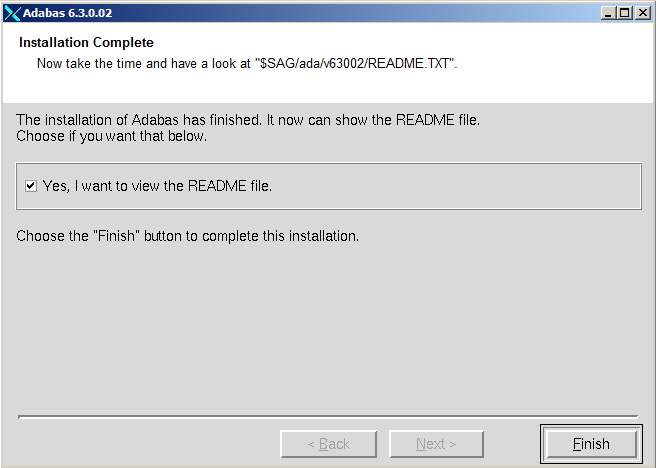
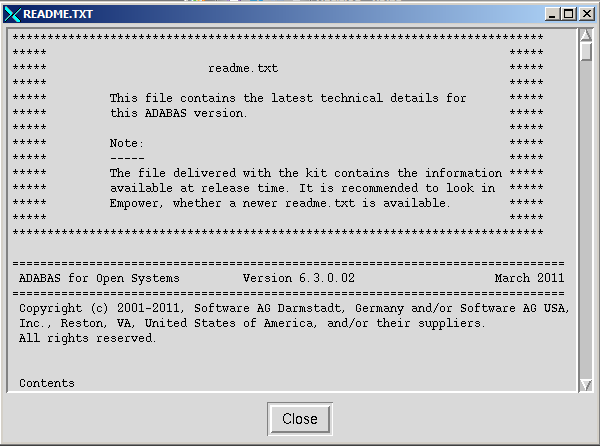
Once the installation has completed, the readme file is displayed. Uncheck the check box if you don't want to display the readme file. Choose to leave the installation program.
When Adabas is installed, the log file (ADAv630nnInst.log, where nn is the service pack number, is written, and another file, ADAv630Inst.sh, which contains the batch installation settings of this particular installation, is written to $SAG/ada/v630/INSTALL. This file can then subsequently be executed as a shell script. An example is shown below.
If you install the product in character mode, the option
-batch can be used to execute the installation program without
further user interaction. If user input is required, the default values are
used; if these values are not appropriate, the correct values have to be set
using the corresponding options in the command line. The available command line
options can be displayed by calling the installation program with the
-help option.
| Warning: Since the value of $SAG cannot be set using an option, it must already have the correct value in the calling shell. |
All prerequisites and parameters are checked for correctness: missing or invalid values will cause the batch installation to terminate.
Installation programs that require post-installation actions executed as a superuser usually have the following three options:
| Variable/Flag Name | Type | Value | Explanation |
|---|---|---|---|
| -user | string | ( ) | User account of SAG user |
| -password | string | ( ) | Root password (usage not recommended) |
| -authcmd | choice | (su sudo "") | Command used for authentication |
It is possible to specify the superuser password (or the user's password in connection with -authcmd sudo), as the value of the -password option, but this should not be done, because the password would appear as readable plain text on the screen or, even worse, be stored in the calling shell script. Instead, we recommend that you start the installation program using su or sudo, specifying the name of the SAG user (i.e. its own account) as the value of the -user option as shown below:
# Unsafe method
sh /cdrom/setupux -batch -password secret

# Recommended method
su root -c "sh /cdrom/setup.ux -batch -user sag"
This example shows a log file for Adabas that was created during a
custom installation. The user is abc, the sudo
command was used and a password was supplied.
#!/usr/xpg4/bin/sh
# ----------- <Start of generated batch script> ----------
# -- <Adapt the following lines until end of generated> --
# ------------ < batch script to your needs > ------------
#
# Please consult the installation documentation for the
# necessary prerequisites.
#
# You may need to install the following Software AG products
# separately below the same $SAG, before the batch is actually started.
# Please consult the installation documentation.
# - acl v6315 "Adabas Client"
# You will find the batch scripts for the other installations
# in the respective INSTALL/ directories of the products.
#
# You should replace SECRET by the actual password
# or (even better) call this script with superuser privileges.
#
  SAG="/opt/softwareag"; export SAG
  /usr/xpg4/bin/sh /FS/fs2059/install/cdrom_ada63002/setup.ux ada v63002 -batch -directory a64b \
	-sagenv /opt/softwareag/sagenv.new \
	-installtype customized \
	-user abc \
	-password SECRET \
	-authcmd sudo \
	-license /opt/softwareag/ada63.xml \
	-packages "
		Nucleus & Utilities  : on
		Examples : on
		DBA Workbench : on" \
	-products "
		acl v6315 : on
		ada v63002 : on"
# ----------- <End of generated batch script> ----------
This example shows the generated batch file for the Adabas client package (ACL) that was created during a custom installation. The user is abc.
#!/usr/xpg4/bin/sh
# ----------- <Start of generated batch script> ----------
# -- <Adapt the following lines until end of generated> --
# ------------ < batch script to your needs > ------------
#
# Please consult the installation documentation for the
# necessary prerequisites.
#
  SAG="/opt/softwareag"; export SAG
  /usr/xpg4/bin/sh /FS/fs2059/install/cdrom_ada63002/setup.ux acl v6315 -batch -directory a64b \
	-user abc \
	-sagenv /opt/softwareag/sagenv.new \
	-caller ada \
	-packages "" \
	-products "
		acl v6315 : on"
# ----------- <End of generated batch script> ----------
This example shows the generated batch file for Adabas that was created during a custom installation. The user is abc, and the user has a root login on the machine.
#!/usr/xpg4/bin/sh
# ----------- <Start of generated batch script> ----------
# -- <Adapt the following lines until end of generated> --
# ------------ < batch script to your needs > ------------
#
# Please consult the installation documentation for the
# necessary prerequisites.
#
# You may need to install the following Software AG products
# separately below the same $SAG, before the batch is actually started.
# Please consult the installation documentation.
# - acl v6315 "Adabas Client"
# You will find the batch scripts for the other installations
# in the respective INSTALL/ directories of the products.
#
# You should replace SECRET by the actual password
# or (even better) call this script with superuser privileges.
#
  SAG="/opt/softwareag"; export SAG
  /usr/xpg4/bin/sh /FS/fs2059/install/cdrom_ada63002/setup.ux ada v63002 -batch -directory a64b \
	-sagenv /opt/softwareag/sagenv.new \
	-installtype customized \
	-user abc \
	-password SECRET \
	-authcmd su \
	-license /opt/softwareag/ada63.xml \
	-packages "
		Nucleus & Utilities  : on
		Examples : on
		DBA Workbench : on" \
	-products "
		acl v6315 : on
		ada v63002 : on"
# ----------- <End of generated batch script> ----------
This example shows the script instpriv.bsh that is created when the installation is executed without sudo or root privileges. This script can be executed after the installation once the user has logged on again as sudo or root.
# Created by Software AG installation at 2011-03-29 10:20:05 MEST
# Please execute this shell script as root.
#
SAG="/opt/softwareag"; export SAG
#
# 2011-03-29 10:20:05 MEST
# No permissions to: Auth command for /opt/softwareag/ada/v63002/bin/showkrn
echo "Executing: Auth command for /opt/softwareag/ada/v63002/bin/showkrn"
cd /opt/softwareag
chown root /opt/softwareag/ada/v63002/bin/showkrn

#
# 2011-03-29 10:20:05 MEST
# No permissions to: Auth command for /opt/softwareag/ada/v63002/bin/showkrn10
echo "Executing: Auth command for /opt/softwareag/ada/v63002/bin/showkrn10"
cd /opt/softwareag
chown root /opt/softwareag/ada/v63002/bin/showkrn10

#
# 2011-03-29 10:20:05 MEST
# No permissions to: Auth command for /opt/softwareag/ada/v63002/bin/showipc.bin
echo "Executing: Auth command for /opt/softwareag/ada/v63002/bin/showipc.bin"
cd /opt/softwareag
chown root /opt/softwareag/ada/v63002/bin/showipc.bin
The Adabas client installation is a subinstallation of Adabas, which installs the Adabas client communication components. During the installation, the environment variables $ACLDIR and $ACLVERS are set in aclenv and are sourced in sagenv.new before adaenv is sourced. Please ensure that the corresponding Adabas Client option is set during the Adabas installation dialog SAG Environment File.
This section contains information about what to do after the actual Adabas installation. For a summary of bug fixes, known problems and restrictions and last-minute news please see the README.TXT file, which has been copied to $SAG/ada/vnnn. The contents of this file are displayed automatically at the end of the installation procedure.
This section contains the following topics:
By convention, a lock file (install.lock) is written to $SAG during the installation in order to prevent parallel installation into $SAG at the same time.

This may happen if you accidently close XWindows sessions, or if you end your installation/uninstallation process with a kill command.
You must remove this link, because as long as this link exists, it is not possible to install/uninstall into this $SAG. Before you remove install.lock make sure that the process on the machine mentioned in the link no longer exists.
The link below contains the current user, host ip address and process id .
lrwxrwxrwx 1 sag sag 22 Feb 12 10:25 install.lock -> sag@10.20.96.151:26372
On a UNIX system, disk space can either be used directly via the raw disk I/O interface, or indirectly via a regular file of a mounted file system, using the UNIX cache as a buffer. If you do not intend to use the raw sections, no further action is required here.
By convention, the disks on UNIX systems are divided into sections in order to manage the space more efficiently and flexibly. Each section defines a range of sectors, and spans contiguous tracks and cylinders.
Some sections are formed by merging smaller sections, which means that the same physical space is defined twice. Usually, there is only one section scheme for all disk types. On smaller disk types, some of the sections are smaller and some may even be missing, but the relative order and the overlapping of existing sections is the same on all disks.
In UNIX systems, physical devices are treated as if they were files. Each device is represented by one or more entries in the directory /dev or in one of its subdirectories. The entries are called device files or special files.
There are two types of I/O device drivers:
raw or character device drivers;
block device drivers.
Block device drivers use the UNIX cache to read/write and buffer a block of a disk or tape. Disk devices have both a raw and a block interface. Each section of a disk is represented by two device files, one for the block interface and one for the raw interface.
The AIX operating system supports freely-definable logical volume names. These names are defined using the system management interface tool (SMIT). Refer to your system documentation for further information about defining logical volume names.
Note:
Do not use the name /dev/adabas, as this will lead to
serious problems.
On UNIX systems, disk sections can be used as file systems, swap space or directly by application programs. Because there is no automatic check for multiple use of the same or overlapping disk sections, the system manager and the DBA have to cooperate. Usually, only the system manager has both read and write access to the device files that represent the raw interface of disk sections.
When using a disk section for ADABAS containers, the system manager must set read and write access for ADABAS by changing the owner of the disk section to the owner of adabas images. When doing so, care must be taken to ensure that the read/write privilege only applies to disk sections that do not overlap with sections that are used for other purposes.
On UNIX systems that maintain a mount table, ADABAS performs a check during the initialization of a disk section to determine whether the disk section overlaps with one that is already mounted. If an overlap is detected, the initialization request is refused, if the option MOUNTCHECK has been specified in ADADEV.
Each disk section used by ADABAS must be initialized once by using the disk-space management utility ADADEV. Once this has been done, there only remains one difference between using the raw disk I/O interface and using the file system. The environment variable of an Adabas container file or sequential file must be set to the path name of the device file that represents the raw interface of the disk section, rather than to the path name of a regular file of a file system.
ASSO1=/dev/rrz0c
export ASSO1
setenv ASSO1 /dev/rrz0c
In this version of Adabas, the container files and some sequential files can be located on either raw device or file system, and some can only be located on file system.
The following table lists the Adabas container files and sequential files which can be located on either raw device or file system:
| Type | Environment Variable |
|---|---|
| ASSO | ASSO1, ASSO2, ... |
| DATA | DATA1, DATA2, ... |
| WORK | WORK |
| SORT | SORT1, SORT2, ... |
| TEMP | TEMP1, TEMP2, ... |
| PLOG | NUCPLGx, PLPPLGx, RECOUTx, RECPLGx |
| CLOG | NUCCLGx, CLPCLGx |
| BACKUP | BCK00nx, BCKOUTx |
| DTA | CMPDTAx, DCUDTAx, MUPDTAx, ULDDTAx |
| DVT | CMPDVTx, MUPDVTx, ULDDVTx |
| ADAMUP LOG | MUPLOGx |
| ADAMUP TEMP | MUPTMPx |
| Error File | CMPERRx, DCUERRx, ERRINx, INVERRx, MUPERRx, RECERRx |
The following table lists all of the Adabas sequential files which can only be located on file system:
| Type | Environment Variable |
|---|---|
| ADAMUP ISN | MUPISN |
| FDT | CMPFDT, DCUFDT, FDUFDT |
| Raw Data | CMPIN, DCUOUT |
The COPY function of the Adabas utility ADADEV can be used to COPY an Adabas container file or sequential file from one disk section to another, to a file system or to a tape, or vice versa. Please refer to the chapter ADADEV in the Adabas Utilities Manual for more detailed information.
Generate a database using the procedure dbgen, then change the working directory to $ADADIR/db<dbid>, where <dbid> is the database number.
Start the Adabas nucleus either by using the DBA Workbench or by using the script adanuc.bsh.
You can verify that the nucleus is now online by, for example, running the ADABAS report utility adarep as follows:
adarep db=<dbid>
If the installation was successful, the utility will respond in a way similar to the following:
%ADAREP-I-STARTED,         29-MAR-2011 14:12:39, Version 6.3
%ADAREP-I-DBON,  database <dbid> accessed online
Shut down the nucleus by entering the following:
adaopr db=<dbid> shutdown
The Adabas kit contains several example files. These files include both input data for creating and loading the demo files, as well as sample programs for accessing this data and for user exits and hyperexits. Please refer to the following sections for further information about the example files:
Appendix A - Example Utility Input Files in Utilities
Appendix D - Example Files In The Adabas Kit in Command Reference
In order to uninstall Adabas on UNIX platforms, perform the steps that are described in the following section.
Ensure that neither the nucleus nor any utilities of the version that you want to uninstall are running.
In the first step, you will remove the Adabas files (which were extracted from the installation CD to your machine) and the Adabas product entry in the SAGInst.xml installation catalog
![]() To remove the Adabas files
To remove the Adabas files
Start the SAGRM utility from the $SAG directory or a directory above it by issuing the following command:
sagrm
Select the Adabas version you want to uninstall. All files which have been extracted from CD will now be removed and the selected product is removed from the SAGInst.xml installation catalog.
All of the container files of Adabas databases and the directory $ADADIR/etc containing the Adabas INI files are still present. If you want to remove Adabas completely, you must remove these files manually.
![]() To remove the Adabas client product ACL
To remove the Adabas client product ACL
Start the SAGRM utility from the $SAG directory or a directory above it by issuing the following command:
sagrm
Select the ACL version you want to uninstall. SAGRM checks whether the ACL version selected to be uninstalled is required for a product version that is still installed. All files that were extracted from the installation CD are now removed and the selected product is removed from the SAGInst.xml installation catalog.
If you use a symbolic link from the /opt/softwareag directory to your $SAG directory to find dynamically linked executables in a shared library, and if you do not need this link for other product versions, you can remove it with the following command:
rm /opt/softwareag
Note:
You need root permissions to execute this command.
![]() To adapt the file sagenv.new
To adapt the file sagenv.new
By default, the script sagenv.new is generated to set up the environments for all Software AG products during installation. This script is not adapted by SAGRM. If you use this script, or any copy of this script or any other script to set up your Adabas environment, remove the instructions which set up the Adabas environment for the uninstalled version, as shown in the following example:
# Adabas
if [ -f "$SAG"/ada/v63001/INSTALL/adaenv ]; then
. "$SAG"/ada/v63001/INSTALL/adaenv
fi