This tutorial provides an introduction to working with Adabas Client for Java and Eclipse.
This tutorial explains how to add the example programs from Adabas Client for Java into Eclipse. In the final step you will execute one of the example programs in Eclipse.
![]() To add example programs from Adabas Client for Java in Eclipse
To add example programs from Adabas Client for Java in Eclipse
This tutorial assumes that a current version of Eclipse (currently Luna 4.4.1) is installed and running on your local machine. It also assumes that you have a demo Adabas database running on your local machine.
From the Eclipse File menu, choose New > Java Project.
The New Java Project dialog is displayed.
Enter the name of the new project (for example AdabasClientForJavaExamples) in the in the field Project name. Click on the button to create the new project.
Select the new project in the Eclipse Package Explorer, then choose Properties from the Eclipse File menu.
Or:
Right-click on the new project in the Eclipse Package Explorer, then
choose Properties from the context menu.
The Properties for ProjectName dialog is displayed.
Select Java Build Path on the left side of the dialog, then select the Libraries tab on the right side of the dialog.
The JARs and class folders on the build path are listed.
Click on the button and then select the acj jar file from install directory\AdabasClientForJava\lib.
Note:
The install directory (by default, this
is "SoftwareAG") can be changed during the
installation.
The JAR Selection dialog is displayed.
In the JAR Selection dialog, select the acj-<version>, log4j-<version>, slf4j-api-<version>, slf4j-log4j-<version> jar file from install directory\AdabasClientForJava\lib, then click on the button .
Click on the button in the Properties dialog to add the jar file to the Referenced Libraries.
The next step is to add the Javadoc location.
Expand the object acj jar on the right side of the Properties dialog and select Javadoc location, then click on the button.
The Javadoc for 'acj jar' dialog is displayed.
Select the radio button , then click on the button next to the field Archive path.
The Javadoc Archive Selection dialog is displayed.
In the Javadoc Archive Selection dialog, select the acj javadoc jar file from install directory\AdabasClientForJava\lib, then click on the button to add the Javadoc location.
Notes:
The next step is to create a new Java package in the folder src.
Select the new project (in this case AdabasClientForJavaExamples) in the Eclipse Package Explorer, then click on the New Java Package icon in the tool bar.
Or:
Right-click on the new project, and then choose
> from the
context menu.
The New Java Package dialog is displayed.
In the New Java Package dialog, enter the string com.softwareag.adabas.query.examples.classic in the field Name. Click on the button to add the new package to the project.
Repeat this step, this time entering the string com.softwareag.adabas.query.examples.mapping in the field Name.
The next step is to import source files to the new packages.
Select the new package com.softwareag.adabas.query.examples.classic in the Eclipse Package Explorer, then choose from the Eclipse menu.
Or:
Right-click on the new package, and then choose
from the context menu.
The Import dialog is displayed.
In the Import dialog, select General -> File System and click on the button . In the subsequent Import dialog, click on the button next to the field From directory and navigate to the directory that contains the source files (in this case \install directory\AdabasClientForJava\examples\classic). Click on the button to select all of the source files to be imported. Click on the Finish button to import the source files to the new package.
Repeat this step for the new package com.softwareag.adabas.query.examples.mapping, this time importing the source files from \install directory\AdabasClientForJava\examples\mapping).
The next step is to verify that Javadoc is working correctly.
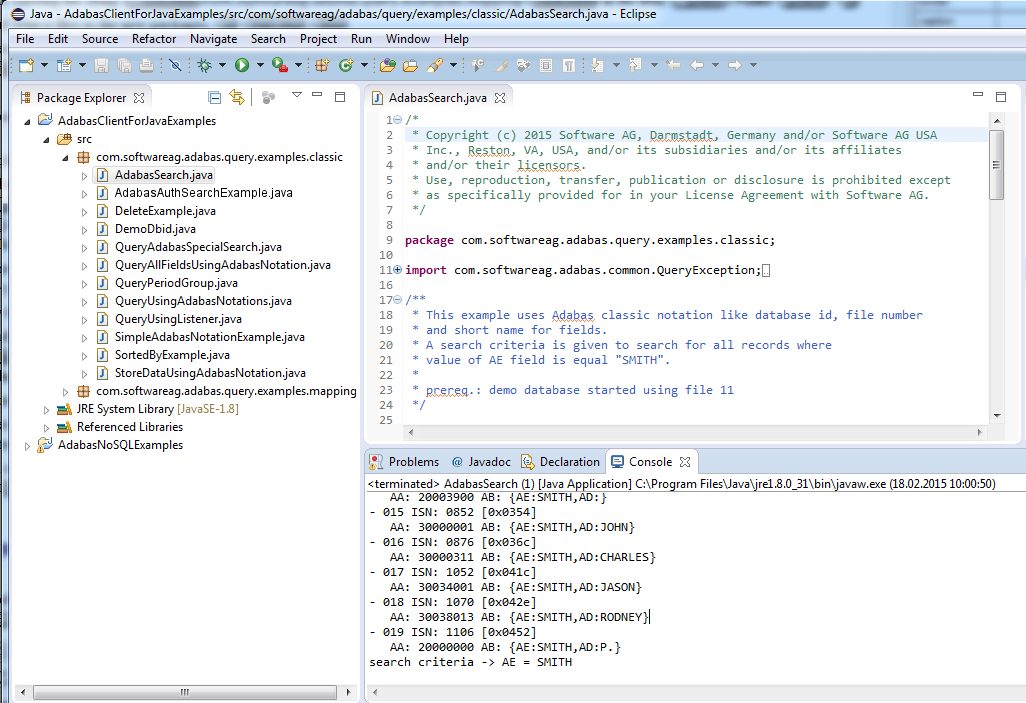
Double-click on the file AdabasSearch.java in the Eclipse Package Explorer to open it for editing. Move your cursor over an occurrence of the string AdabasTarget in the source code - the corresponding Javadoc text should be displayed in a popup window. Click on the icon to display the text in your web browser.
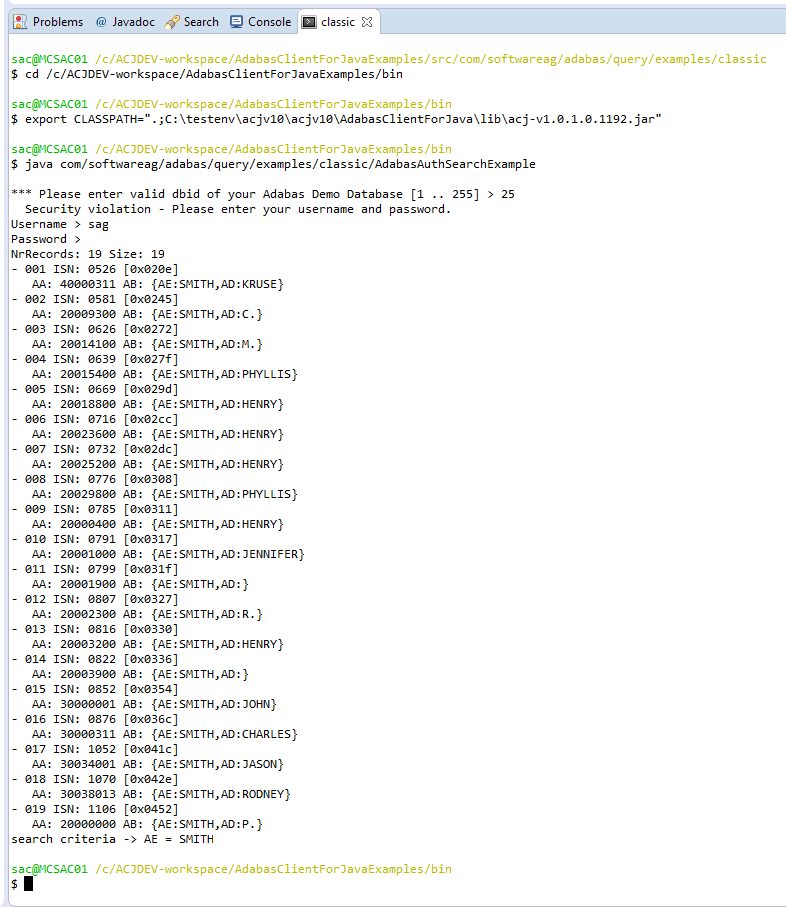
The final step is to execute one of the example programs.
Select the example program AdabasSearch.java in the Eclipse Package Explorer, then click on the run icon in the toolbar to run it; you will be prompted to enter the DBID of your demo database in the Eclipse Console window, then press Enter to run the program.
The results of running the program are displayed in the console of the Eclipse main screen, which will look something like this:
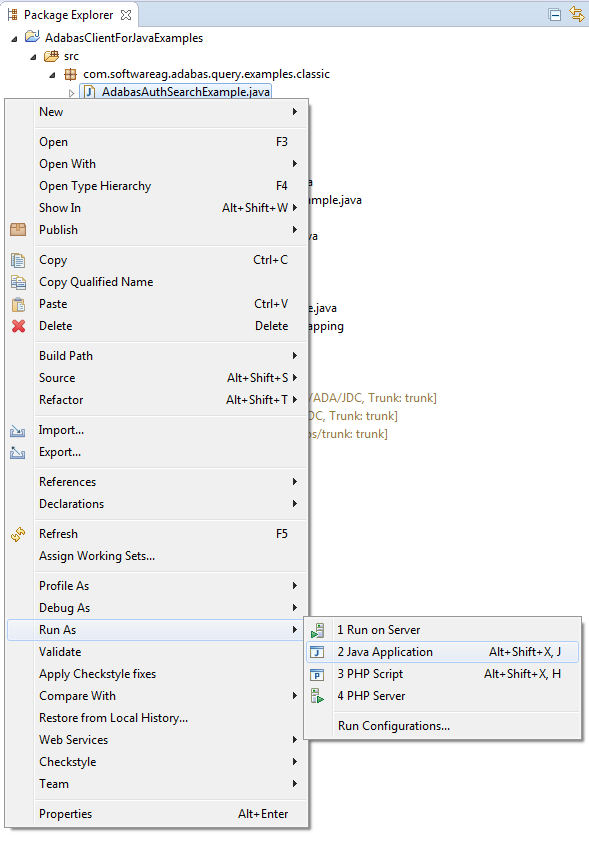
There are two ways in which the example program AdabasAuthSearchExample can be run from Eclipse:
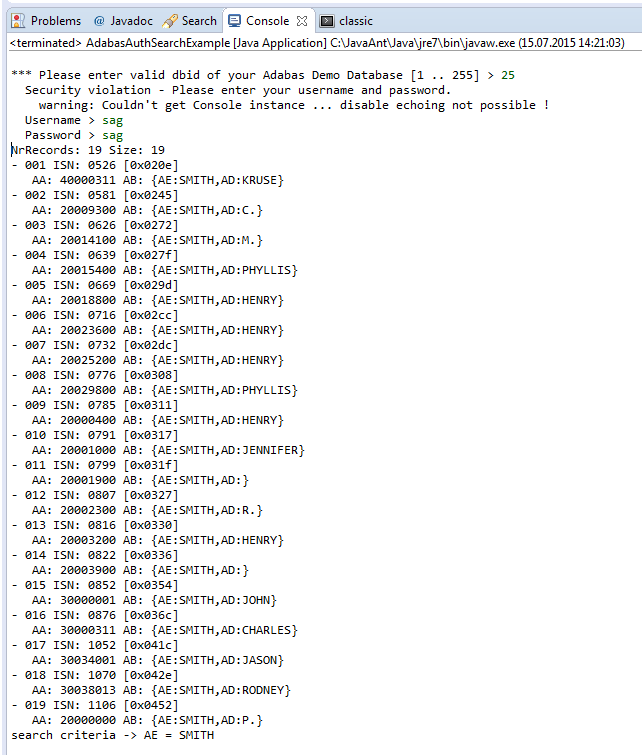
Use - in this case, it is not possible to disable echoing of the password.
Use - in this case, it is possible to hide the password during input.
Examples of each case (including output) are shown below; in each case, you must first select the example program AdabasAuthSearchExample.java in the Eclipse Package Explorer.
Click on -> from the toolbar, as shown below:
The output in the IDE console window will look something like this:
Click on -> from the toolbar, as shown below:
The output in the IDE classic Terminal window will look something like this: